Behind the Scenes: Electric Guitar

About
Hi, my name is Aleksandr, and I’m an 18 year old 3D hobbyist from Ukraine. As a kid, I saw my older brother’s works in Photoshop and found out that I want to impress people with computer graphics. For a long time, I was also just experimenting with Photoshop, but after I got a new computer, it became possible to play with more powerful programs like After Effects, a little bit of 3ds Max, and, eventually, Blender. I’ve been learning it for over 3 years mostly by watching free video tutorials on the Internet and trying to overcome my addiction to them.
Electric Guitar
I have been making guitar renders from time to time throughout all my 3D learning period. It started with an extremely simple classical guitar in 3ds Max, which turned out to be the only complete work I’ve ever done with that software. Then, as one of my first models in Blender, I made an acoustic guitar. At the time, I thought that my skill wasn’t good enough and I didn’t deserve to create something as cool as an electric guitar. So I continued to learn, and this time, after a couple of attempts, I created this Fender Stratocaster. Since I didn’t know much about electric guitars when I decided to make one, I just picked one of the most iconic and recognizable models.
https://skfb.ly/6svwB
Modeling
To give myself a general feeling of how the model should look and note its most important features, I looked at similar models on Sketchfab. For the details on specific parts of the model I just googled them and had a really close look. This is important – my previous model looked pretty awful because of the amount of inaccuracies it had, so I’ve learned my lesson!
When I was done with the references, I started modeling the body. The workflow was simple: set a background image and extrude the base shape from a plane. The only challenging part was to keep topology clean while making all those slopes and cuts.
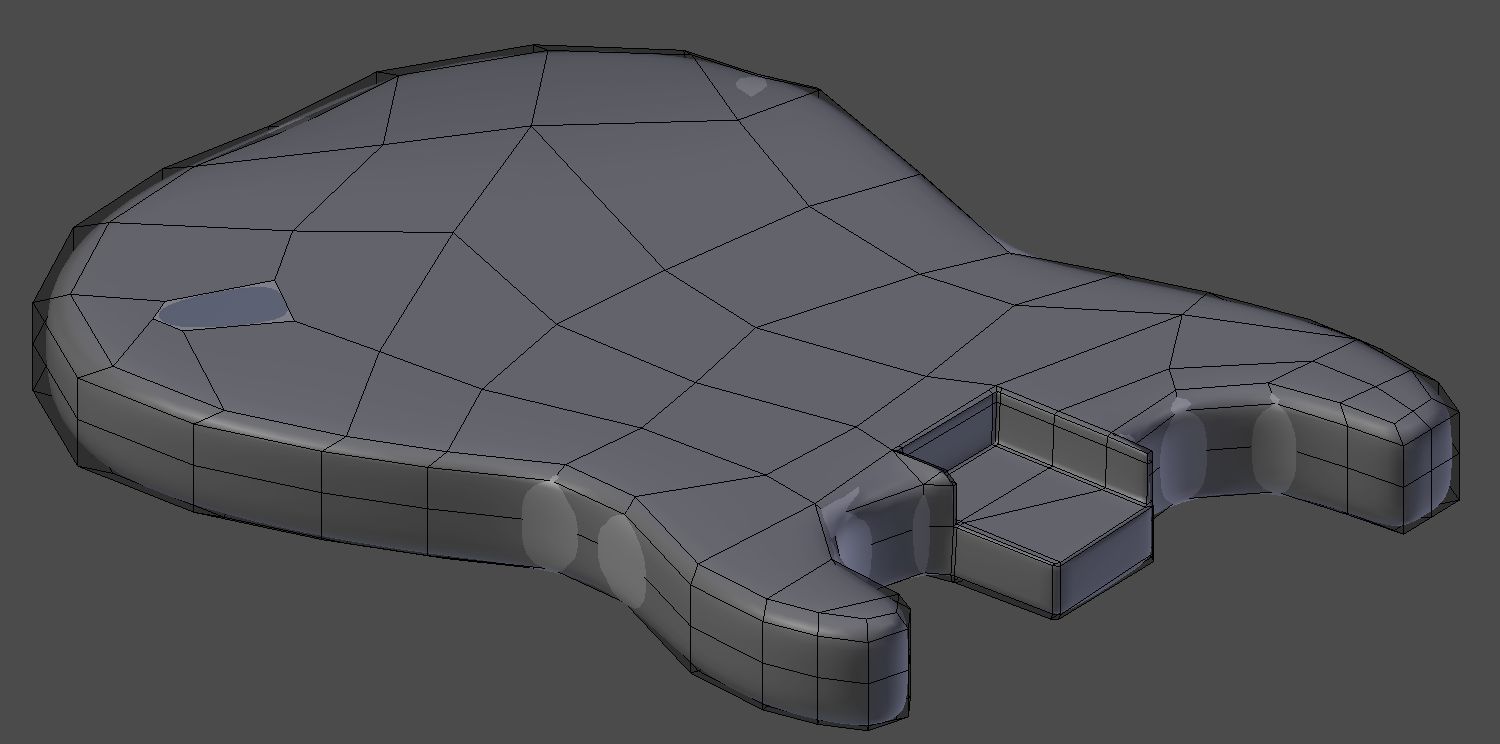

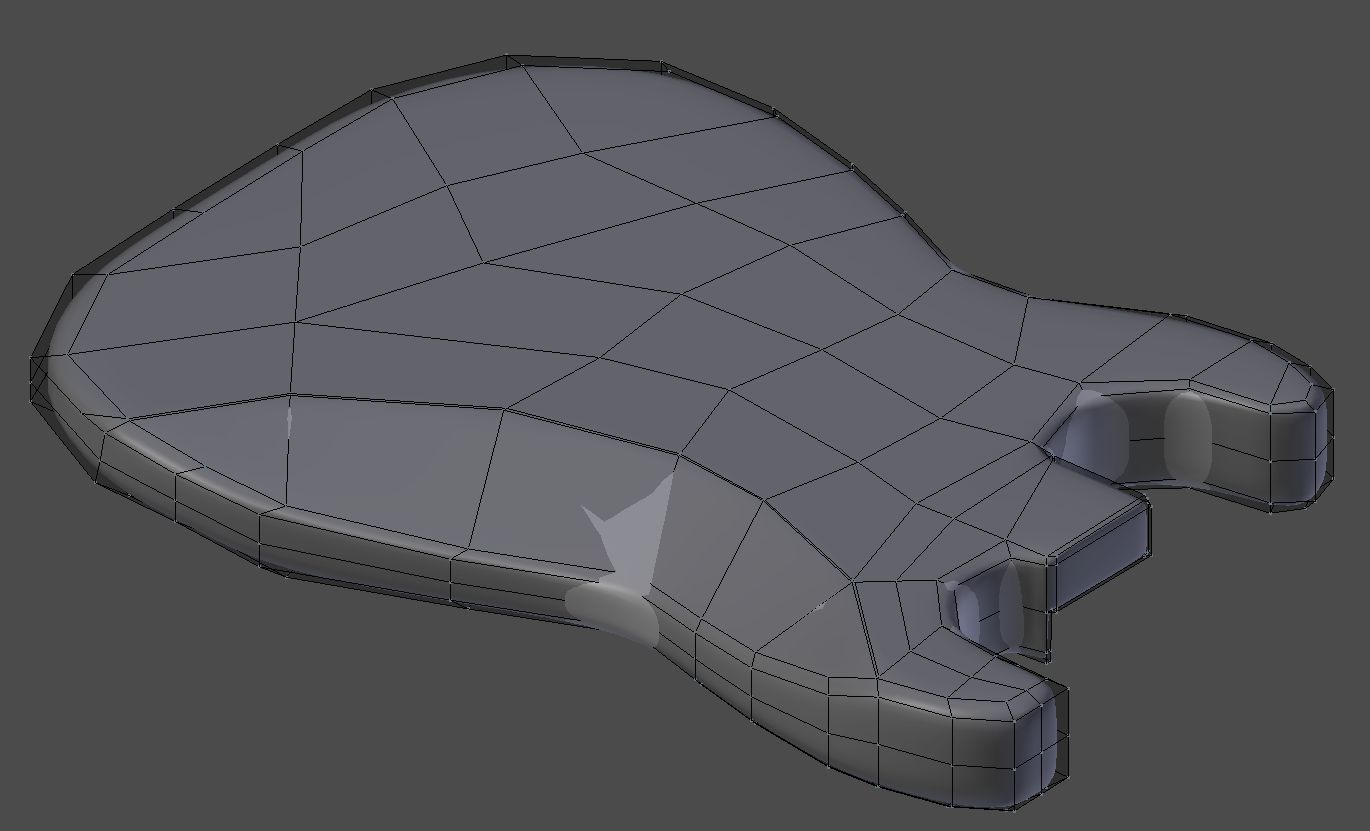
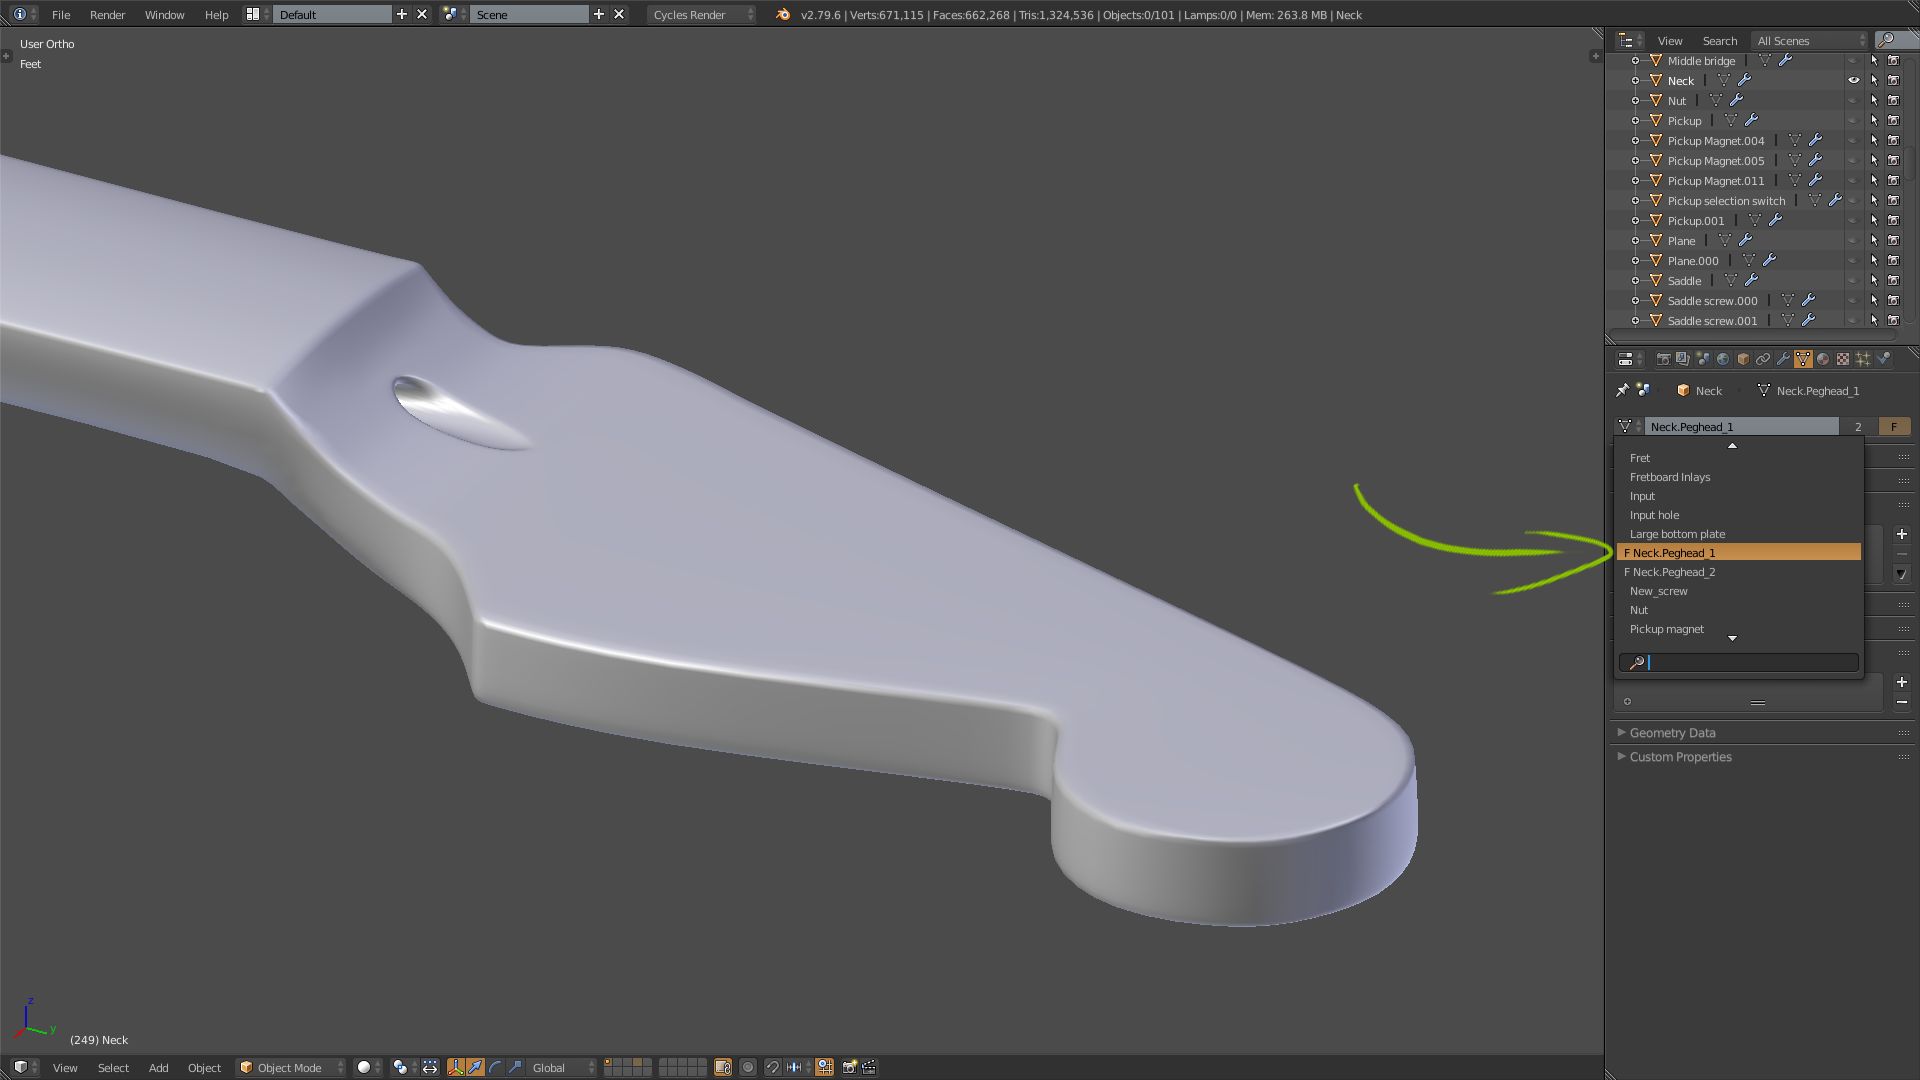
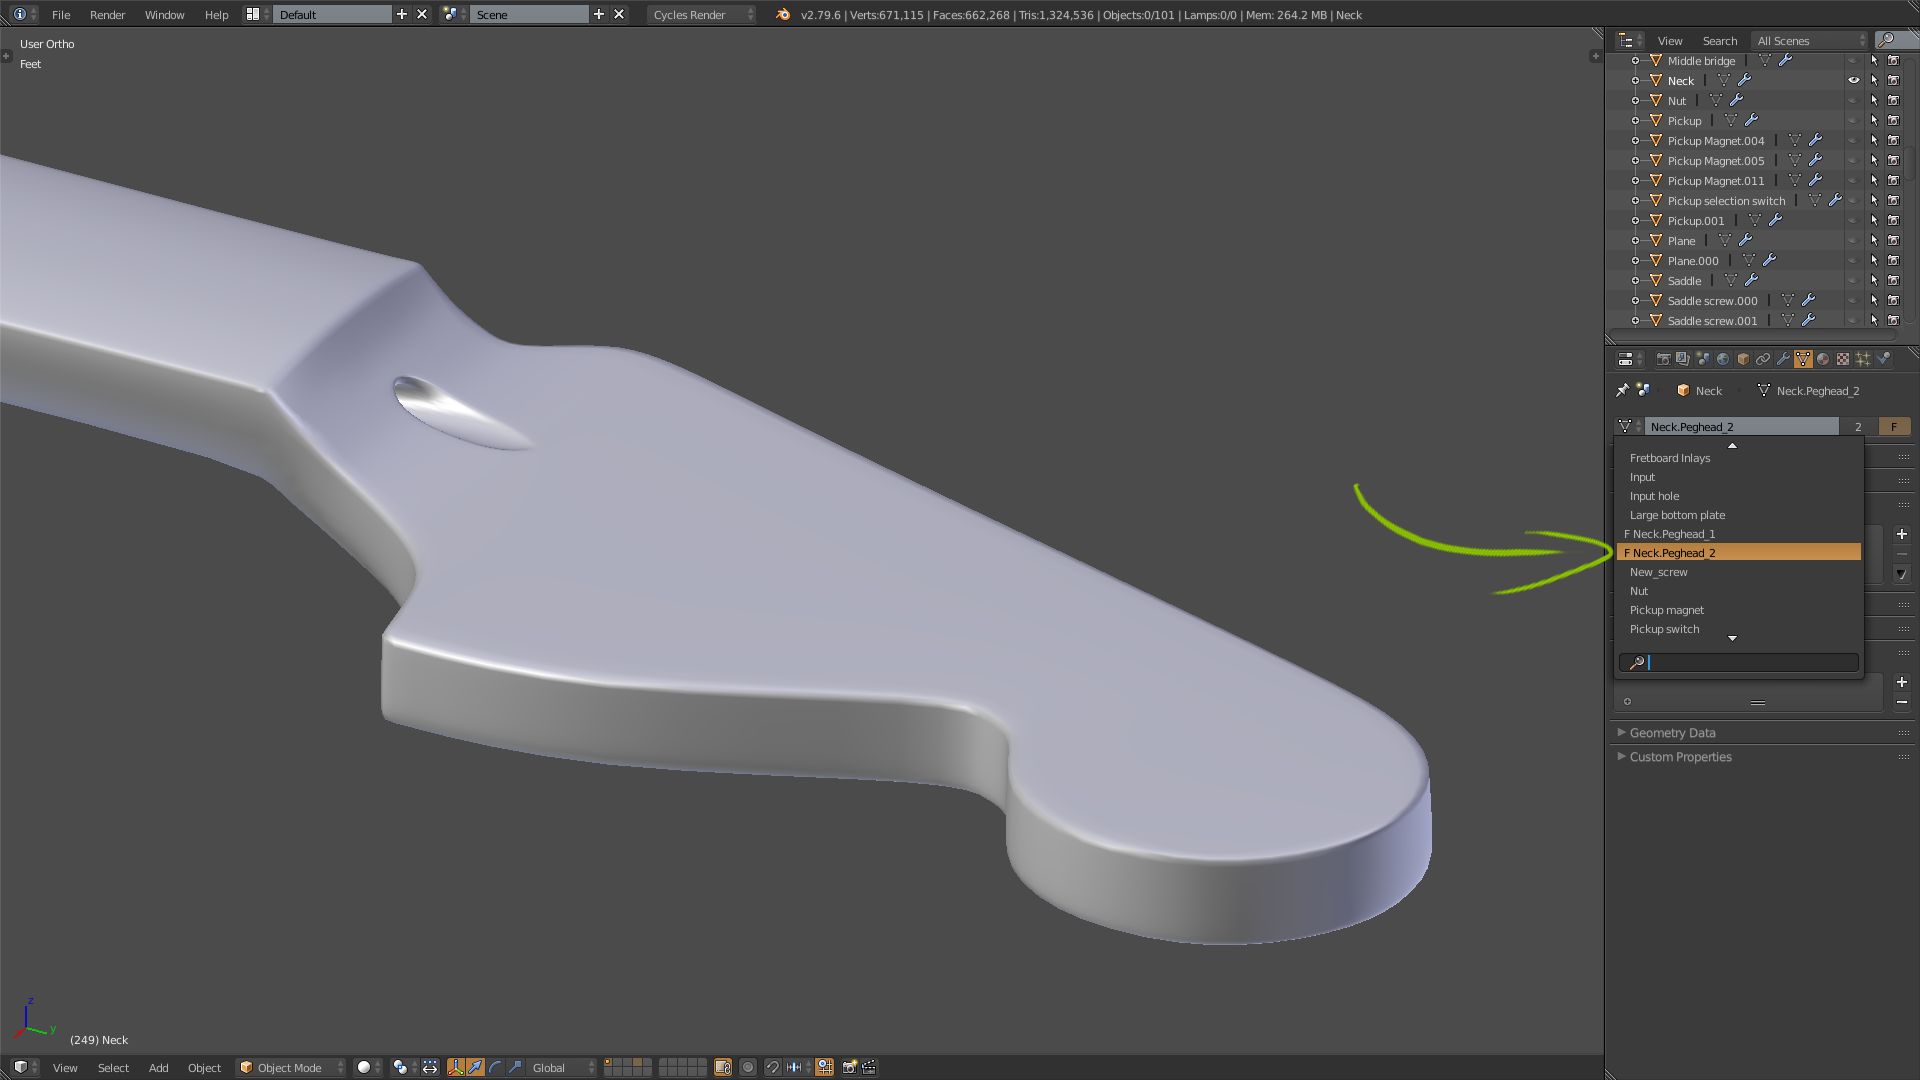
The pickguard and neck were modelled in a similar way. Also, since Strats have a few different peghead shapes, I used a little trick here. After the neck was complete, I copied (with Shift + D) and deleted it. It duplicated the mesh data-block (information about geometry of an object from the top of an object data panel). Then I edited the peghead to create a new shape and could quickly switch between them by selecting different mesh data-blocks. For both shapes I created a fake user so that Blender wouldn’t delete an unused shape after relaunch.
The same technique can be applied to some other guitar components (tuning pegs, pickups, bridge and saddles, vibrato arm) to be able to quickly change the look of a particular detail.
Most of the other elements were pretty easy to model, so I will mention only a few of them.
Strings: I started by “winding” a single vertex around the tuning peg with the Screw modifier, applied it, and extruded the end vertex all the way down to the bridge’s saddle. The last step was to add Skin and Subsurf modifiers.
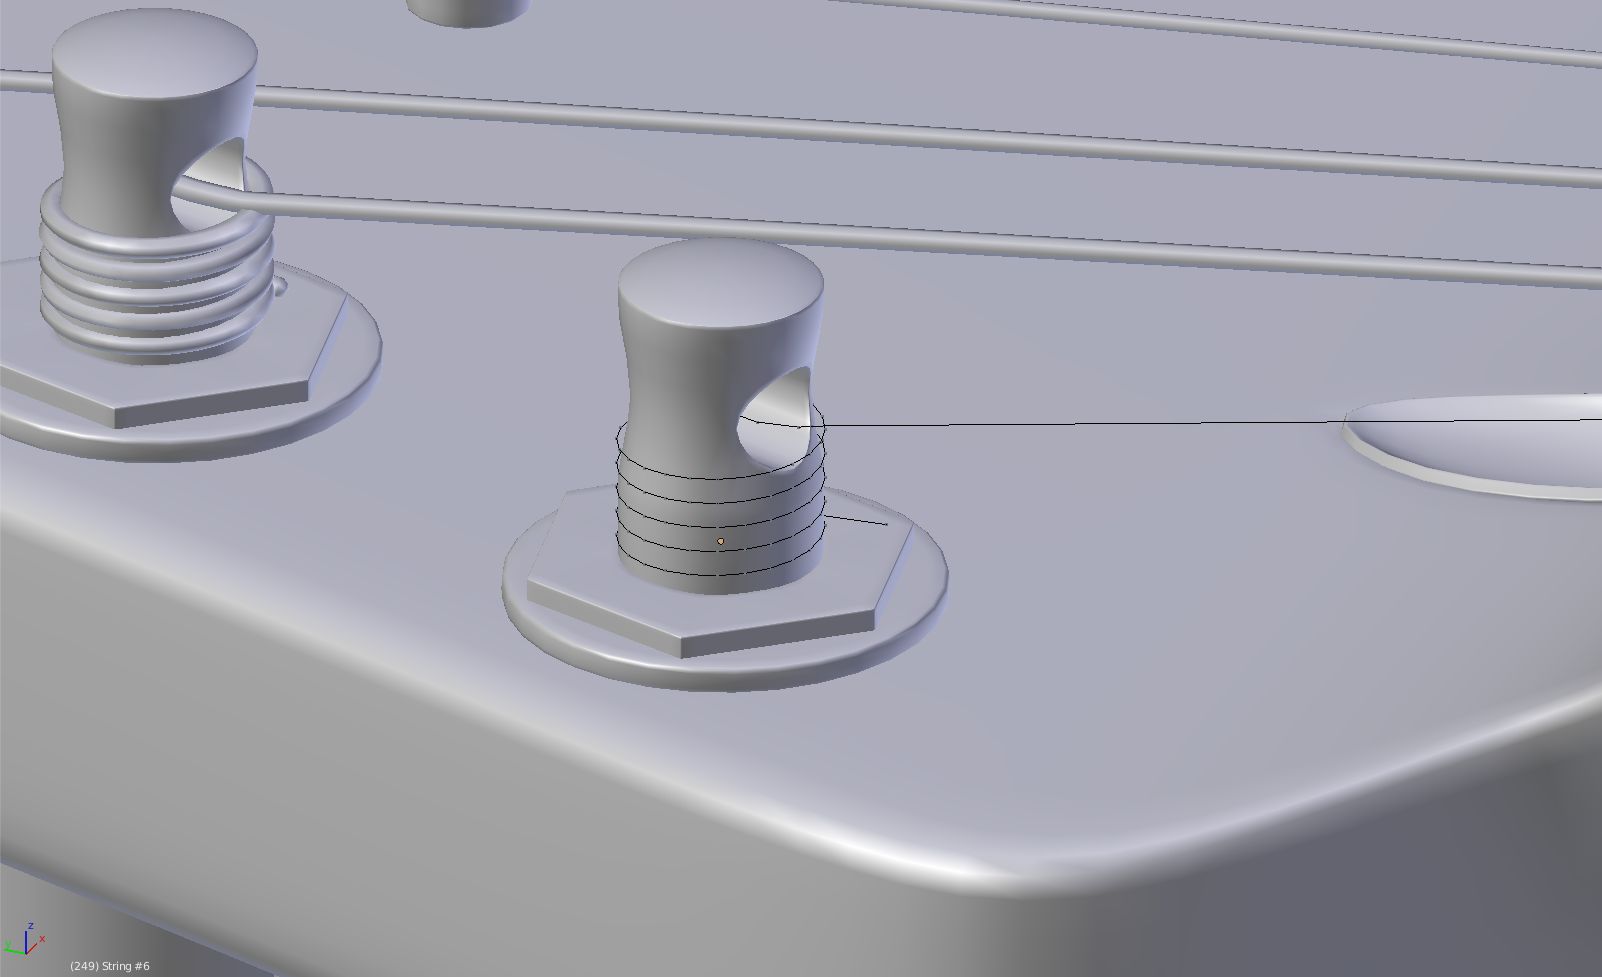
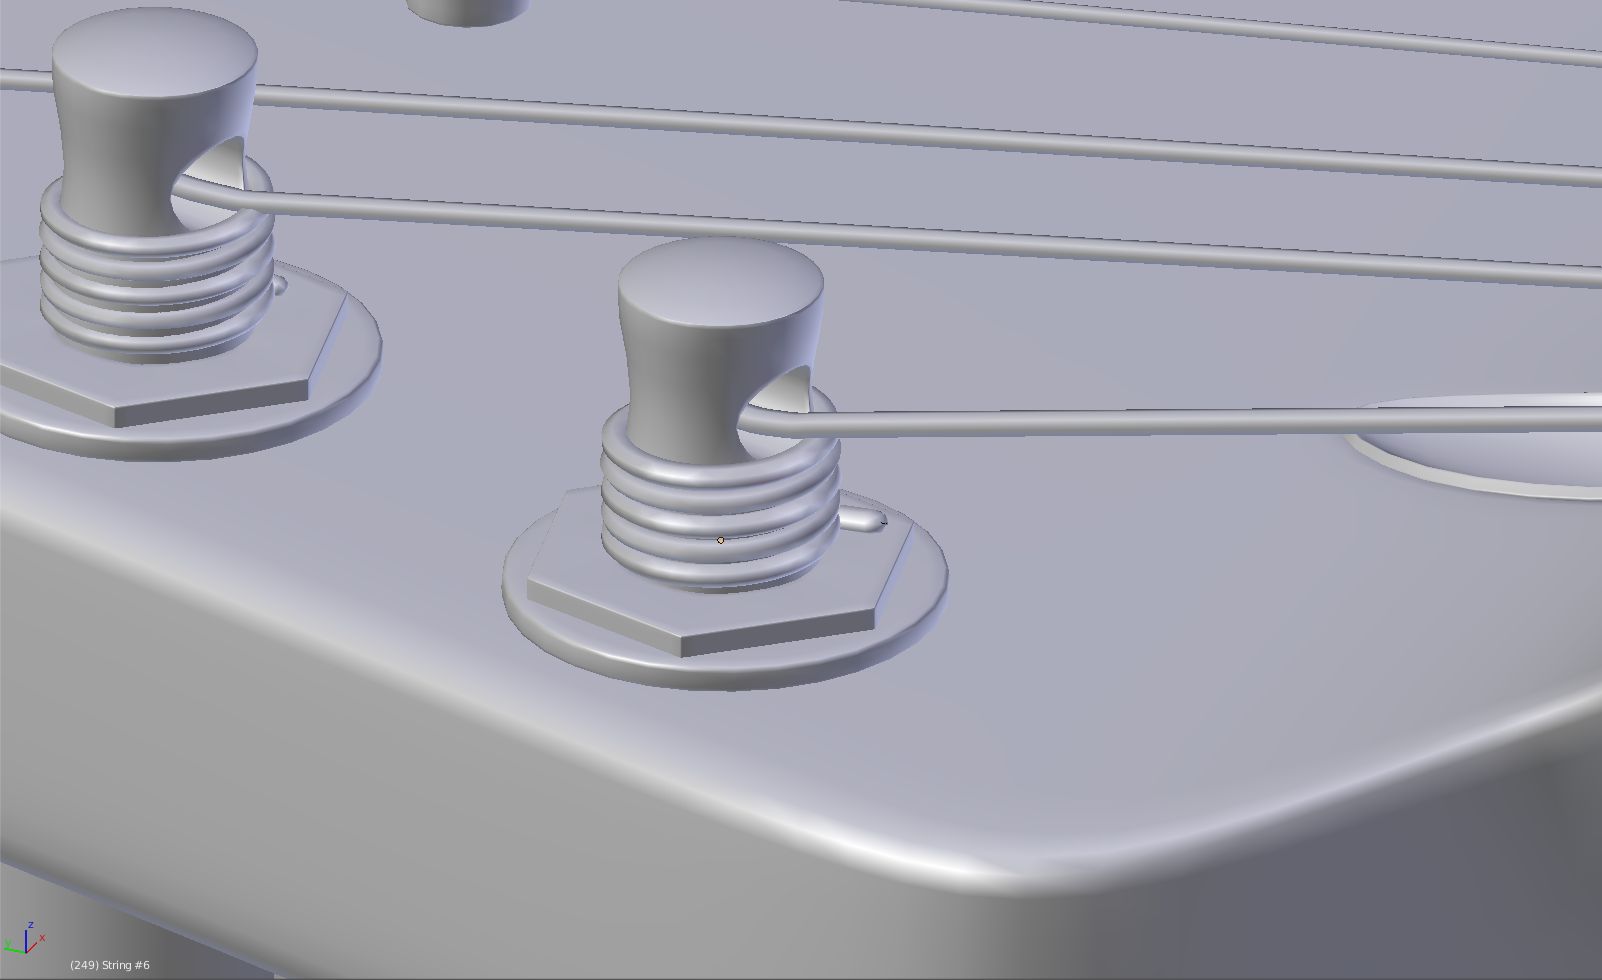
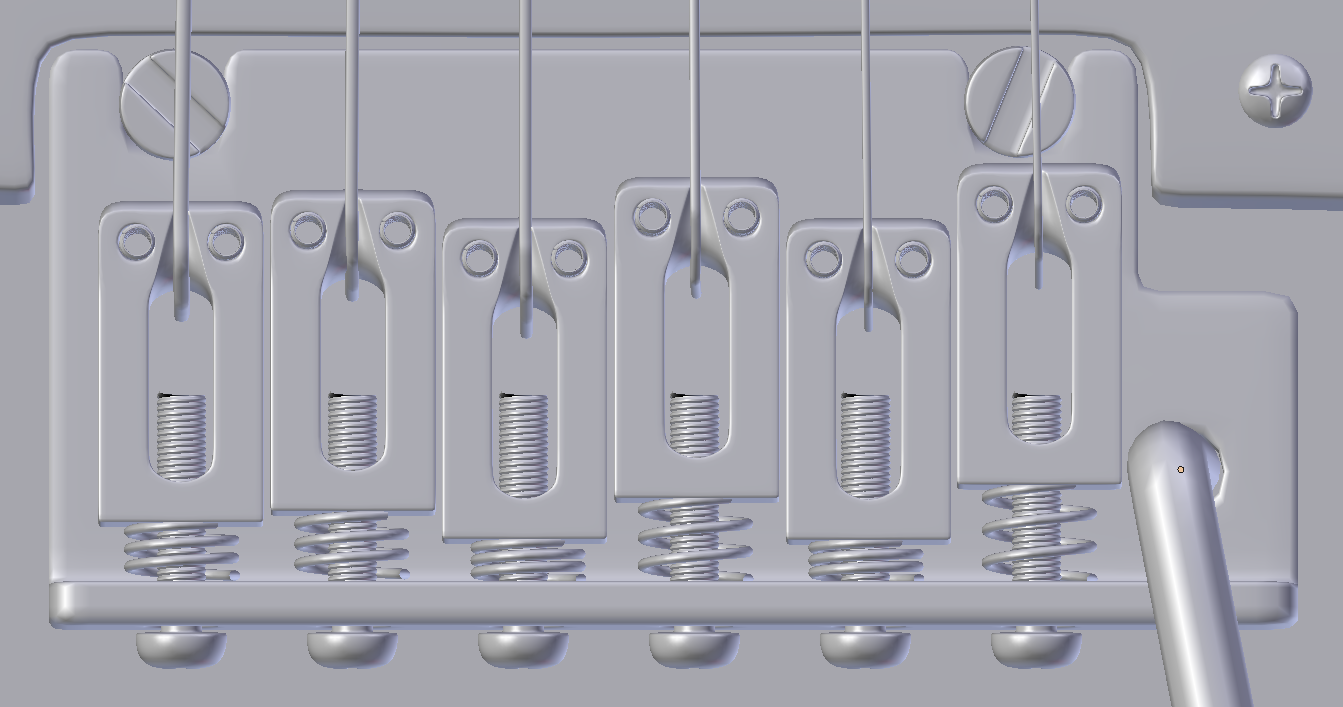
The bridge’s springs and bolts (that is, their threads) were also modelled with the Screw modifier.
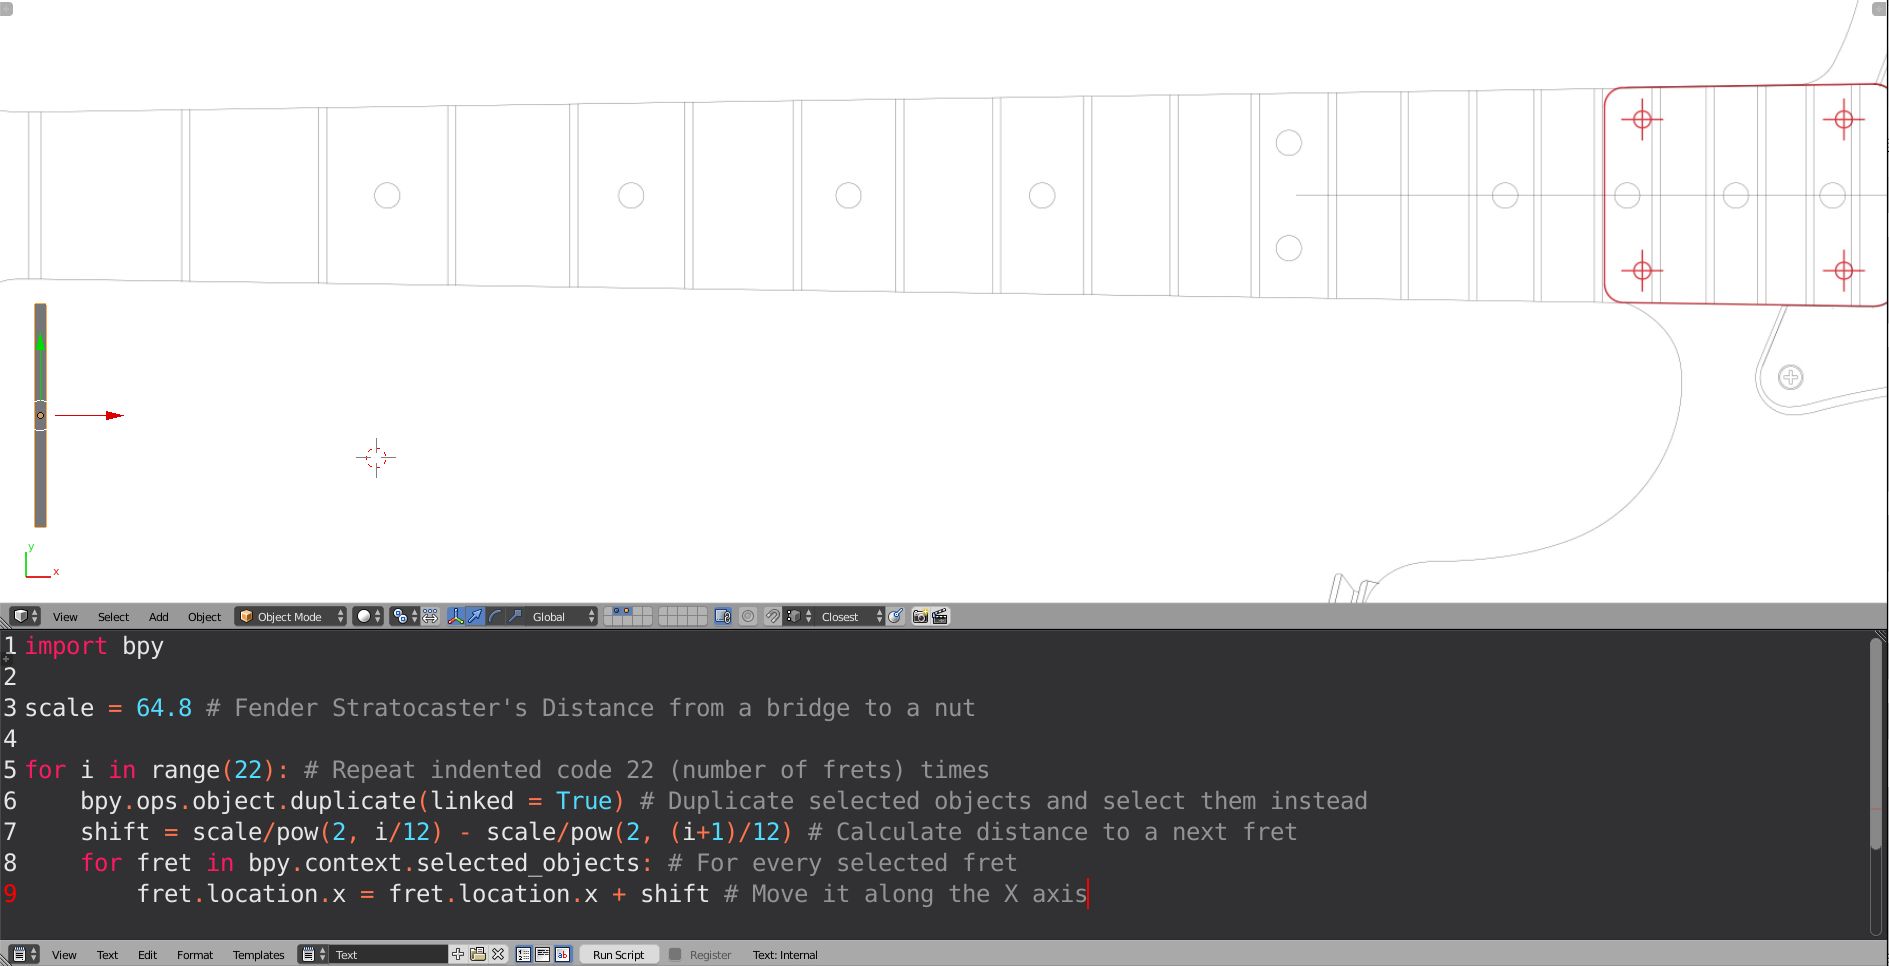
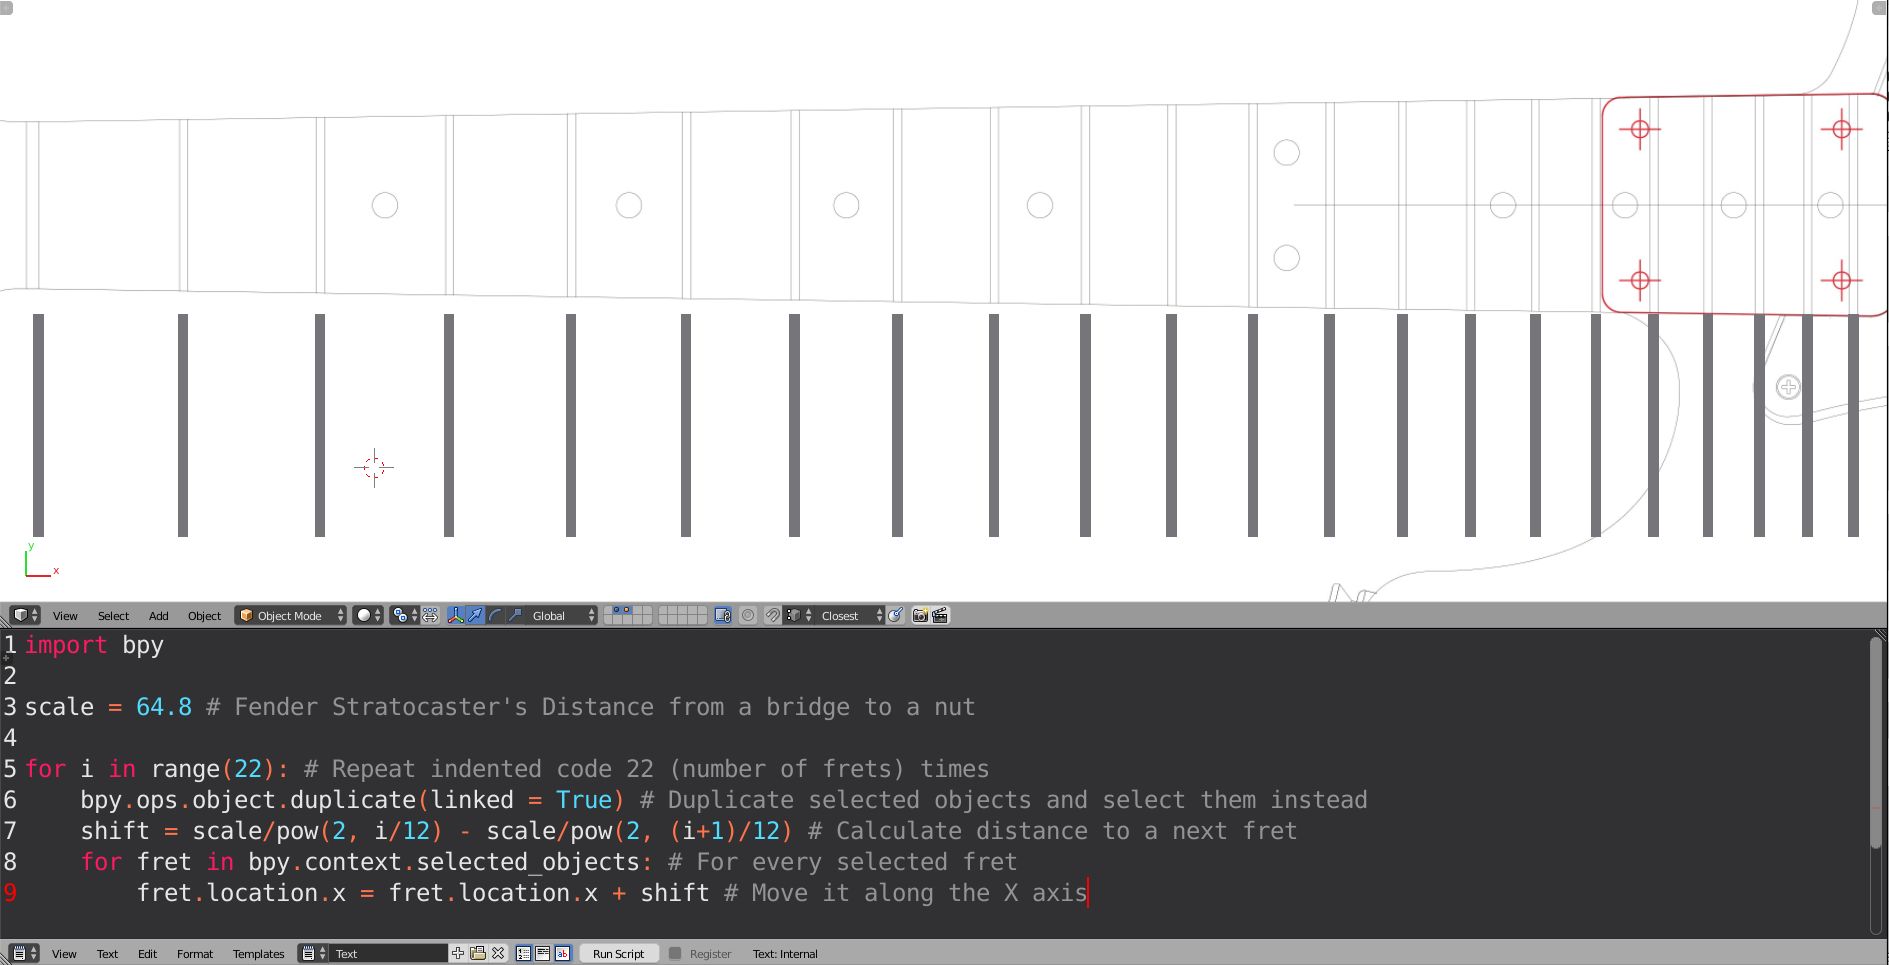
Frets: Modeling itself was simple, but the interesting thing here is the frets’ positioning. Though I could’ve placed them all manually, just by using a background image, I decided instead to try out Python in Blender and wrote a small script that would copy and move all the frets to their appropriate positions.
The key idea here is that the distance from a bridge to any fret is 2^(1/12) times bigger than the distance from a bridge to the fret before it. All I needed to do was to implement this mathematical relationship.
Texturing/Shading
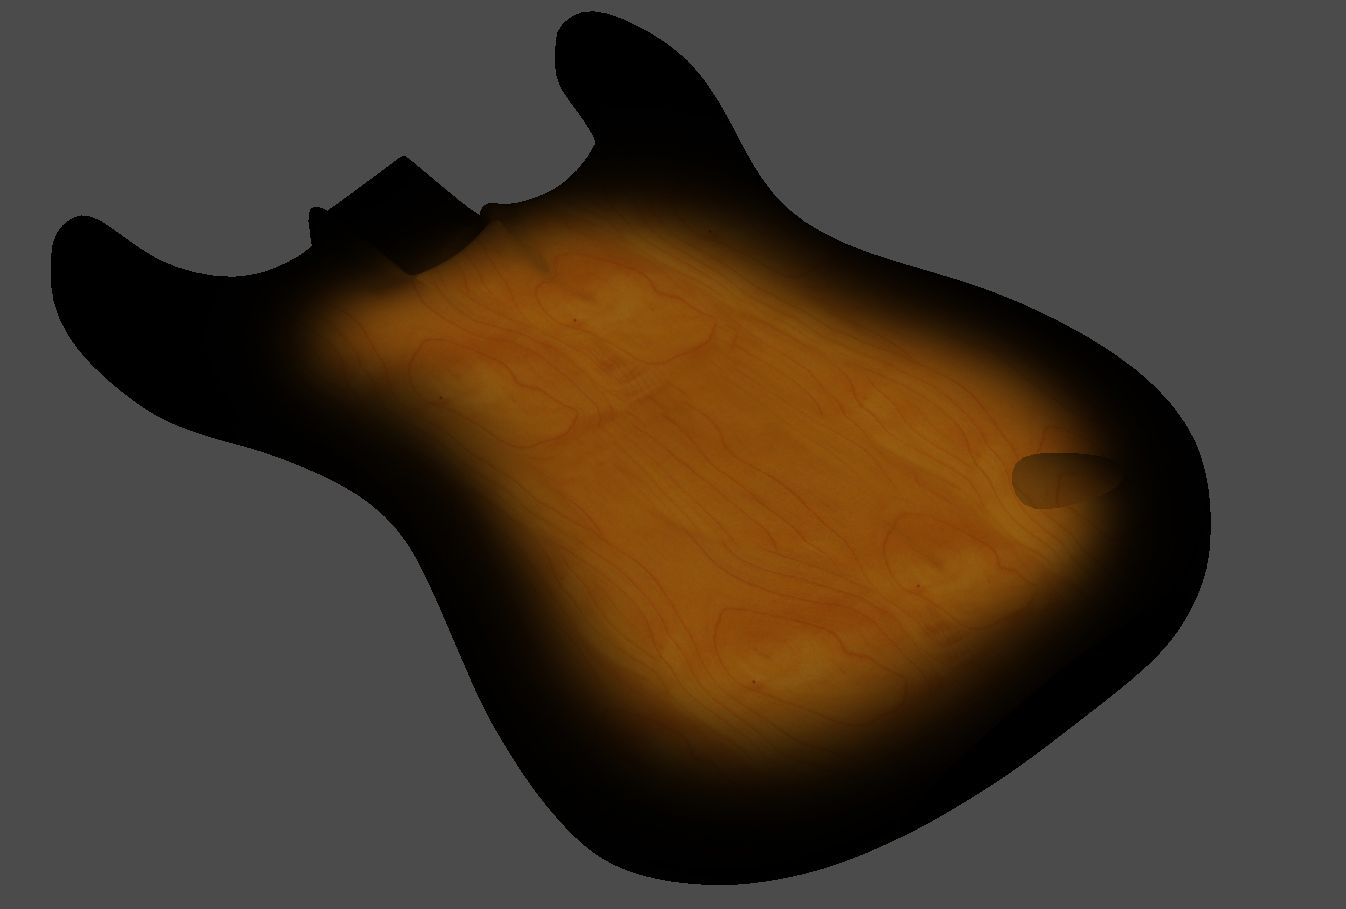
To create the sunburst color of the body, I just put a wood texture on it and painted a black border in Texture Paint mode.
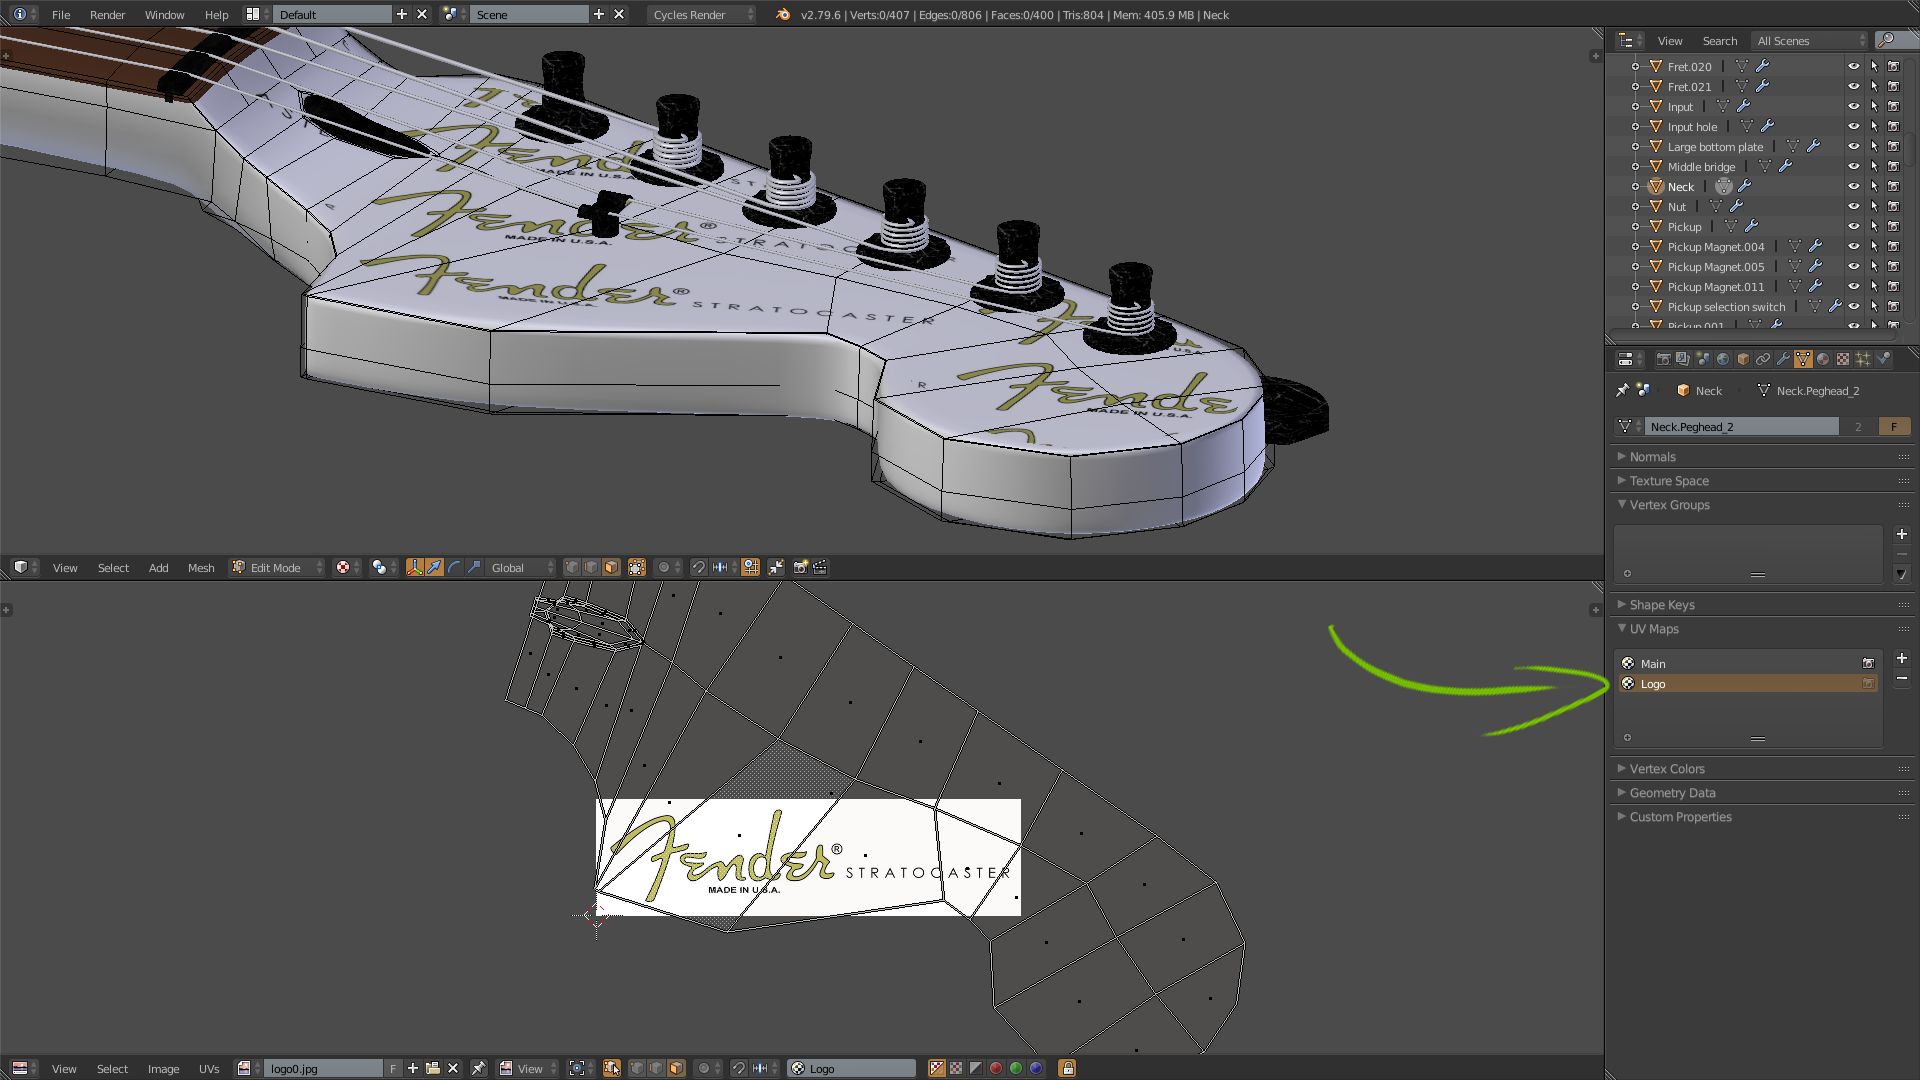
The neck uses a dark wood texture for the fretboard and bright wood texture for the rest of the body. To add a peghead logo on it I created another UV Map and scaled all faces that didn’t belong to the top of a peghead down to 0. Then I could easily place any logo onto that map. In the Image Texture node for the logo I changed Extension mode from Repeat to Extend and plugged UV Map node into the Vector socket to use a custom map.
There isn’t much to say about shading because almost all the materials just use glossy and bump maps for surface imperfections plugged into a Principled BSDF.
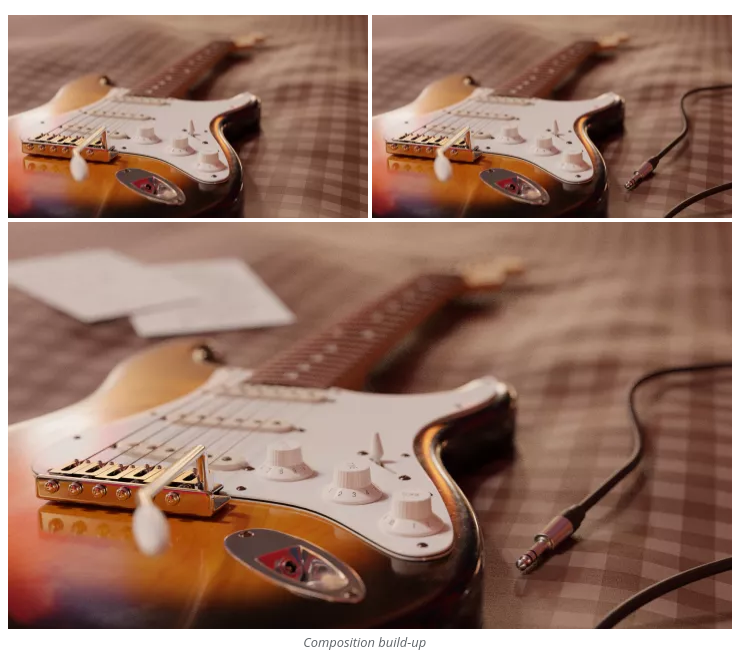
Composition
I decided to finish with composition before the setting up the lighting.
First of all, I added this big piece of cloth as a ground. This is, in my opinion, one of the flaws of this image. The cloth is very large and I can’t even imagine the place where this scene can be happening. A better solution would have been to render this guitar in a room, but I’m too lazy to model all that. In any case, then I set up the camera angle, tested different focal lengths and focal points. The image looked empty on the sides, so I added the cable (using Curve modifier) and music sheets.
Lighting
While lighting is arguably the most vital part of the end render, it is still pretty simple: HDRI map and a sun lamp. I downloaded a few HDRIs from hdrihaven.com, rotated them, trying to highlight the right edge of the body, and chose the best fit.
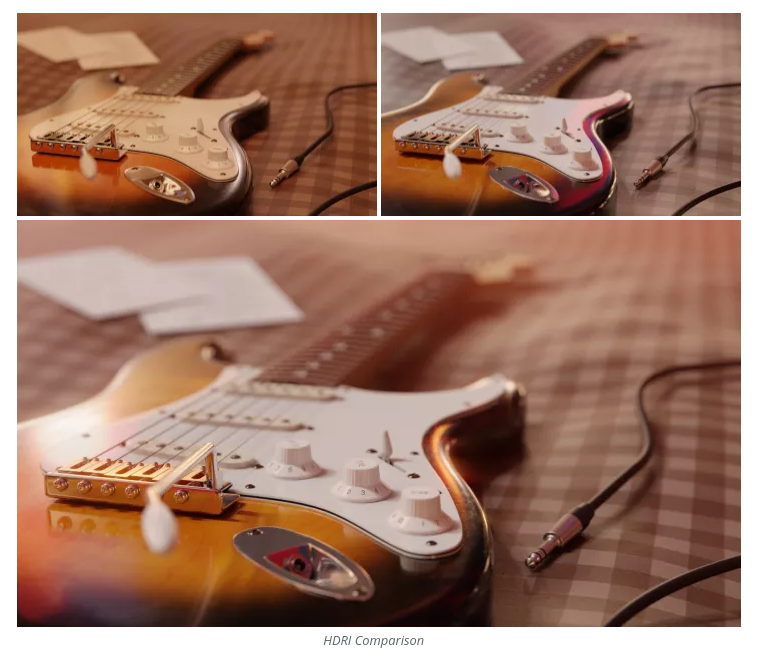
Finally, I selected Filmic for color management and tweaked Exposure/Gamma settings a little bit.
Compositing/Post-Processing
In Compositor, I added Ambient Occlusion, mist, fog glow, lens distortion, and streaks glare to highlight the right edge even more. I had to use a pretty low threshold for that glare node, which made the left part of the image very shiny. To fix that issue, I created a box mask and used it as a mix factor to hide the unwanted shine.
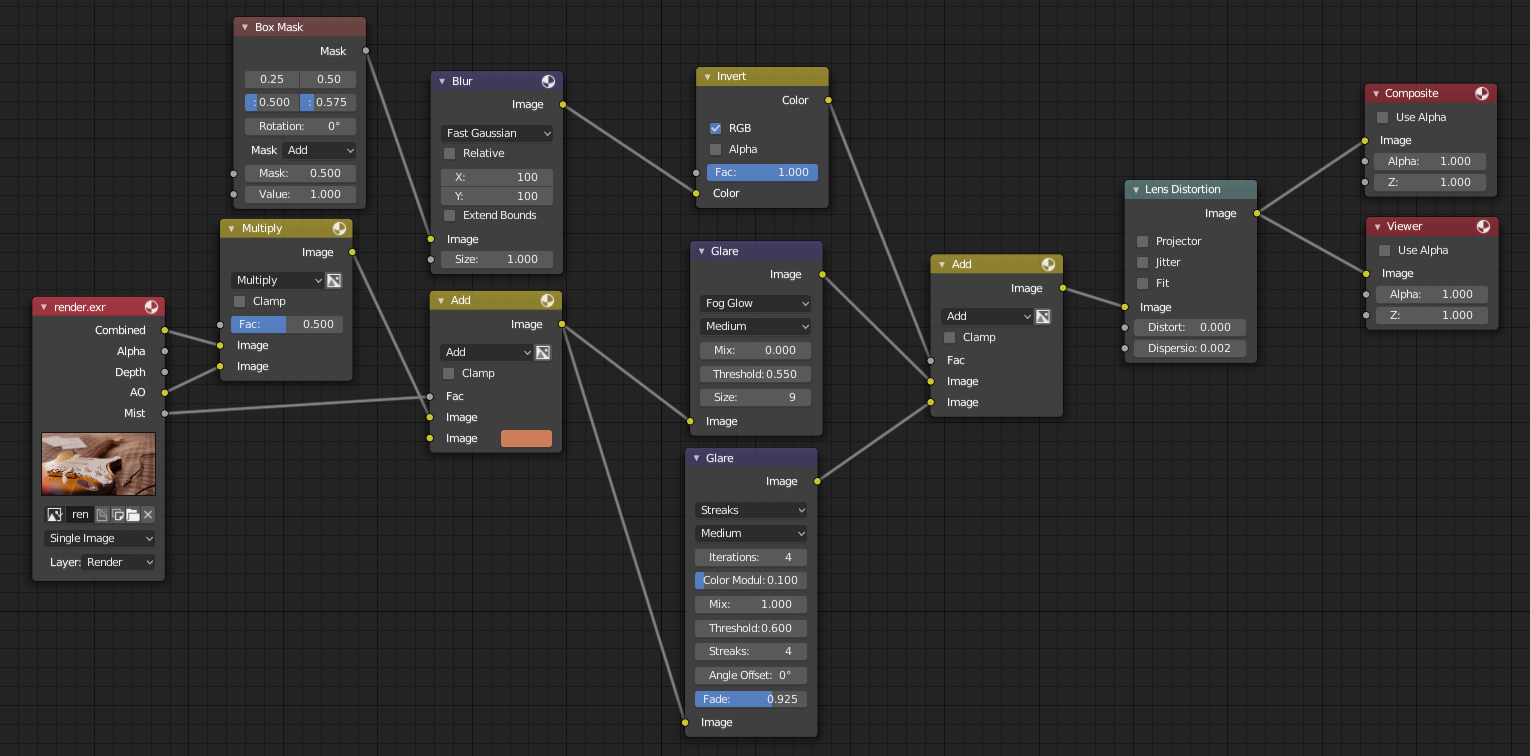
In Gimp, I reduced the noise, added a faint lens flare overlay, and cranked up the lower part of the blue channel in curves to tint the shadows and create this vintage atmosphere.


Conclusion
Well, that’s it guys, the final image is done! And though there are a few aspects to be improved, I’m pretty happy with the end result. I hope this image shows that you don’t have to use fancy, elaborate materials or lighting setups to get a fairly decent render, which is an important concept to keep in mind.
And, of course, thank you all for reading this. I hope you’ve learned something interesting that you can use in your future projects. Feel free to leave some critique or any other thoughts you’d like to share. Best of luck!
About the Author
Aleksandr Zymohliad, 3D artist


Perfecta composición. Es agradable ver el trabajo de grandes artistas. Saludos desde Spain.
Great job, really well done. Super life like. But the black wire in the final render looks very unnatural. Too rigid and looks suspended in the air.
Insanely cool :) Thanks for sharing the details. Just had to look at my (default reality) electric guitar for reference. That leaves the challenge for you in the guitar field to model a Guitarra Portuguesa… very beautiful instrument, but complicated structure.