

Background
My name is Alex Kane, I am a 3D Artist with a passion for creating cartoon characters and photorealistic scenes! I am currently freelancing in Cincinnati, Ohio while also developing tools and plugins for other artists.
The majority of my artistic knowledge came from self-study and experimentation. In my elementary school years, while other kids played video games and sports, I was found filming home movies on my parents’ VHS camcorder with my sister. My dream at the time was to become a director. This dream evolved into becoming a VFX artist when I got a green screen and proper editing software. It then morphed again once I accidently discovered stop motion animation while experimenting with a camera and some action figures. Finally, it wasn’t until 8th grade (age 14) that my journey into the world of 3D took hold. My first 3D model was an attempt to re-create Eve from Pixar’s Wall-E. It was a very blocky model with basic animations and can still be found on my YouTube channel. I have used a countless number of 3D programs over the years, finally settling on Blender as my main go-to tool when their interface became more user friendly in the 2.5 release.
I graduated from Huntington University in 2017 (Huntington, IN) with a Bachelors in Digital Media Animation and have been freelancing since my sophomore year.
Lupita
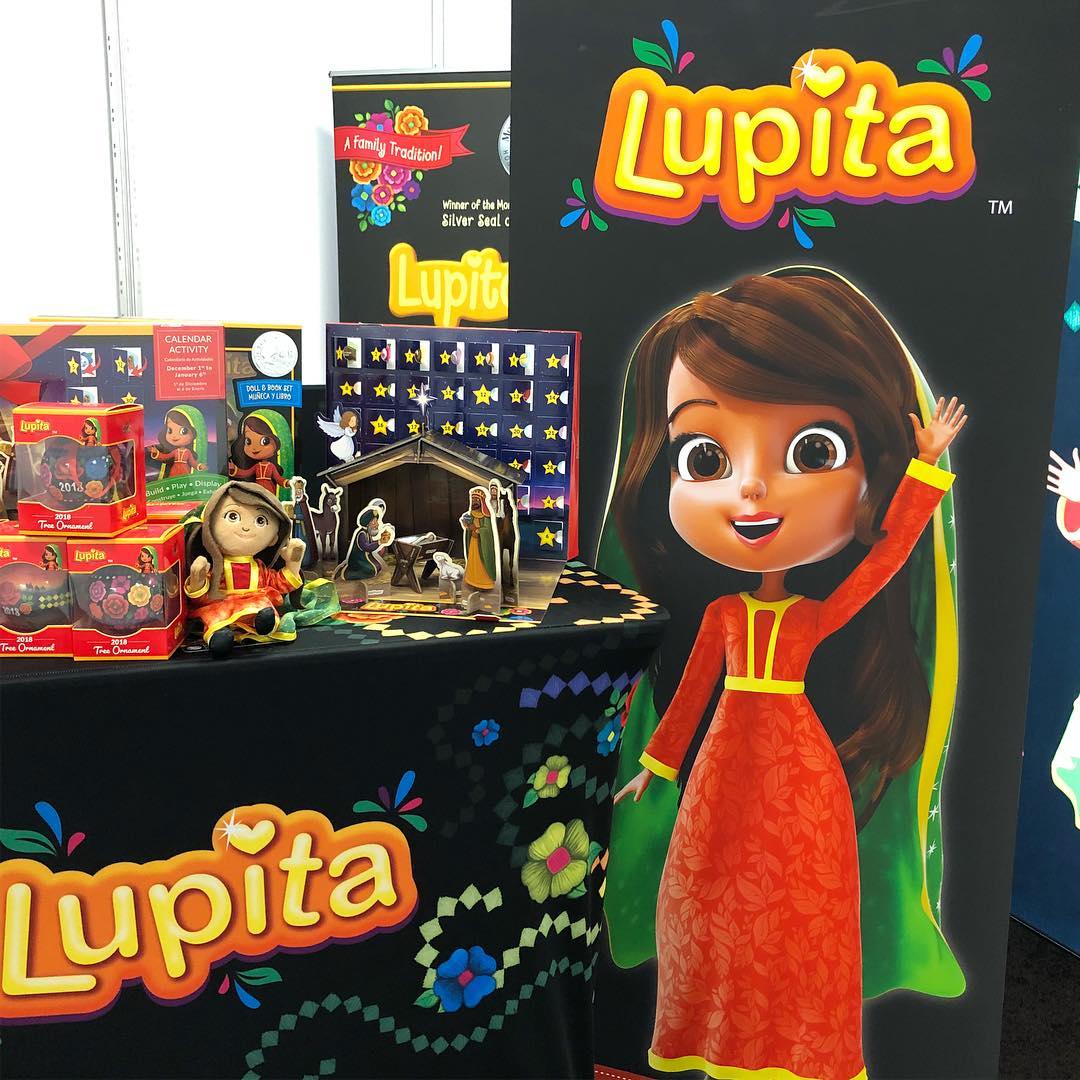
Photo courtesy of Tepeyac, LLC
In late 2017, Tepeyac LLC, a local company in Cincinnati, OH reached out to me in regards to a children’s toy they were developing. I had the wonderful pleasure of creating the 3D version of their mascot, Lupita. From Tepeyac, LLC:
“Lupita tells the story of wonder in Mexico nearly 500 years ago. The Lupita storybook shares ideas of love, tolerance and inclusion. Lupita teaches the cultural heritage and traditions of the Christmas Season. She helps children learn values that they can practice daily. The book encourages values of love, cultural acceptance, and the importance of sharing a smile. Children write Lupita a letter of the good they have done, and reflect each night with their Lupita.”
Process
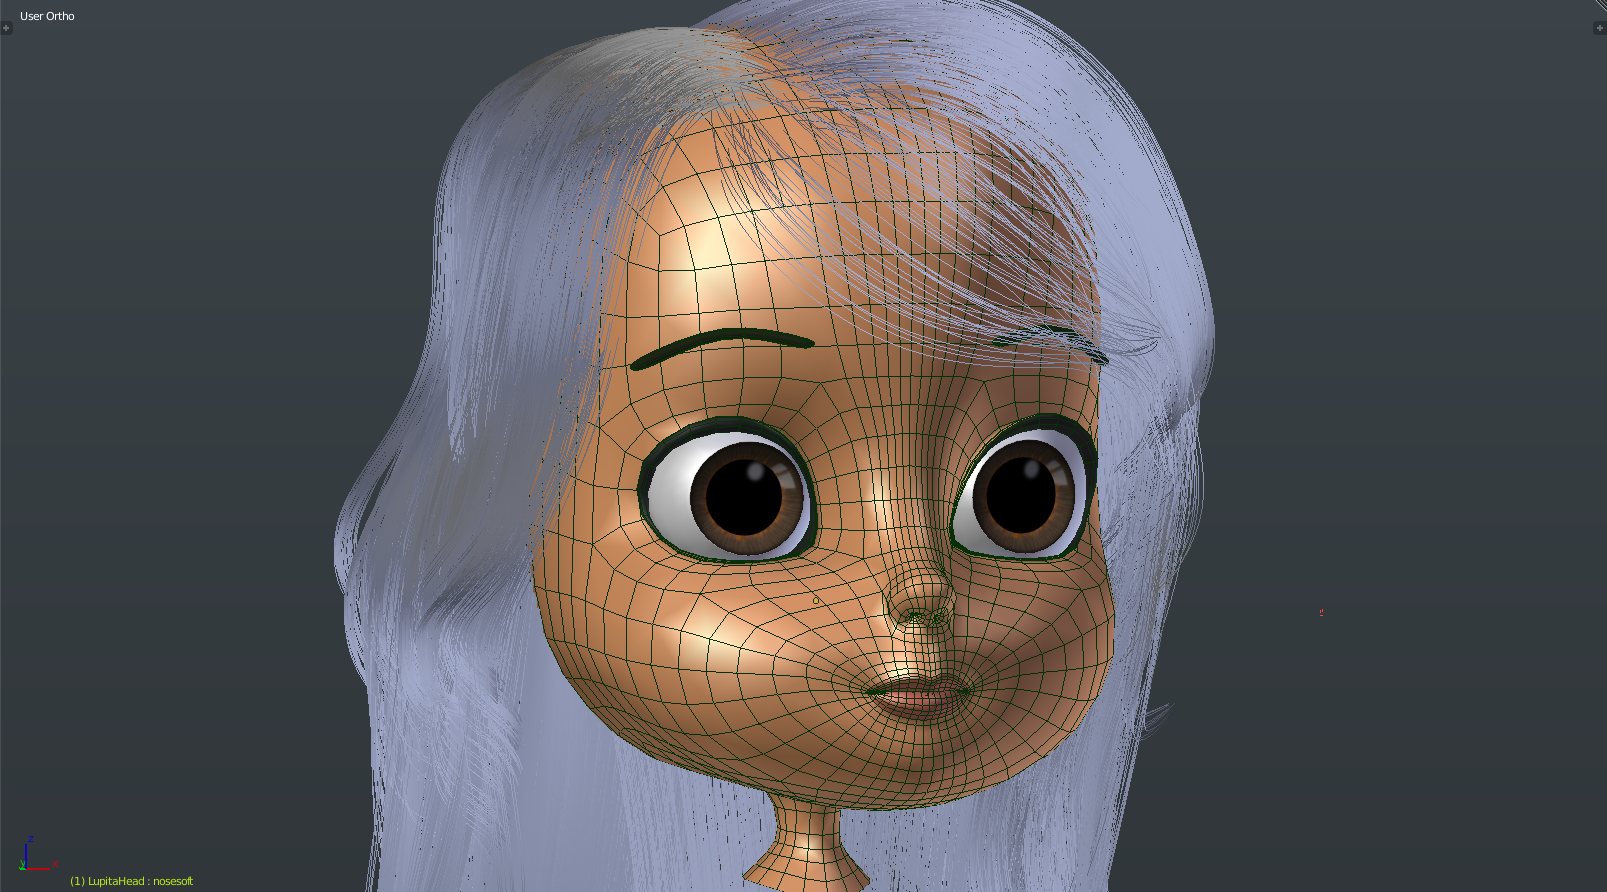
During the modeling process, I had access to 2D character illustrations and references provided by Tepeyac, LLC. I would classify my style as a mix of the 3D Disney with my own twist. 3D Lupita was created entirely in Blender with polygon modeling (no sculpting) and starting from a few vertices, no primitives (exceptions are the skirt, arms, and legs). I always begin my models with the bridge of the nose, creating an outline of the head’s dimensions, progressing to the eye sockets, outlining the topology and flow of vertices, and then I fill in the gaps.
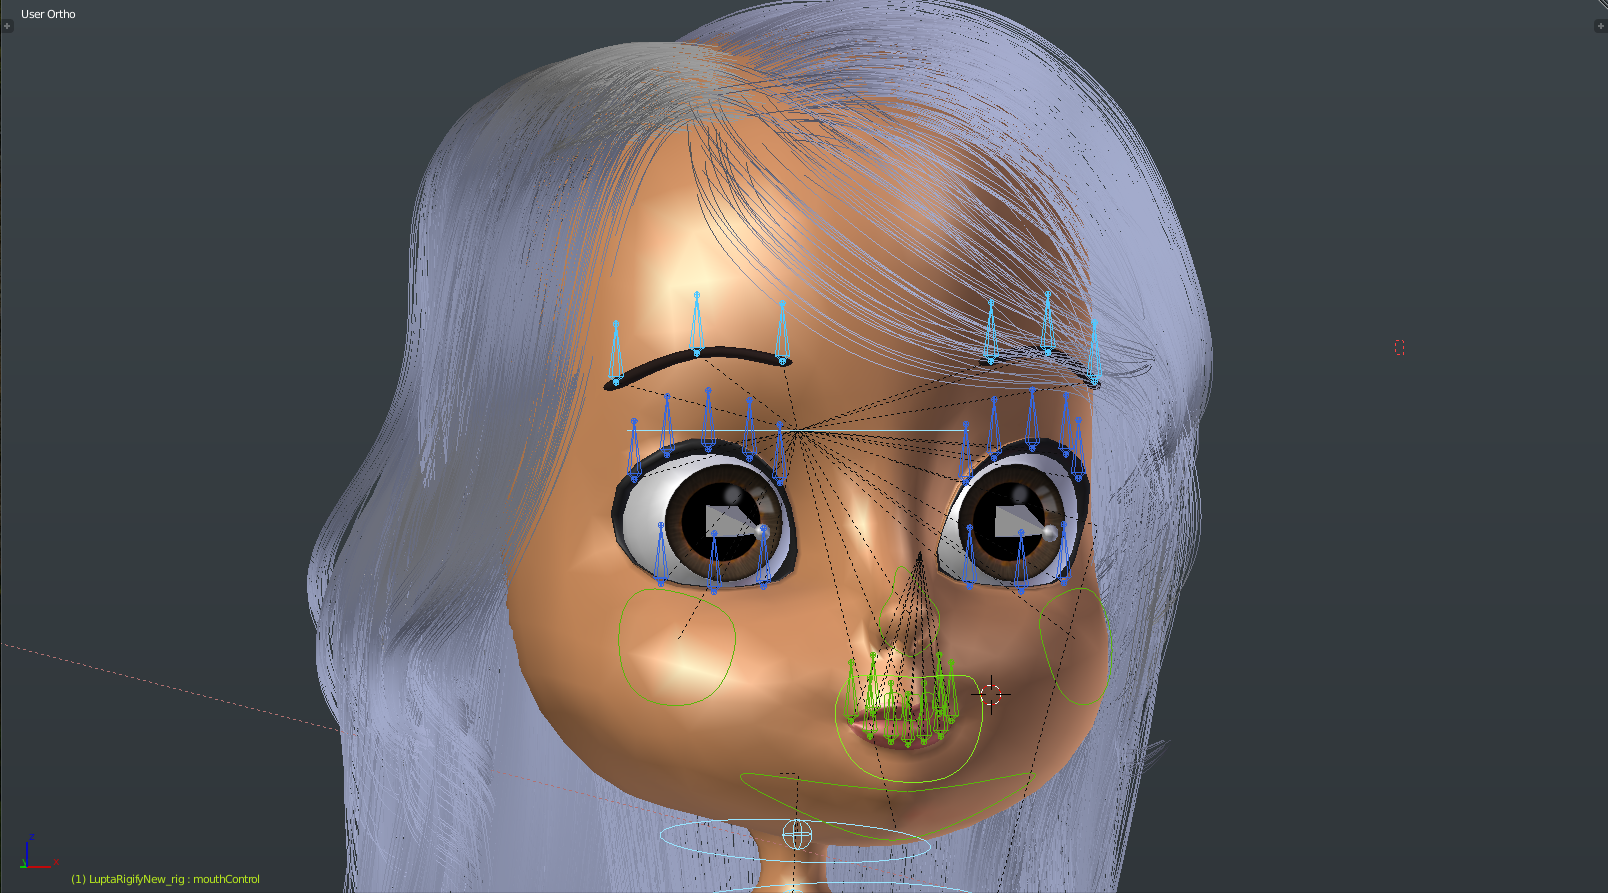
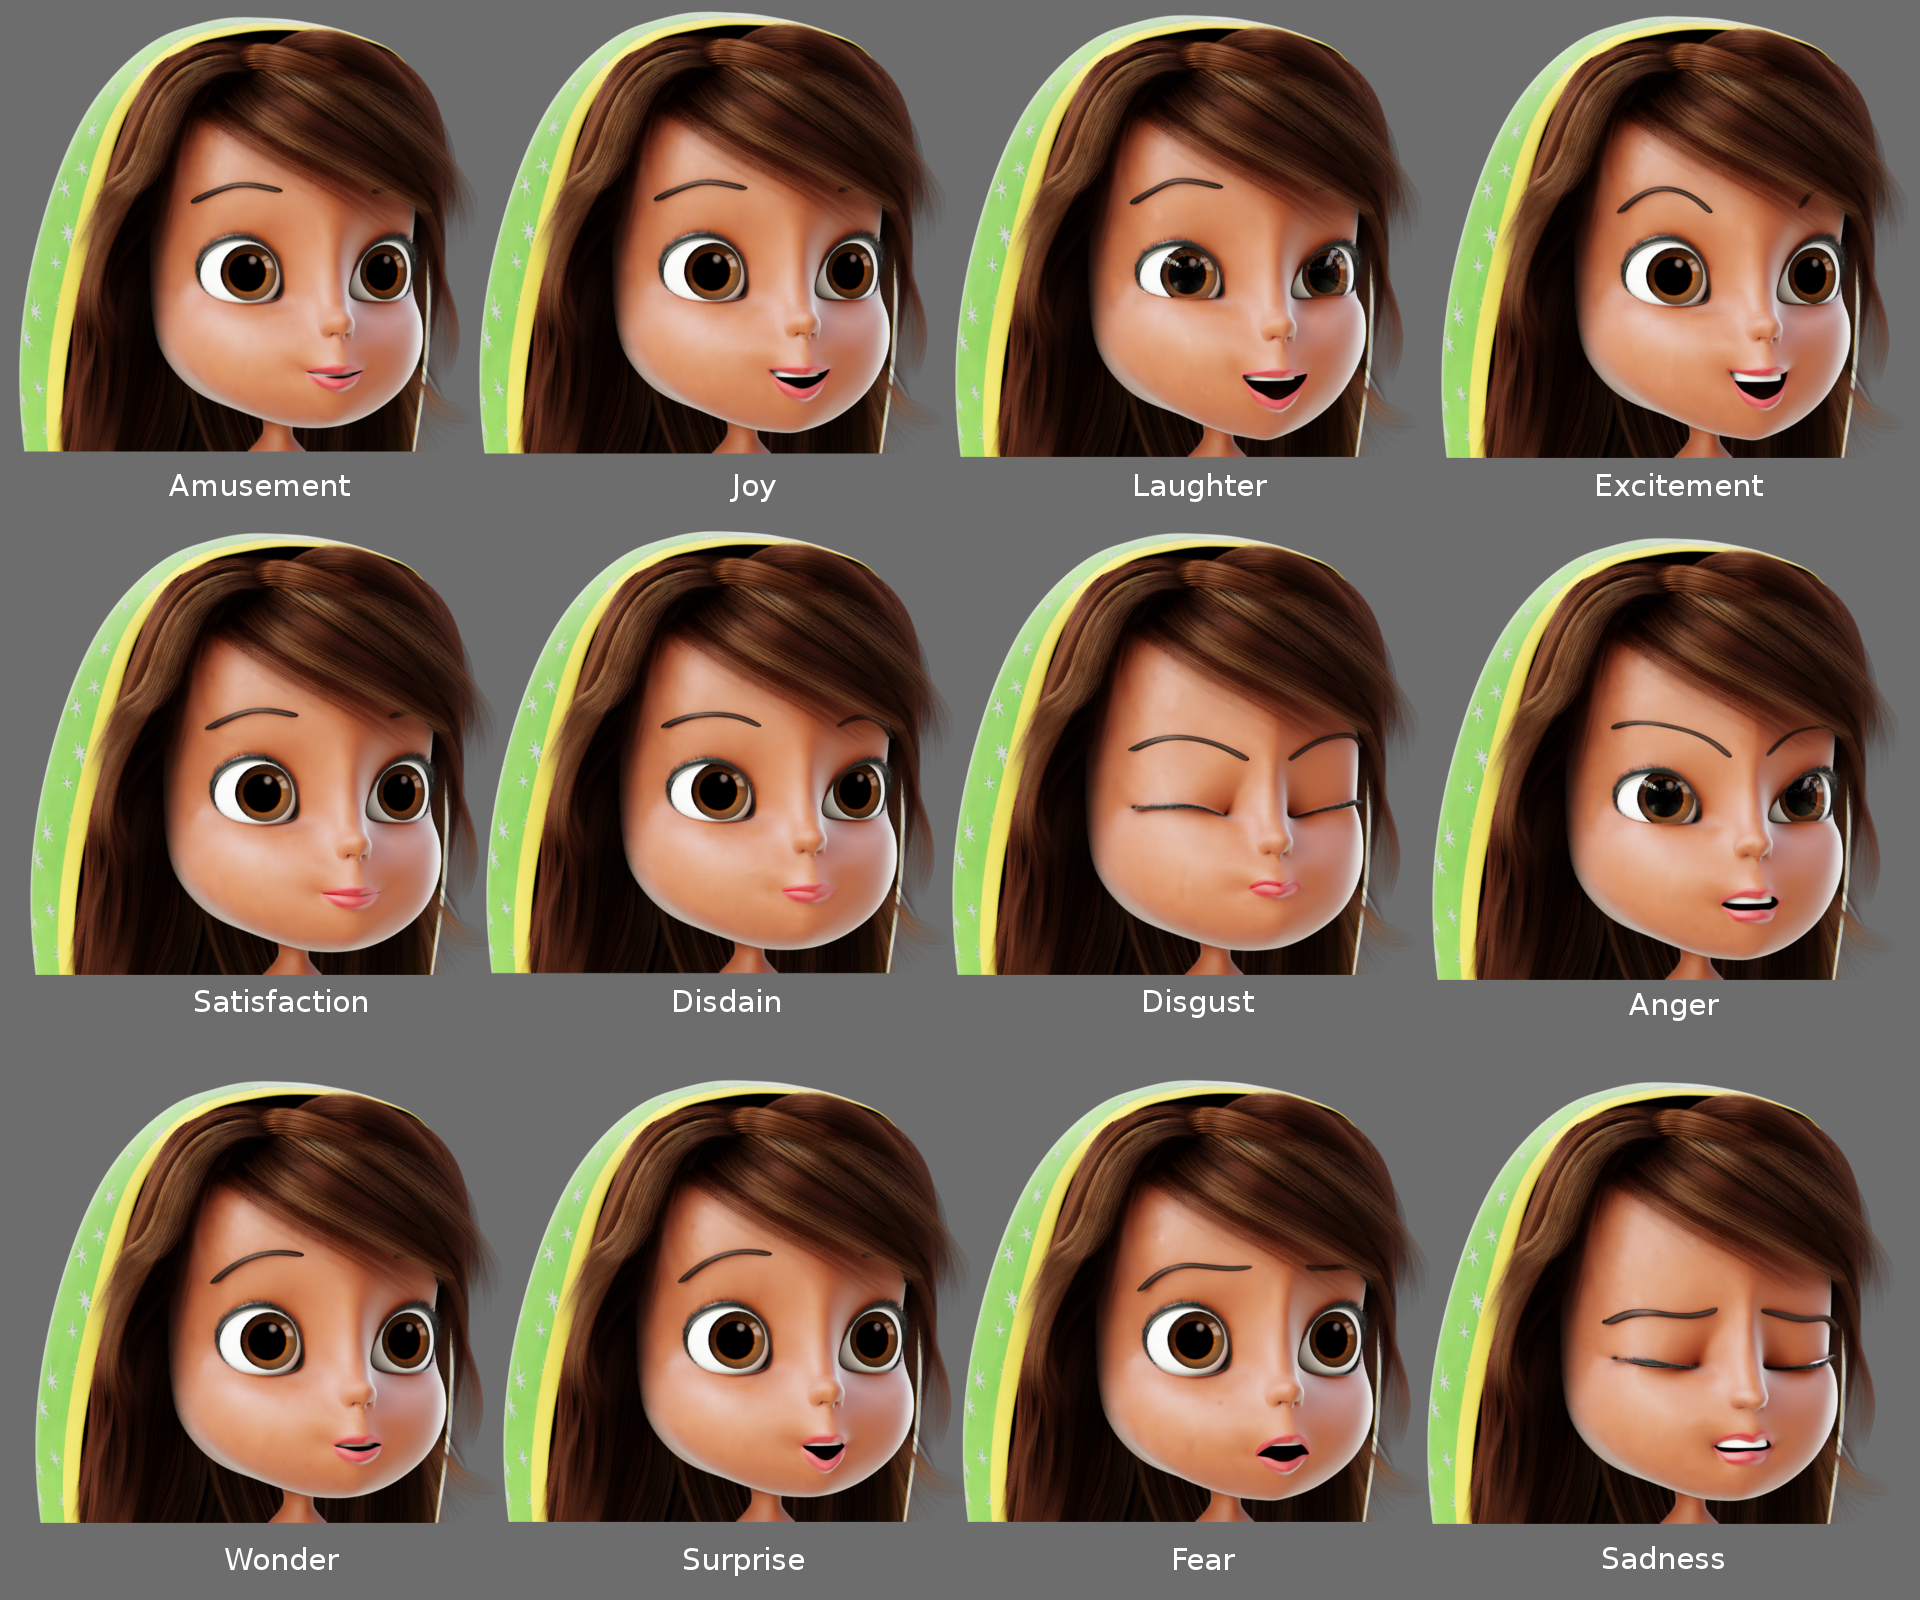
This was the first time I have done a custom facial rig entirely with bones and weight paints. This proved to be a faster, less stressful method unlike the shape key and driver path. The weight paints produced greater flexibility in facial expressions; no hassle of setting up countless drivers for each bone and re-doing them when they do not yield adequate results.
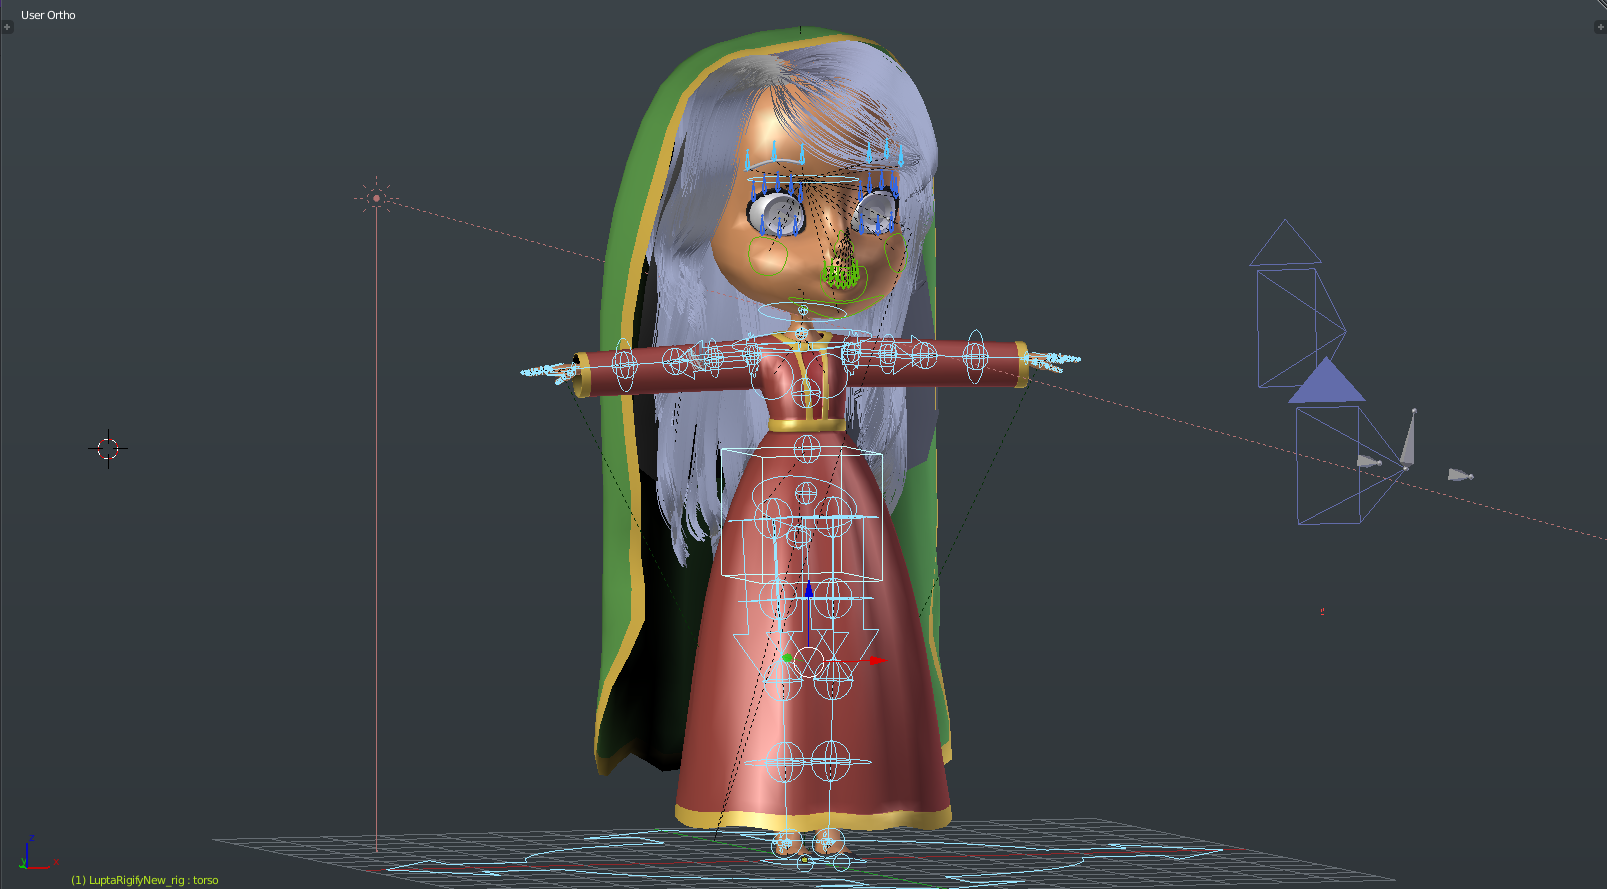
The body utilized the current rigify add-on built into Blender 2.79.
For all clothing materials, I used the default clothing shader from the Cloth Weaver add-on. Lupita’s veil and dress patterns were provided by Tepeyac, LLC.

I had a lot of freedom and input throughout this project. I needed to create a 5 second animation and a 10 second one to be used for advertising. After drawing out rough storyboard sketches, I began blocking out the key poses in Blender. The cloth and hair simulations were tricky, which delayed the actual keyframe animation process. I spent many hours adjusting physics parameters, collision barriers, world gravity and running test after test to render what you see in the final animation. Most simulations were isolated to their own layers and had to be baked individually in a specific order, as not to collide with the other sims.
Rendering was done on my home desktop: Intel i7-6800K CPU, 16GB RAM and 1x GTX 1080Ti GPU. All processing occurred on the GPU at an average of 15min/frame, 30fps, 15s of animation, at 4K resolution. It took about 5 days to render all the final animations (not including countless test renders). The 6ft tall poster image alone took 18 hours to render.
Overall, I had a fantastic time being a part of this wonderful project! Lupita can be seen in your local Target Stores.
About the Artist
 Alexander Kane, 3D Artist: cartoon characters, photo-realistic scenes | Software Developer
3 Comments
I love the design. On riggify: how were you able to add bones? Was it BEFORE generating the meta rig into full rig, or AFTER creating the full rig: by duplicating the eyebrow bones?
Thanks
Extra bones were added after generating the rig. Facial bones are parented to the head bone, except the eye follow bones which are parented to the root.
Its amazing, i really love the headwear and asian indian look which is not usually adapted by many artists.
P.S: at one point in the animation her hair went right through her head wear.. did you learn how to fix that? do share please.