
Behind the Scenes: Remnant of a Mascot
About
Hi! I am Amaury Lefoulon aka Leamon, 35 years old, self-taught in 3D, and living in France.
Since Santa Claus brought me my first Master Systems II video game console in 1989, I always knew that I would like to do a job related to multimedia entertainment.
It was only six years ago, after I had found professional stability, that this ambition re-surfaced and I was able, thanks to Blender, the internet, and the sharing of this community, to reconnect with this dream of my youth.
Today, I am more than anything determined to become a professional 3D graphic designer, and I am seizing the opportunities that are offered to me.
How I Did This Project
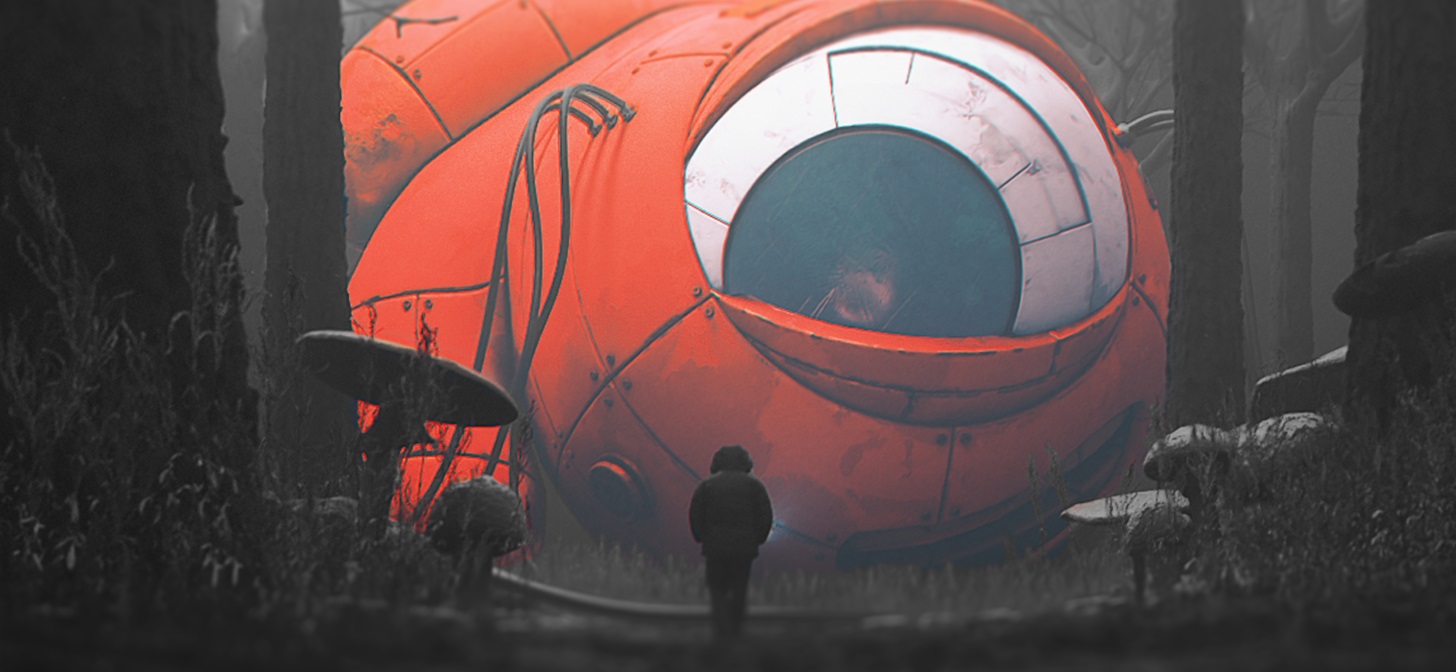
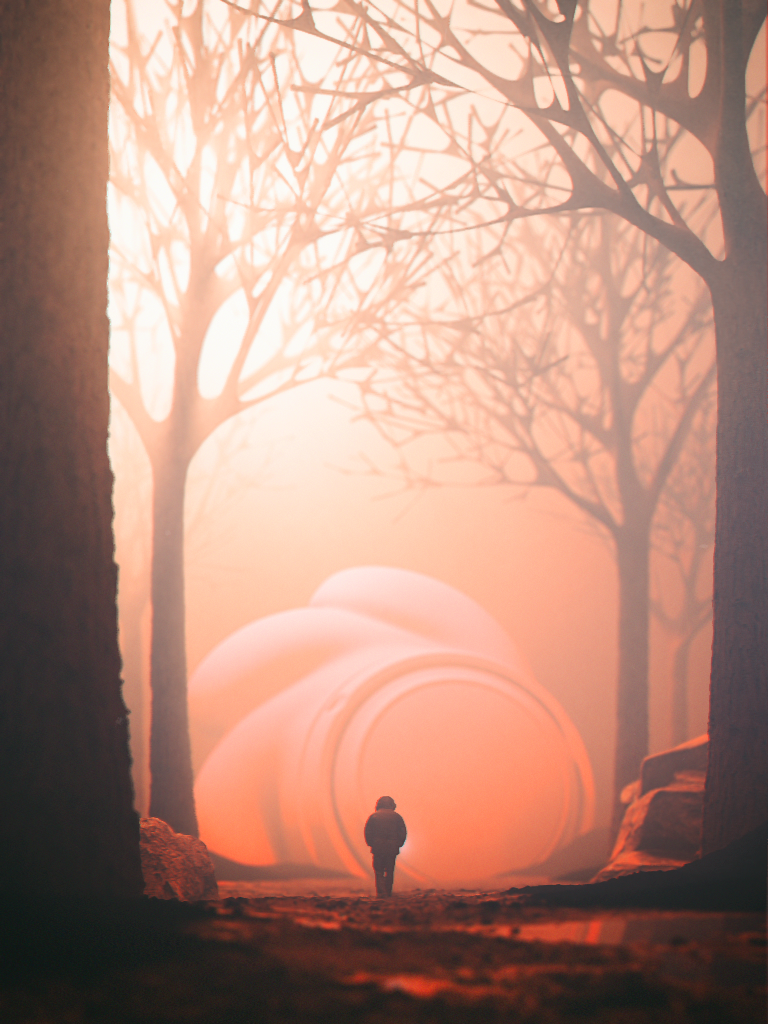
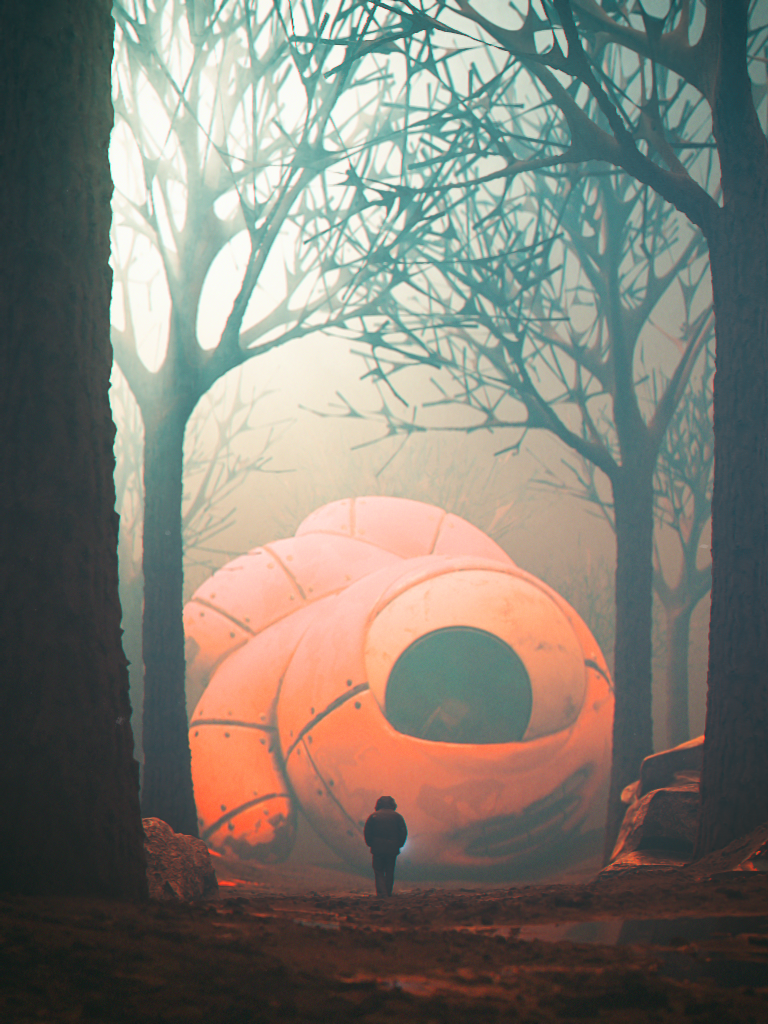
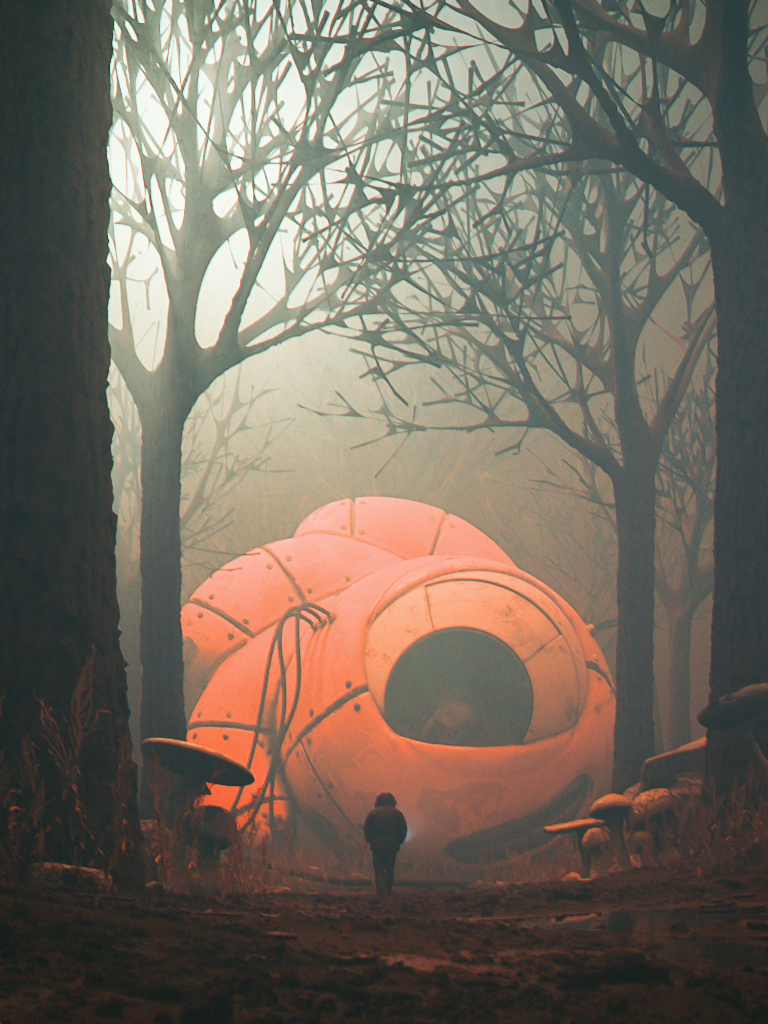
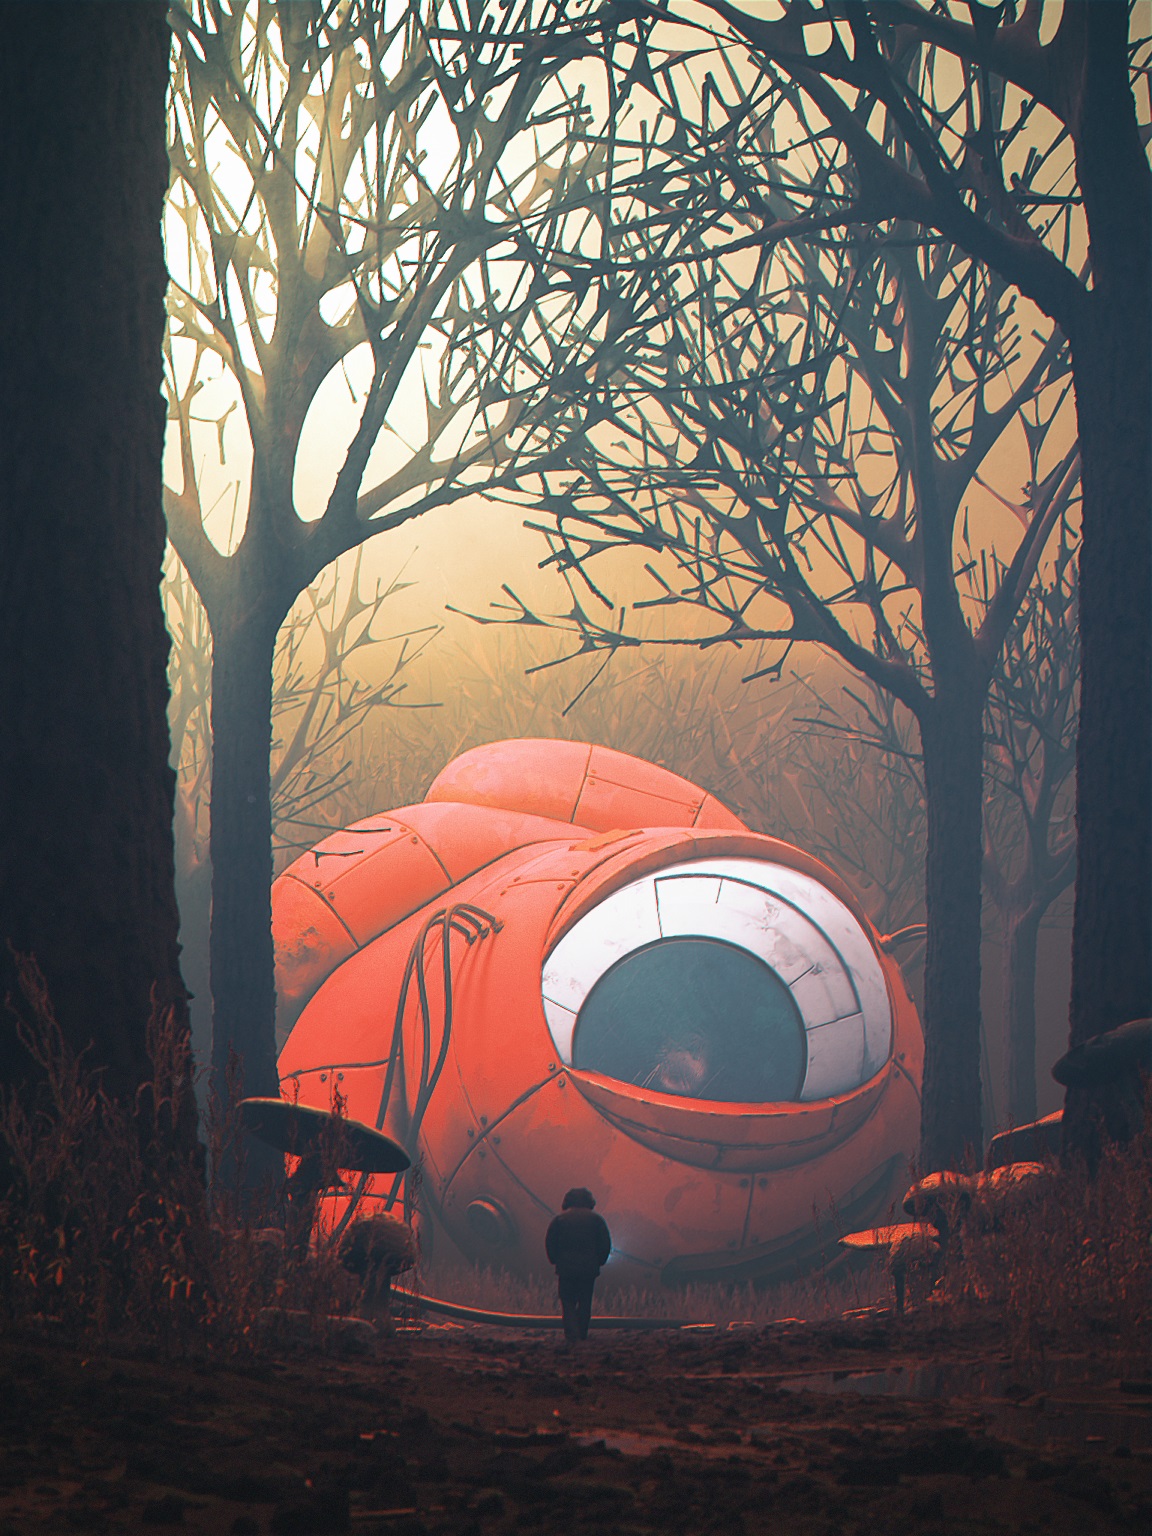
For this project I wanted to see what my abilities were to produce a scene with new tools combined in Blender. Being very inspired by the work of the concept artist Simon Stålenhag and Beeple Crap, I wanted to create my vision of the discovery of the remnant of a mascot, belonging to an old technology, in a vast and gloomy forest… Blender :D
Tools
I worked on the scene daily in Cycles 2.79, using assets from the Megascan library and Quixel Mixer. The main character is a free scan from the xoio-air.de website, and the mascot’s head is a recycling of my model already posted some time ago on Sketchfab. For hardware, I have a i7 3770k, 16Go Ram and a GTX 980.
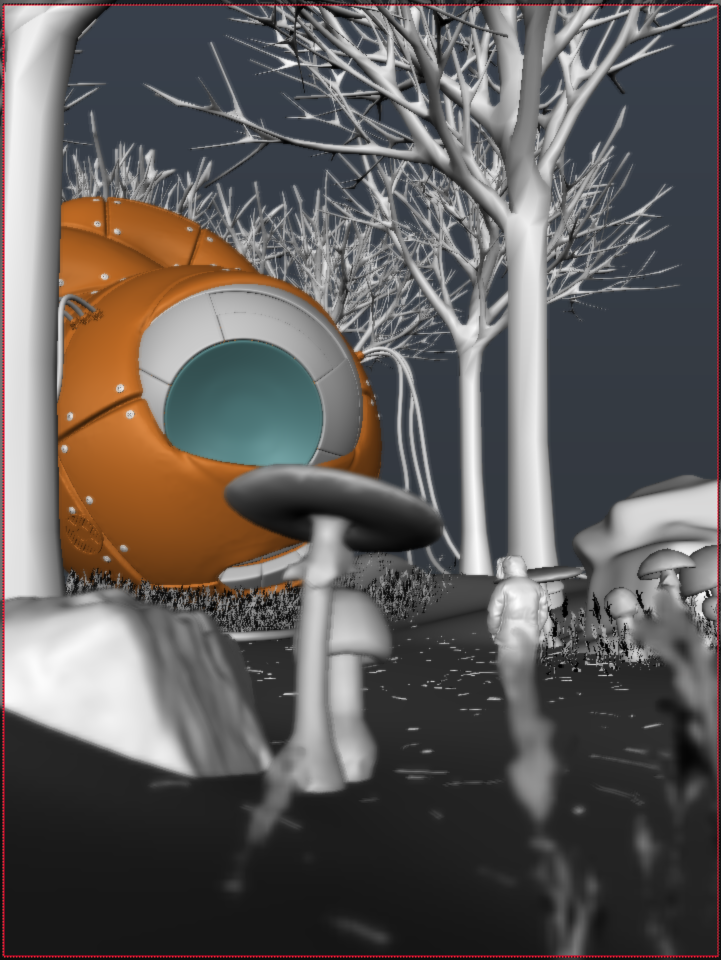
Blockout
I first blocked out my ideas: some trees made with the Modular tree addon, a volumetric box to get a sweet light scatter effect, a guy in winter suit scanned, and Suzanne.
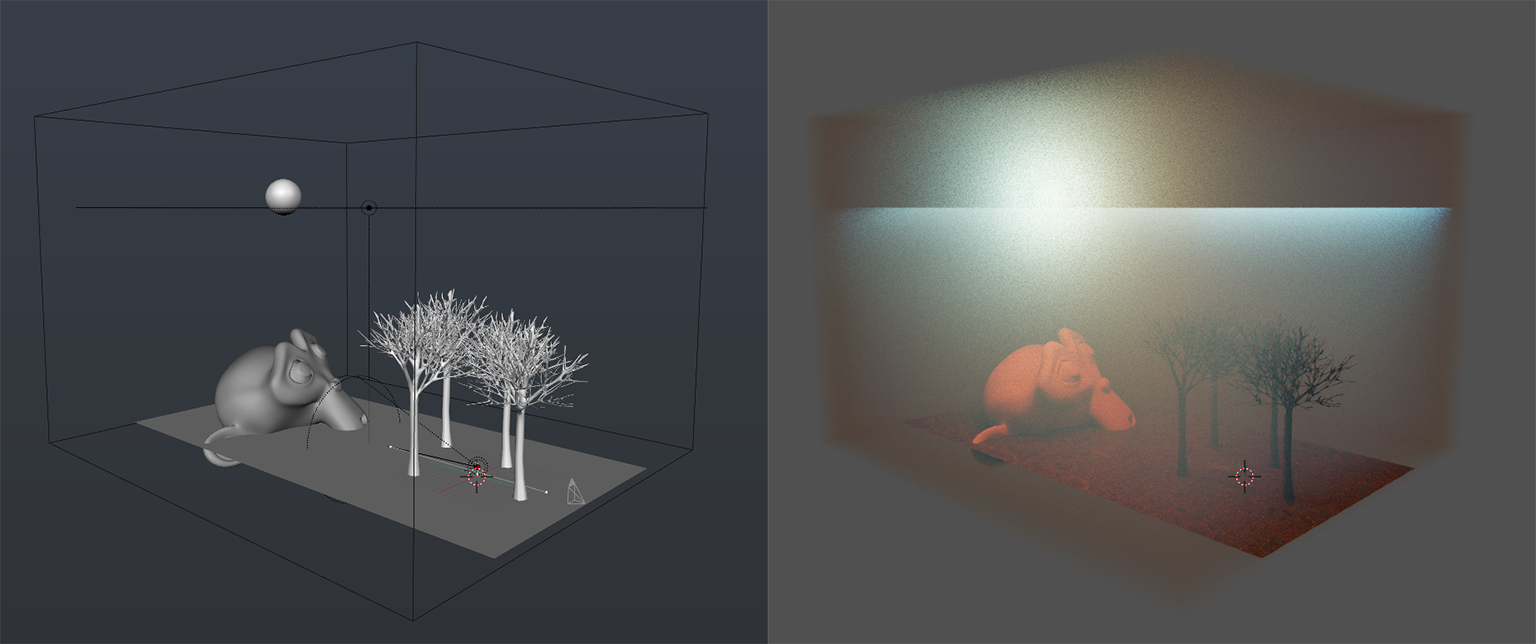
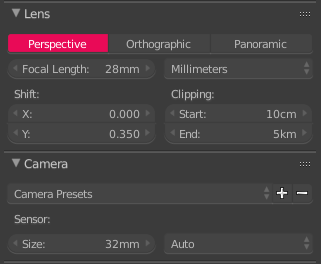
I chose a short focal length of 28mm to get maximum information in the scene, but with this choice I had trouble with lens deformation. So I broke it by shifting the Y axis of camera setting a bit.
In the second pass I added some rock, variation of the soil, and tried another big head for fun.
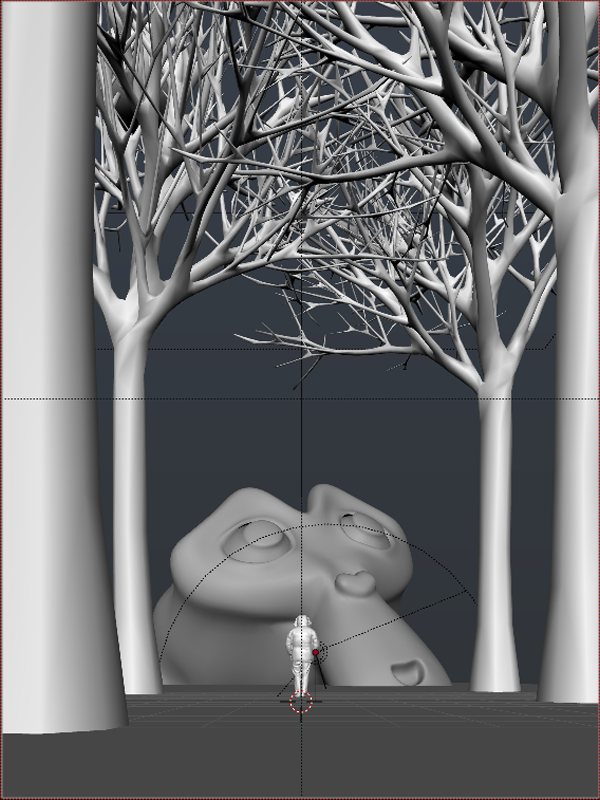
Modeling and Finishing
I added the head of the mascot, which I had sculpted before going further with my idea.
I added more organic detail with grass and giant mushrooms, small rock and twigs with a particle system to enhance the feel of a real, strange forest and played around with volume scatter and absorption color to get a good gradient.

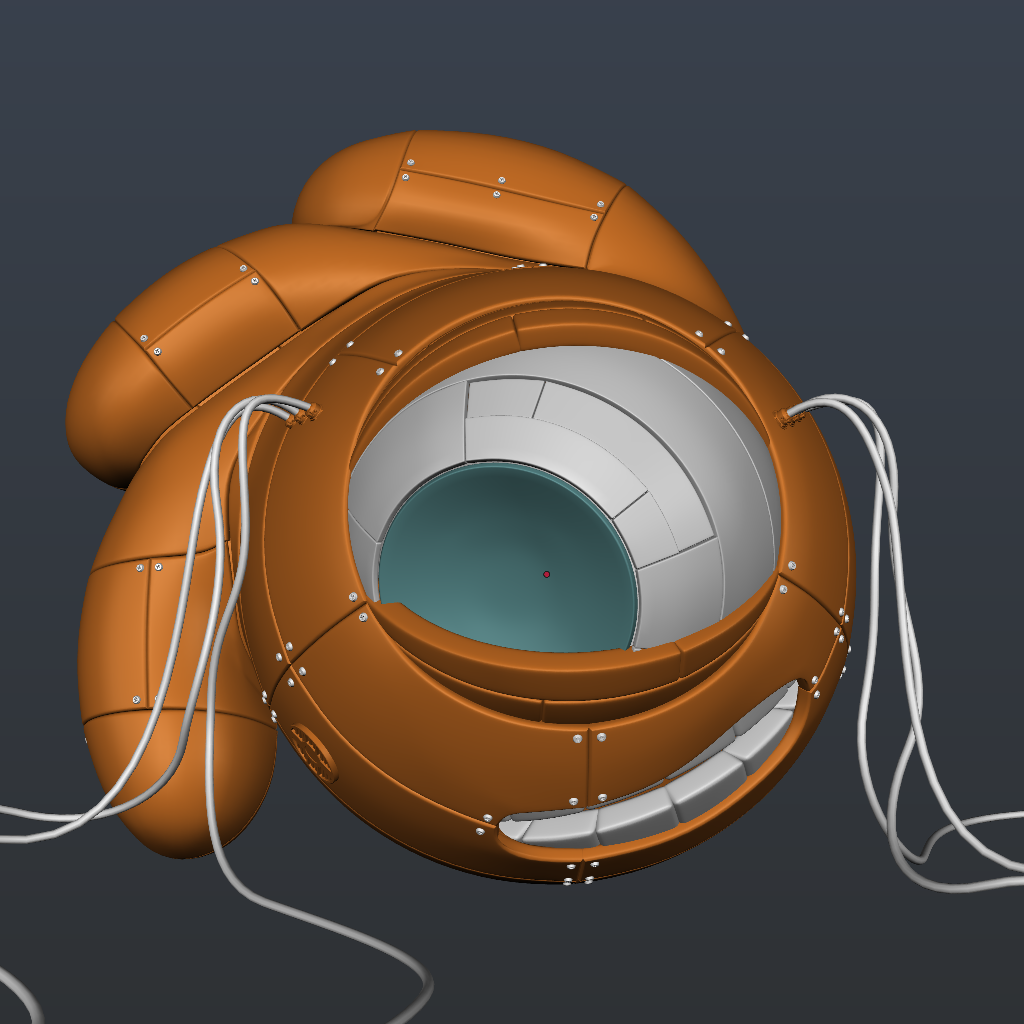
To finish the mascot head by retopology of the original Blender mascot head, I simply cut out some edges and combined it with a solidifier modifier to get hard surface panels. I added some details with screws, cables and an air grid. I textured it using procedural textures in Blender, combined with some imperfection maps.
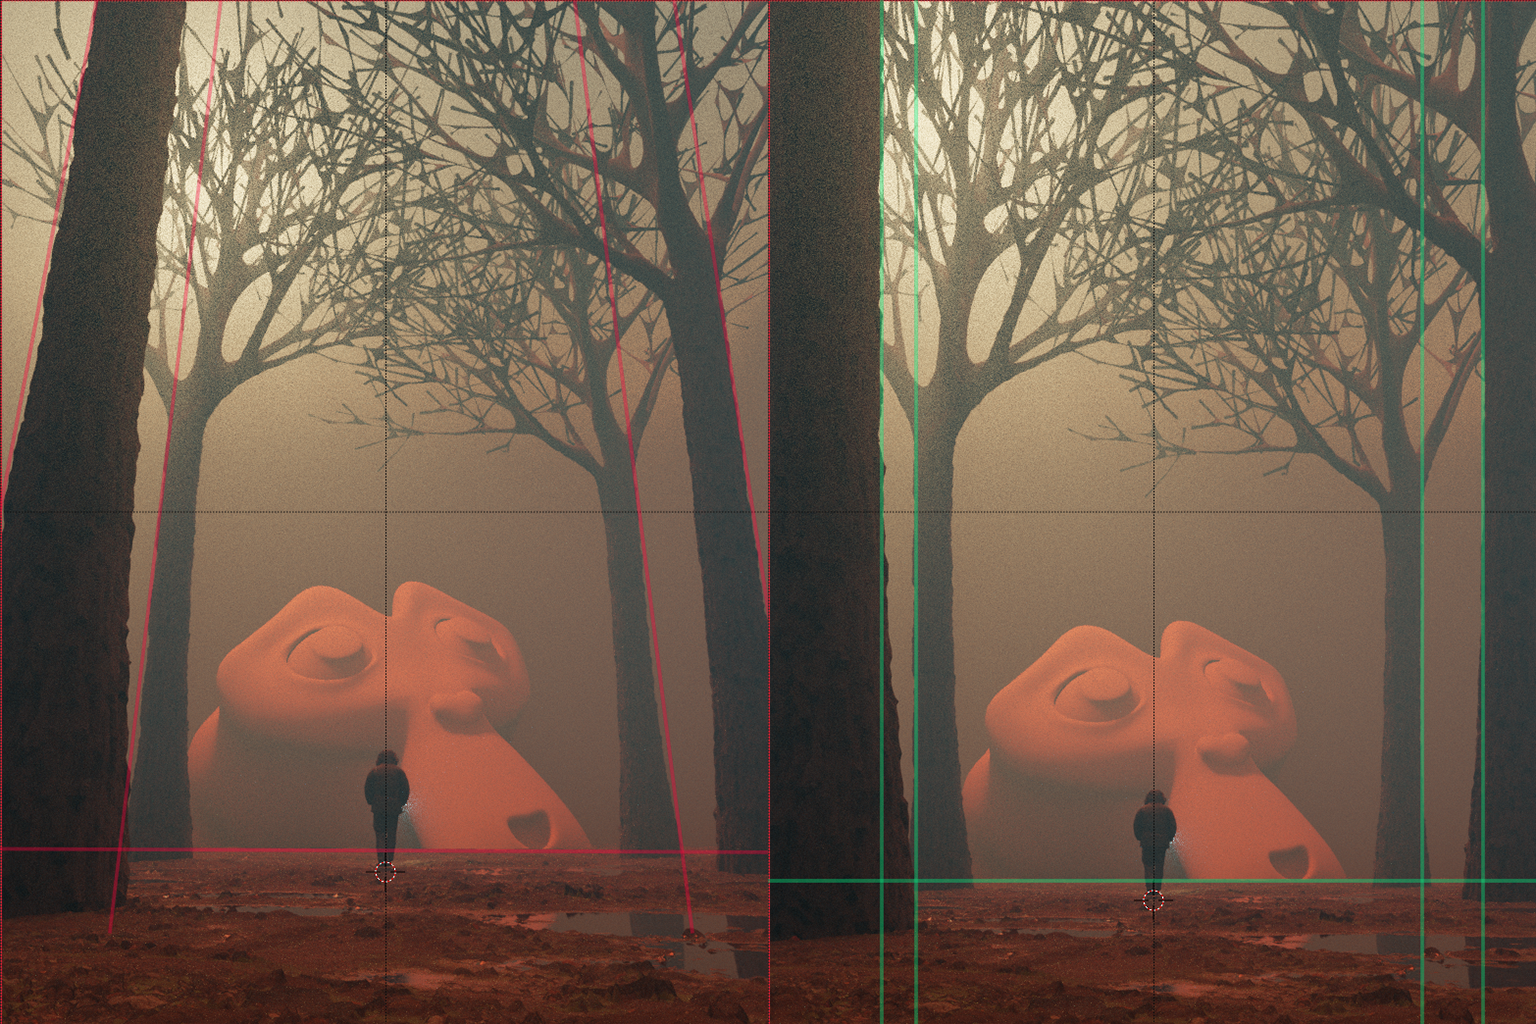
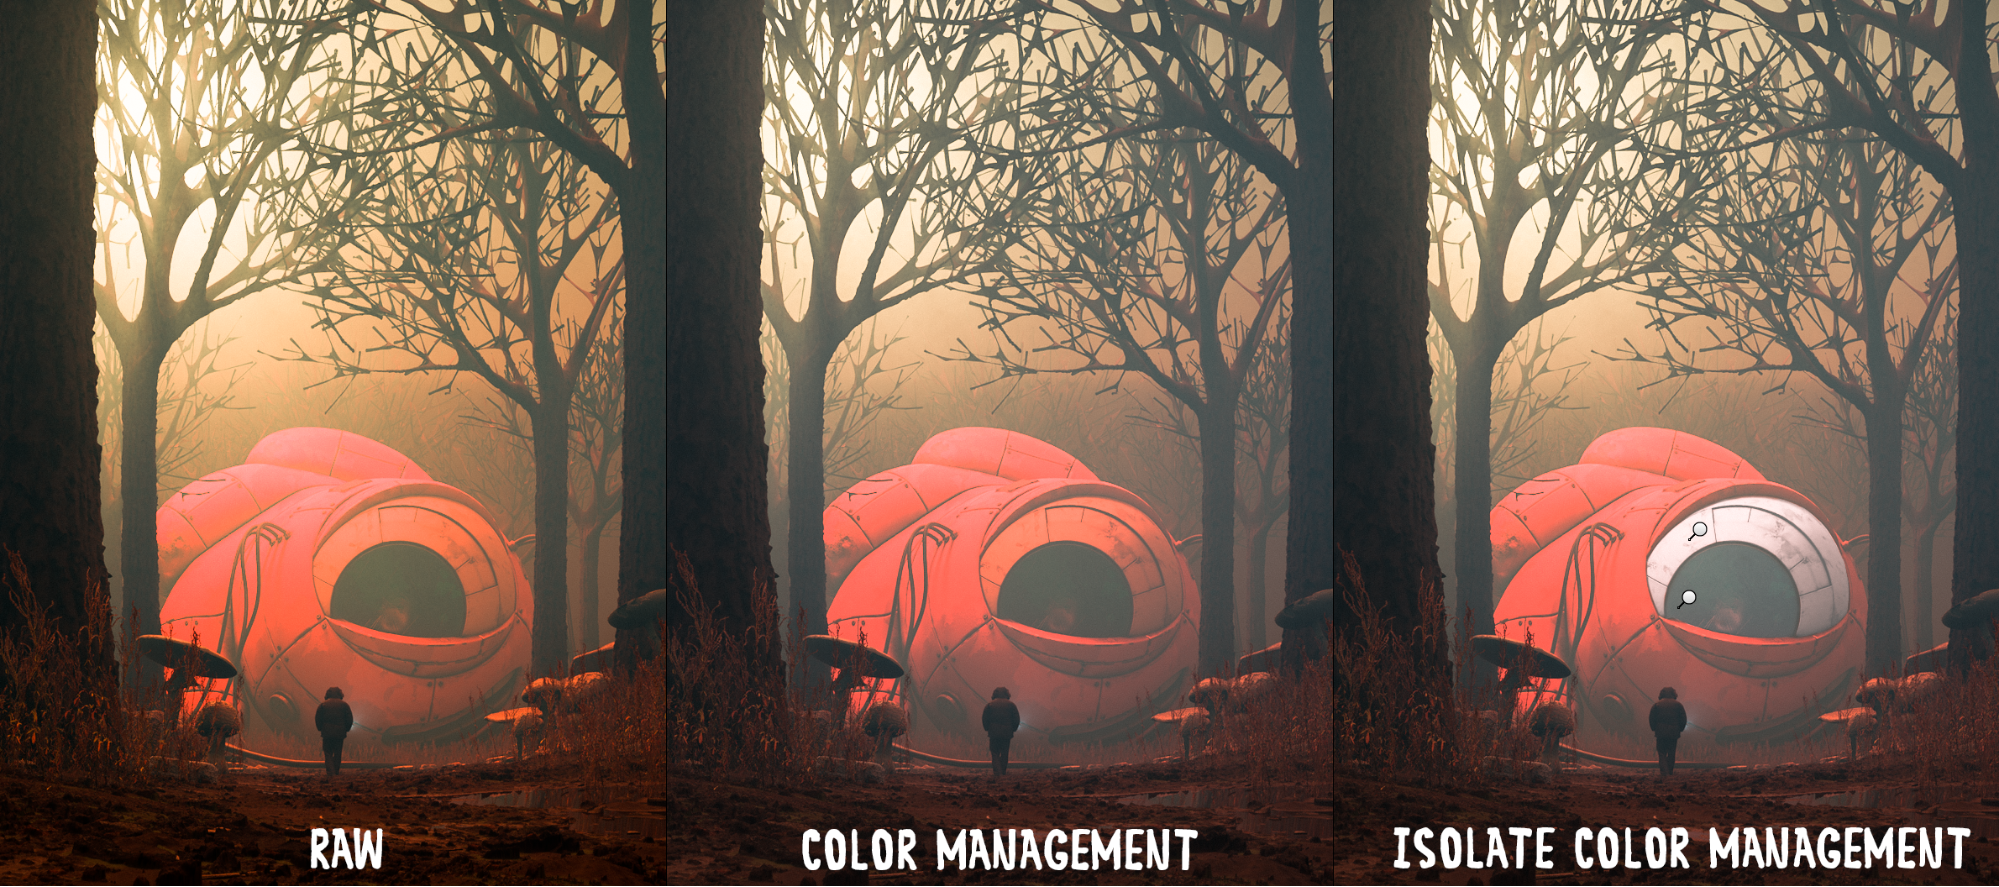
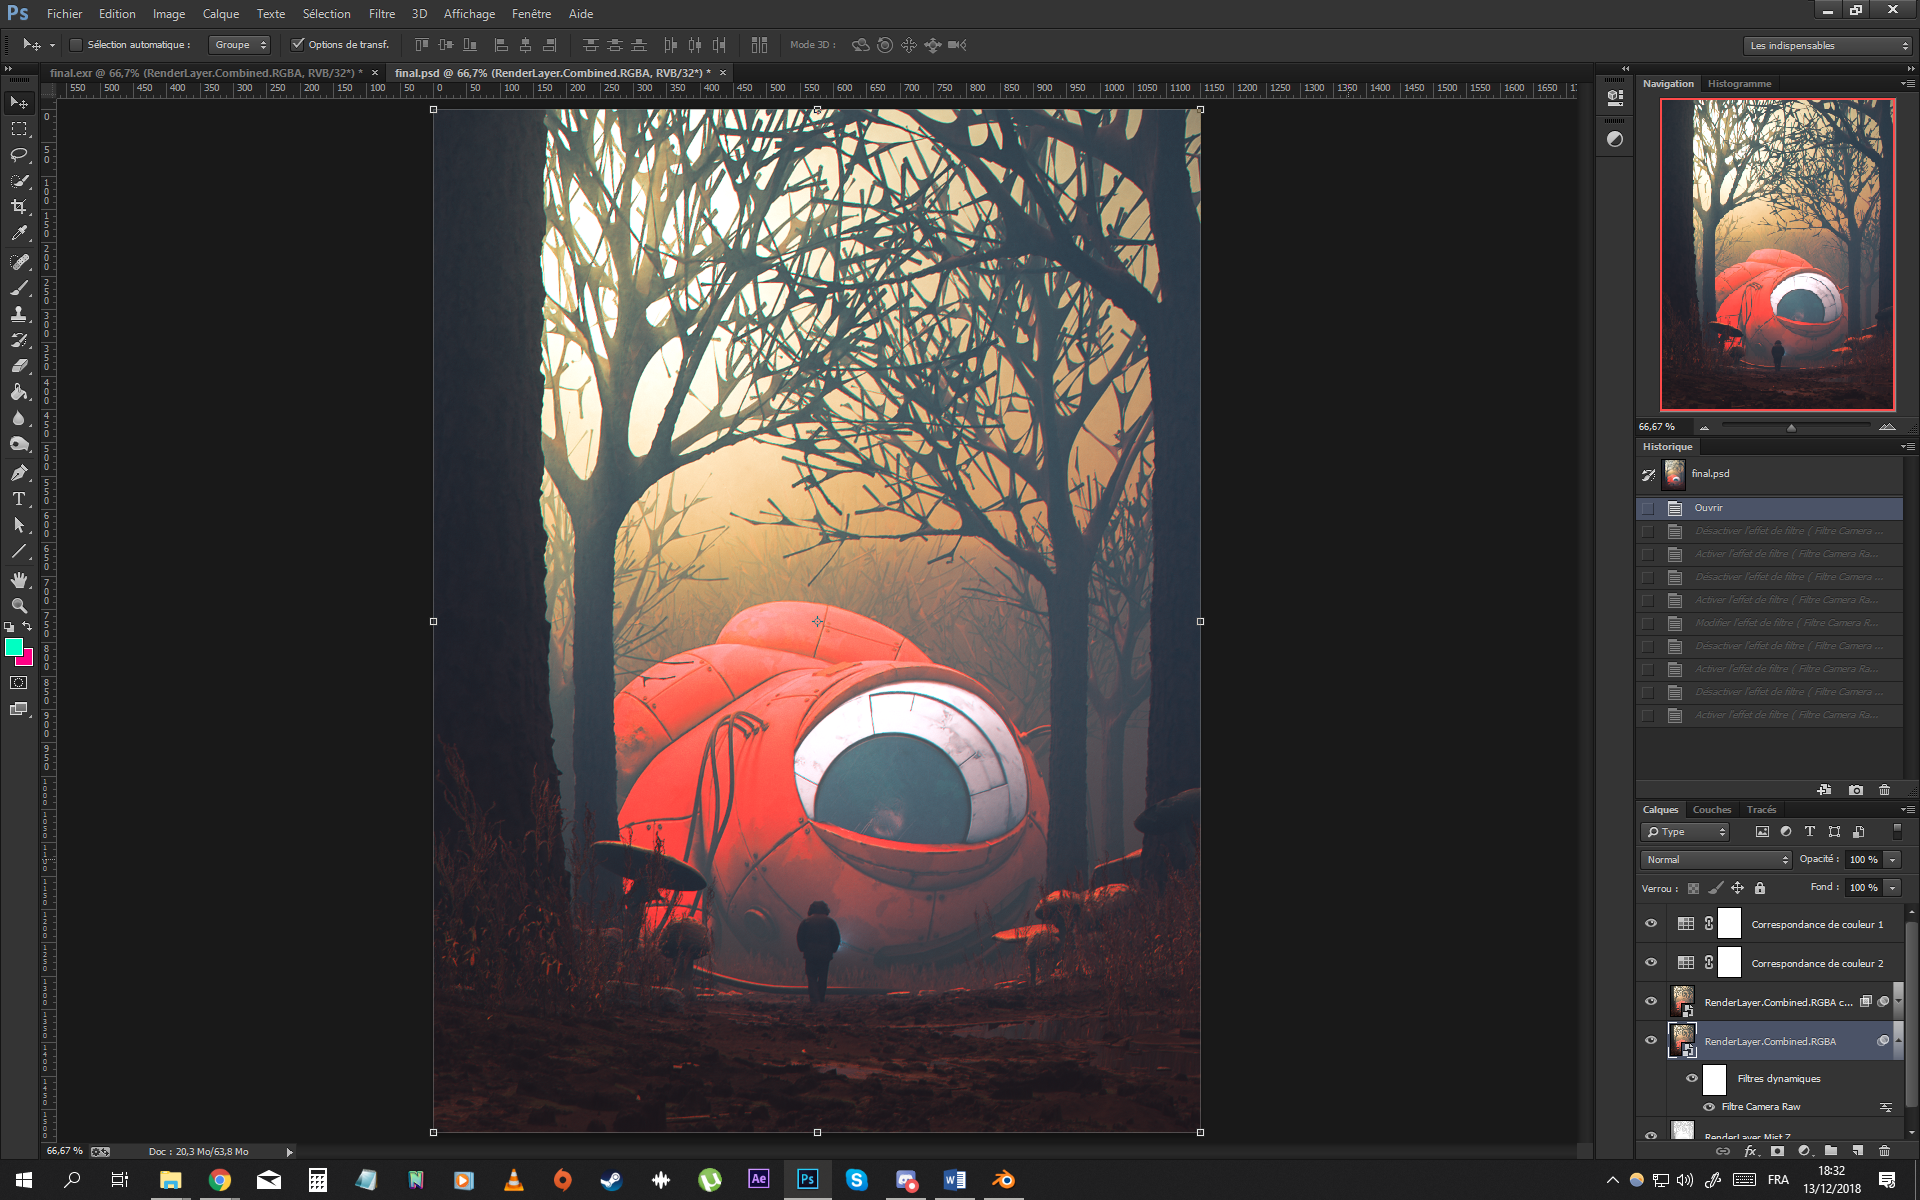
Render and Post-processing
I used Photoshop for post processing by color balancing and management with Camera raw Filter. I got the white of eye and the blue of the iris, which is denatured by the volumetric scatter by an isolated color management, to match the original material and the Blender logo.
Finally, I color graded with the 3D LUT preset, added a bit of depth of field by Z depth pass, a chromatic aberration, and that was it.
It’s done! ;)
About the Artist
 Amaury Lefoulon, 3D artist


Love the image and especially the breakdown of your process – brilliant – thank you.
Thanks for the build description. I very much enjoy the final product! :)
Great work ! I love it very much !
Is this a paid post? Or is the feed with problems? Or is it just me? This post is appearing as the first in the blog for days now…
I make these articles ‘sticky’. We invest a lot of effort into producing them and I want to make sure they don’t disappear within a few hours :)
I really liked this one! I just curious because I (really) visit the site every day hahaha.