
About
Hi all. My name is Vasyl Matsuk (also known as FeralMan).
Big thanks to BlenderNation for giving me the opportunity to write a “Behind the Scenes” on this project.
A little about me...
I am a 3D artist, from eastern Europe, Ukraine. I am an old whale in the CG industry. My learning of 3D graphics started in 2009, at university. In university, I developed an understanding of drawing, composition, proposition, but nobody taught me the 3D stuff. I learned computer graphics the hard way, from tutorials online, friends and a large number of mistakes.
I started my CG career in advertisements, so on the first job I used 3ds Max. But 3ds Max was very unstable, and I had redo the same job many times. I decided to change software, and try out Modo, Cinema 4D, Maya and Blender. The point was to test how each software met my needs. I found that Blender suits my workflow best among others.
Inspiration
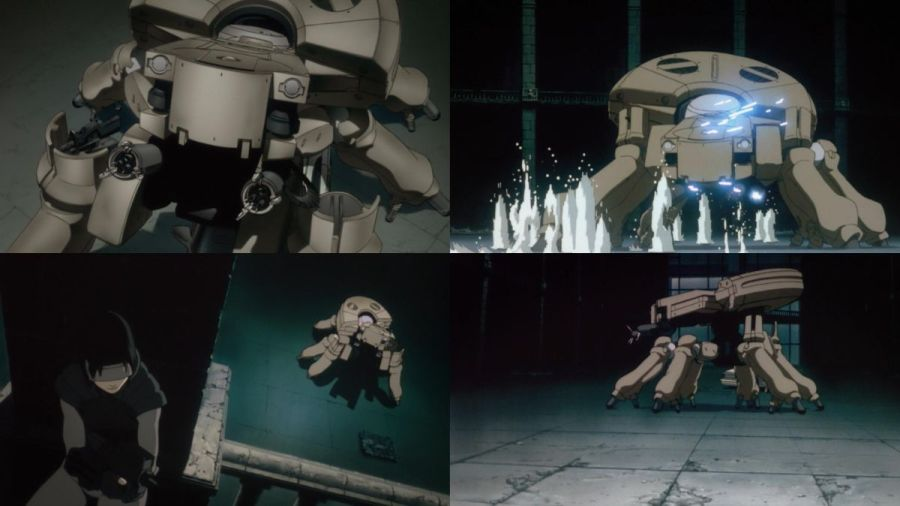
Anime “Ghost in the shell” 1995
I am a fan of the anime "Ghost in the Shell", so it exerted its influence on me. The "Major vs Tanks" fight scene is fantastic and beautiful. In 2017 the film version was made. The adaptation of "Tank" made by Vitaliy Bulgarov is just great. So I decided to make something similar.
Workflow
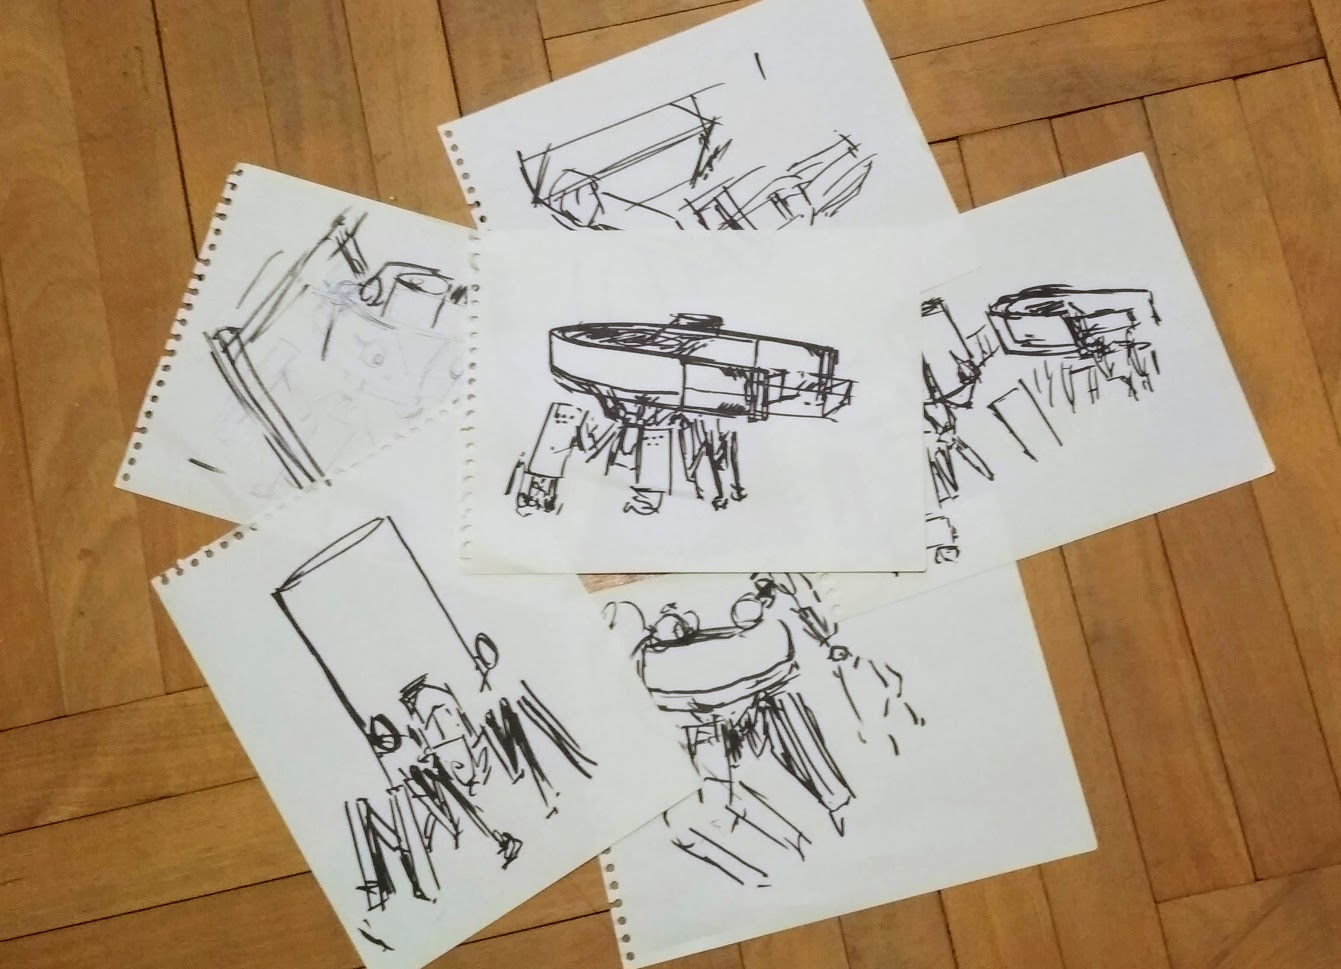
Sketches
It is always a good idea to do sketches first. At this stage, you can experiment with proportions and forms. It saves time. And you can answer the questions for yourself:
- What is the function?
- What is the scale of the machine?
- Does it need hands?
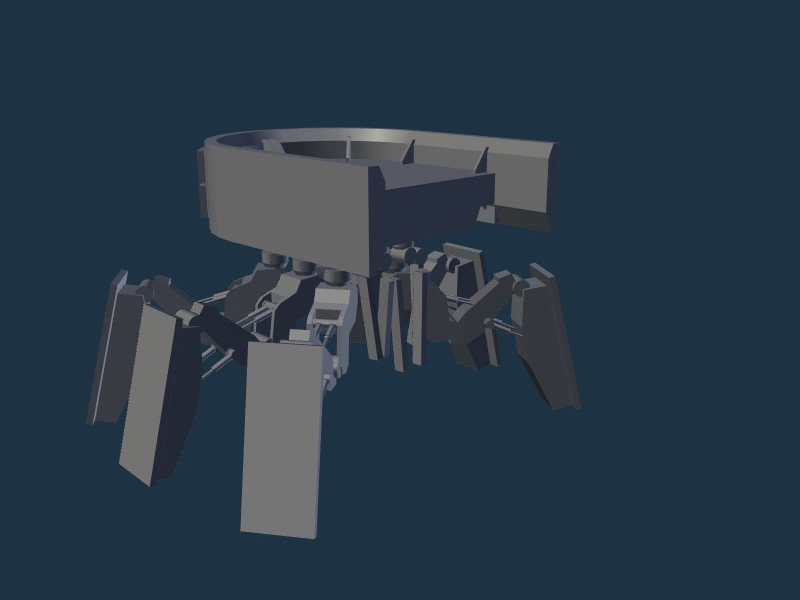
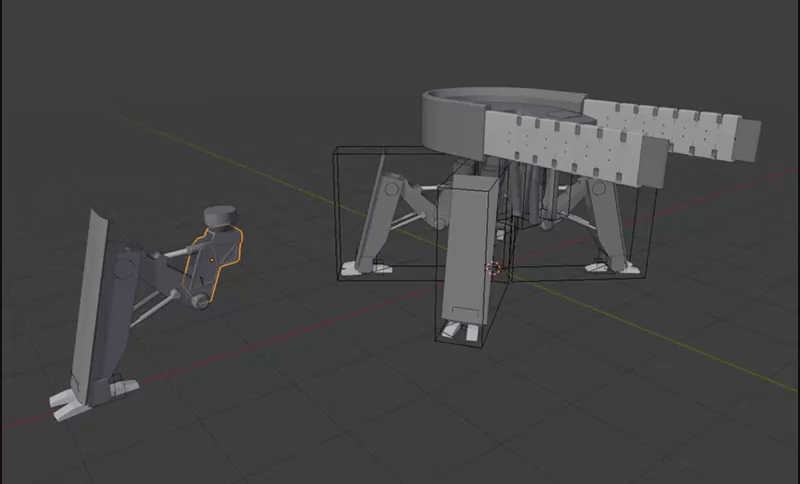
Four vs Six legs
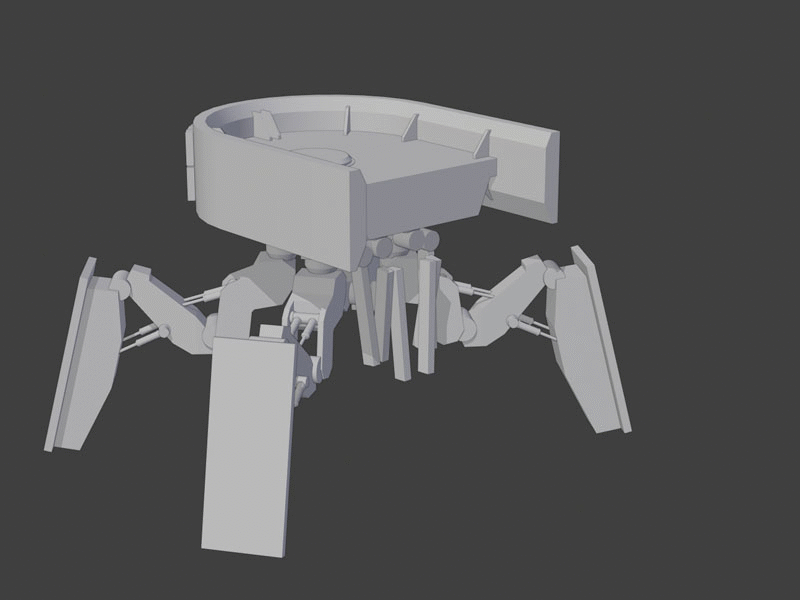
Now it's time for modeling. And here is 3D sketching, also called "Boxing". Just create a bunch of boxes and cylinders. Play with scale, location and rotation. Place them in the "right" place. At this stage, you can say whether the volume looks good. First, I gave six legs to the machine. But my robot has the ability to fire artillery from a long distance. So he needs heavy armor and he will be medium weight. That's why the robot needs only four legs.
”Group pro” addon
Through boxing, you also can check how functional the model is, whether joins will bend properly, and if one mesh will penetrate into another mesh.
Although this model would not be animated, it was important to make it look like the robot would be able to move and shoot.
So I made one leg, merged objects into one group and copied this group four more times with instancing. With instancing, you can change objects in one leg, and changes automatically apply to all legs. I use the GroupPro addon, it gives more control over the group. With that, you can change the origin, flip the group, and more.
For faster editing, I put one leg aside. I set the center of the group on the X, Z world plane. That way I could use global axis arrows, reset object rotation and work with symmetry.
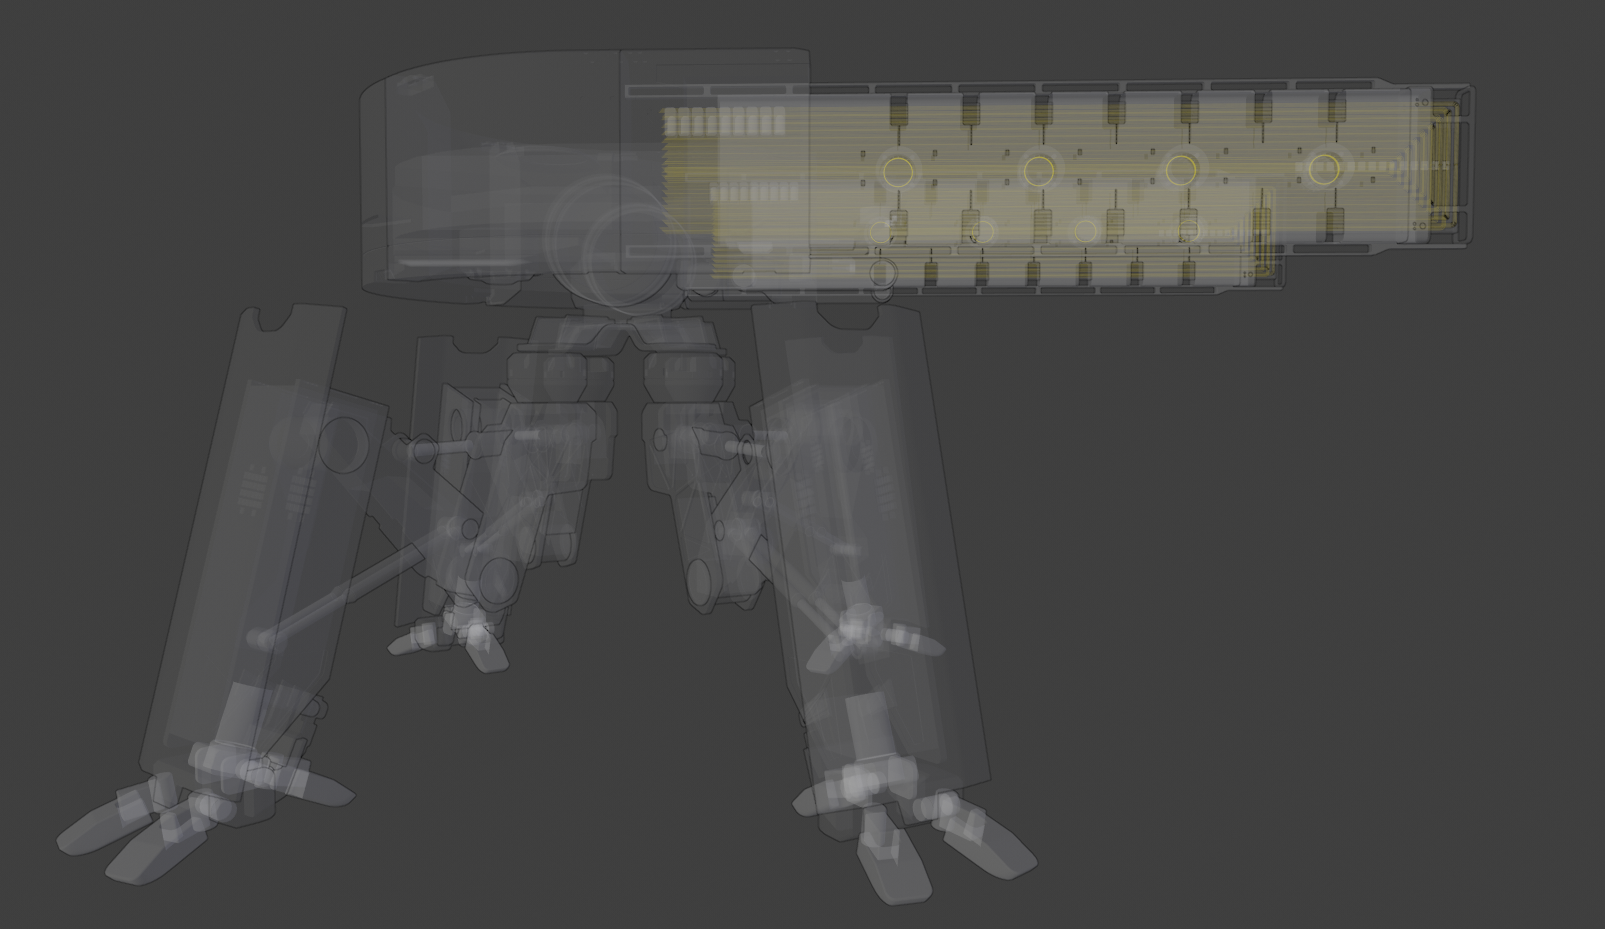
What’s inside. X-ray
For work, I also use Speedflow, Speedflow companion, and Wazou RMB pie from Cedric Leppiler. Yeah, I am a "Pie menu" boy. You just become faster with these tools. I am like a fish in water when working with them in Blender.
Basically, with Cedric's add-ons, you follow a non-destructive modeling workflow. At any moment you can edit any part of your mesh. And it’s crazy.
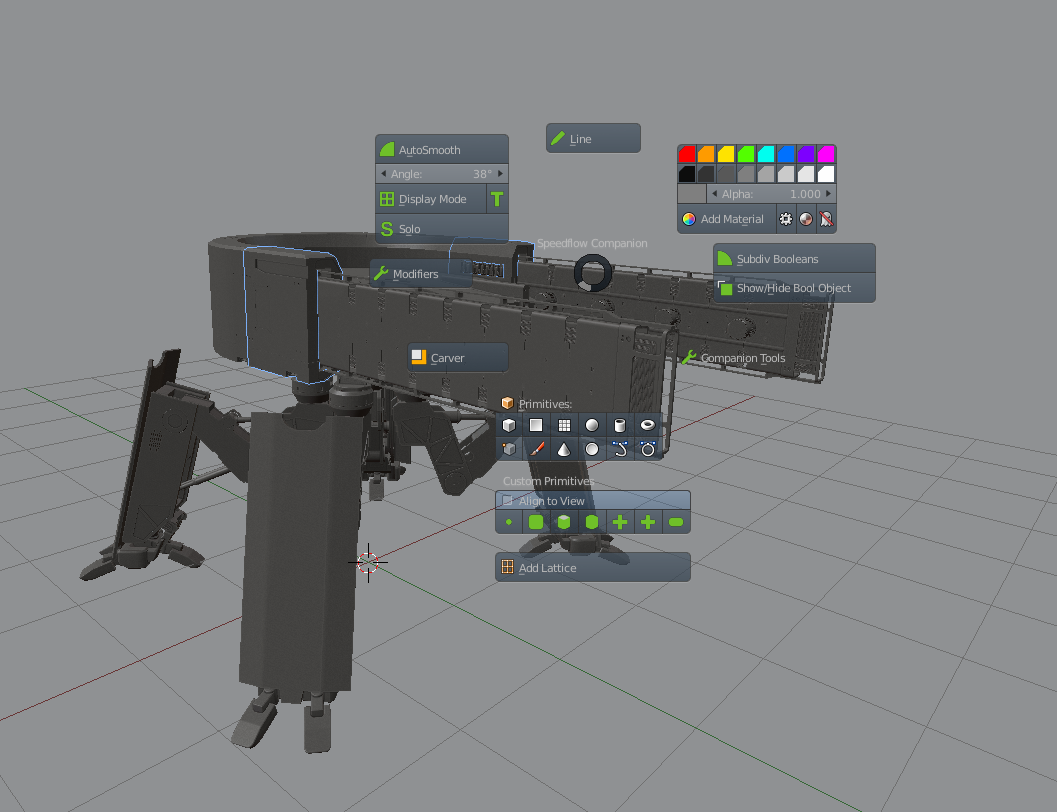
Speedflow companion
Also, it’s the first time I had used the MESHMachine addon. After tests, I can say it’s a powerful tool. It's a "must have" addon if you want to work with hard surfaces. This addon will help you correct bevels, adjust normals, model symmetry, and plug one mesh to another. Without this addon work would take much longer. Now I working on my set of plugs for this addon.
Stages of work, from start to finish.
One of my secrets: It’s always good to have music with you. It helps to concentrate.
Here are the final renders.


My goal is now to completely concentrate on hard surface modeling and in the near future I will make more stuff in this style. So stay tuned.
If you liked this “Behind the Scenes”, don’t hesitate to check out more of my projects on my Artstation.
Cheers.
About the Author
Vasyl Matsuk, 3D Artist
4 Comments
Maaaan that's AWESOME! Amazing work, Vasyl!
Thanks, Evan.
Very well done!!
Awesome mech! Thanks for mentioning MESHmachine, much appreciated. Glad you've found it useful!