Behind the Scenes: Robot Pilot
Background and studies in 3D
Hi, there! I’m Luis Augusto and I live with my wife in the state of São Paulo, Brazil, in a small town called Registro. Nowadays, I spend most of my time learning and practising 3D.
My first contact with 3D was around 2001 with the software LightWave. At first I had difficulties that limited my learning, such as a owning a low-end computer, and a dearth of appropriate study materials. During this period of my life, I got a bachelor’s degree in Audiovisual Studies and started working as a videomaker (more specifically as a cameraman and animator of motion graphics). Then, due to work obligations, and several frustrated attempts to learn 3D on my own, I eventually gave up learning!
In 2011, ten years after my first contact with 3D, I was working in a production company and haphazardly came across Blender on one of their computers. It got me interested, and I decided to give 3D learning another try. This time, I was able to achieve significantly better results, particularly on modeling. From that day on, I tried to include 3D animations in all projects the production company was working on. It is true that the things I was doing back then were not exactly elaborate but, even so, it was really enjoyable for me.
In 2016, my wife and I moved from São Paulo to Registro looking for a better quality of life. This provided me the chance to dedicate my time almost entirely to study 3D. Essentially, all my training process since then had been based on CGCookie courses and some YouTube tutorials.
Inspiration for the models
The two models of this set were created in different moments of my practising process.
First, I focused on learning hard surface models because I thought they would be easier to accomplish, given that I always had some uneasiness working with organic models. For this reason, the Suit was made almost 6 months prior to the Character.
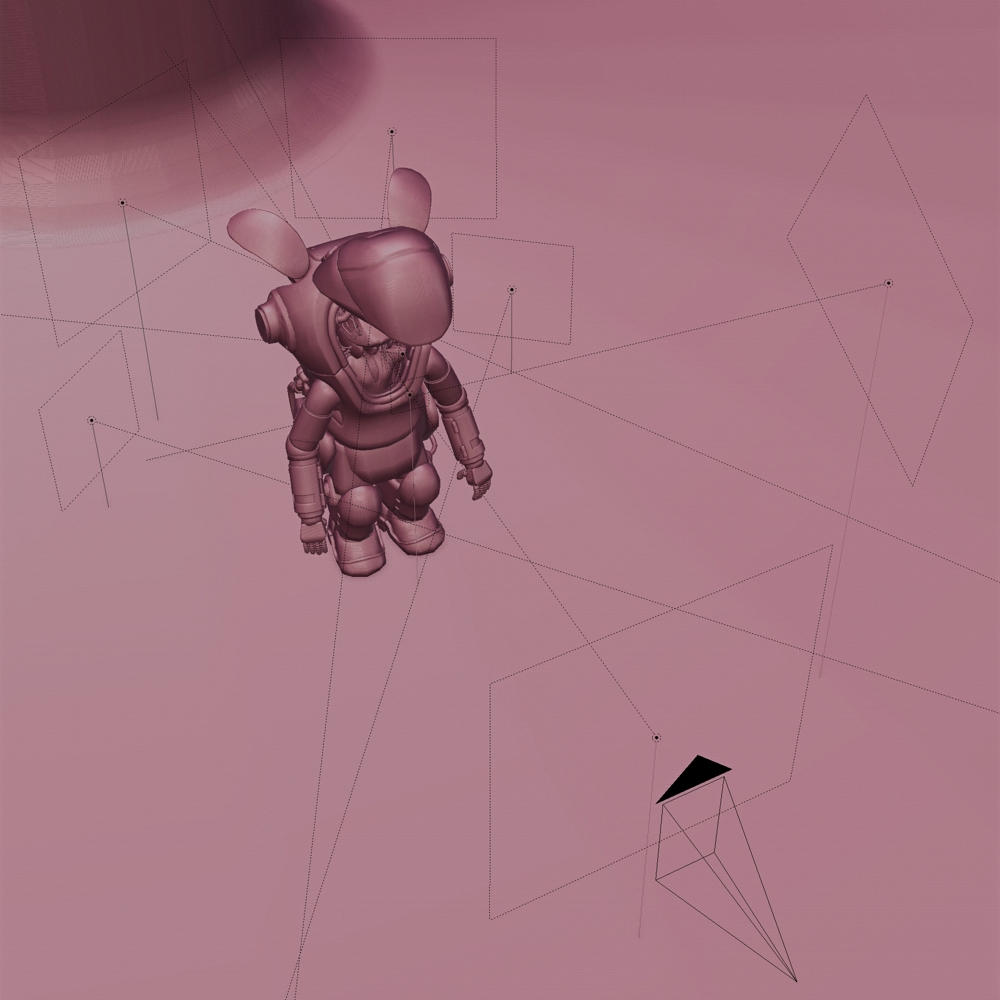
I really enjoy dioramas, action and toy figures and all kinds of miniatures. Therefore, I found in the Maschinen Krieger universe a large variety of interesting models to reproduce in 3D. I considered them to be good challenges, mainly because I used to avoid models with internal parts, which I always felt were too hard for me to do.
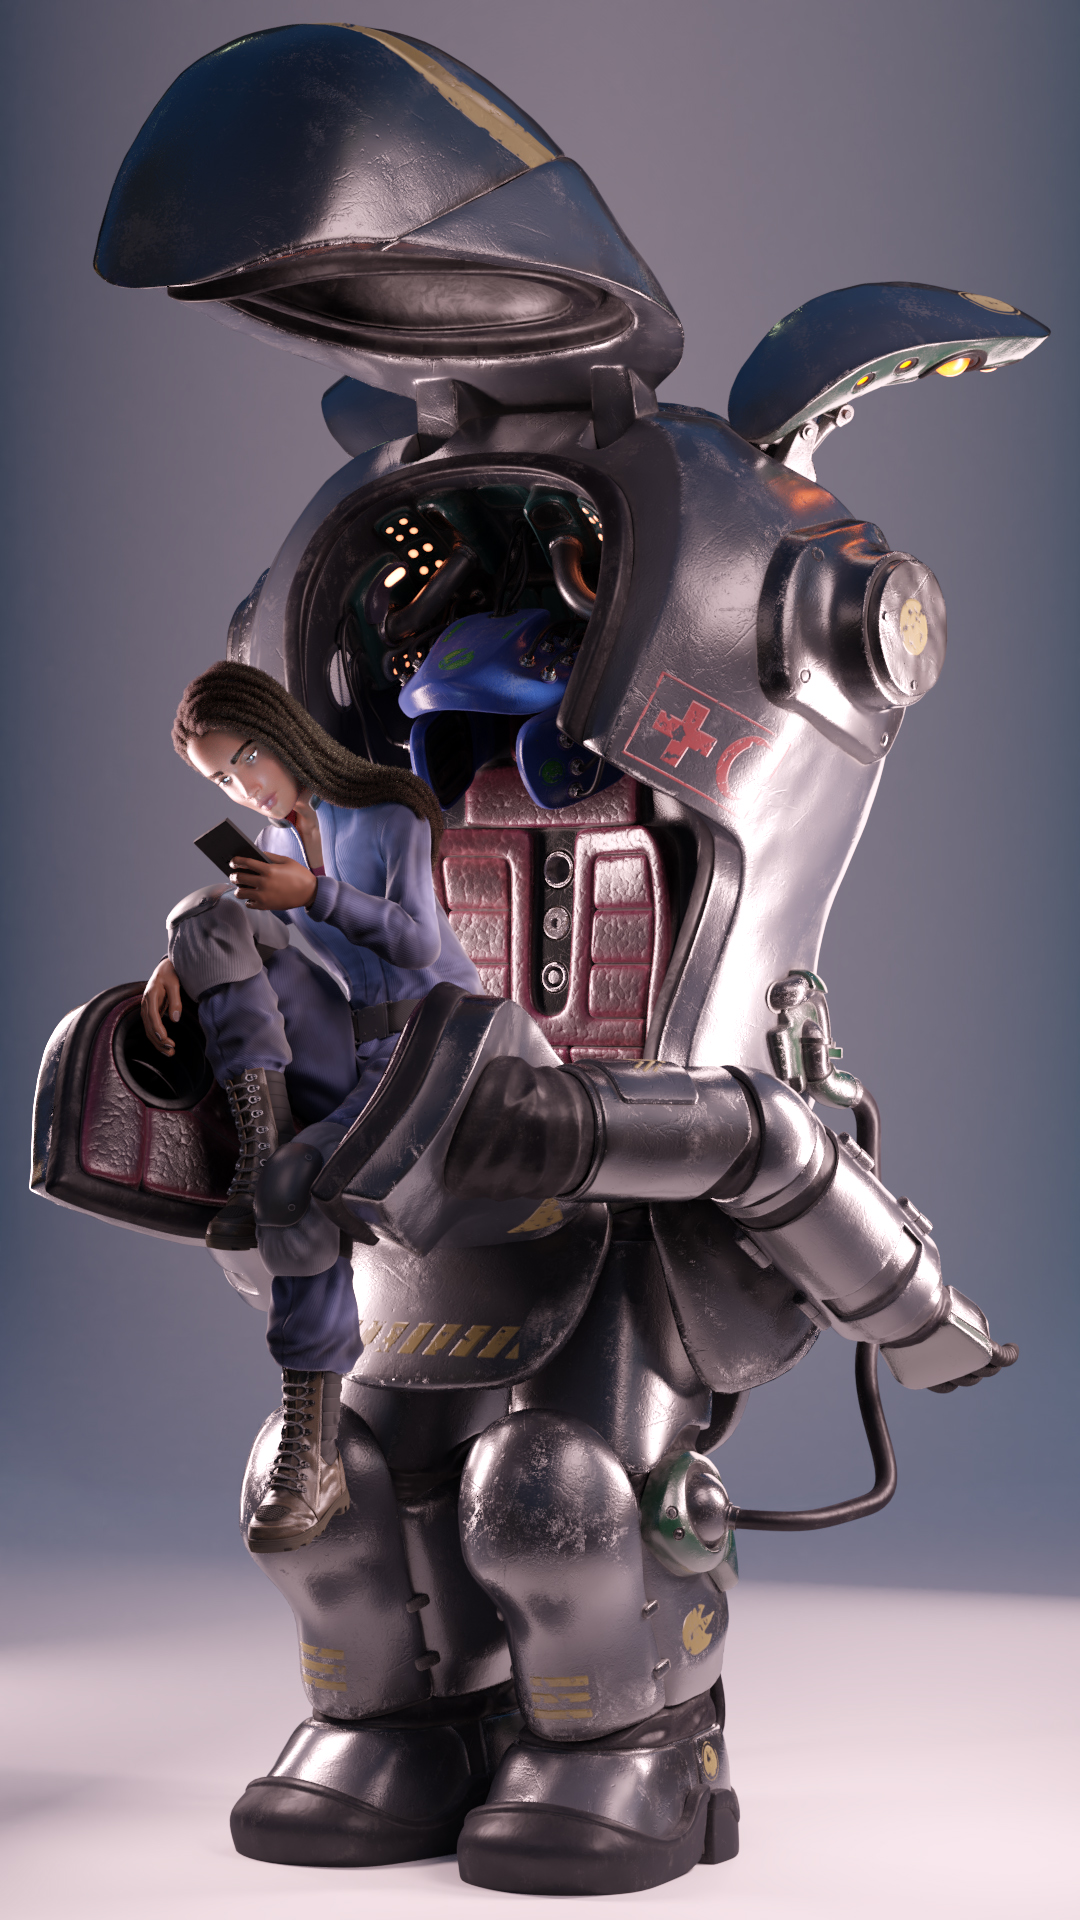
I selected this model specifically because it doesn’t have any weaponry. My intention was firm on not making anything with warlike features. This actually inspired me to depict it as a rescue model. Suit was the last model from my period of studying hard surfaces.

Once it was done, I committed myself to practicing organic models. With the sculpting and retopology techniques I learned with the Kent Trammell courses on hard surfaces, I gained more confidence to break the restrictions I had with organic models.
After developing some models following tutorials and courses, I decided to build a model all by myself. In order to do so, I thought it was a good idea to work on a character for the Suit.
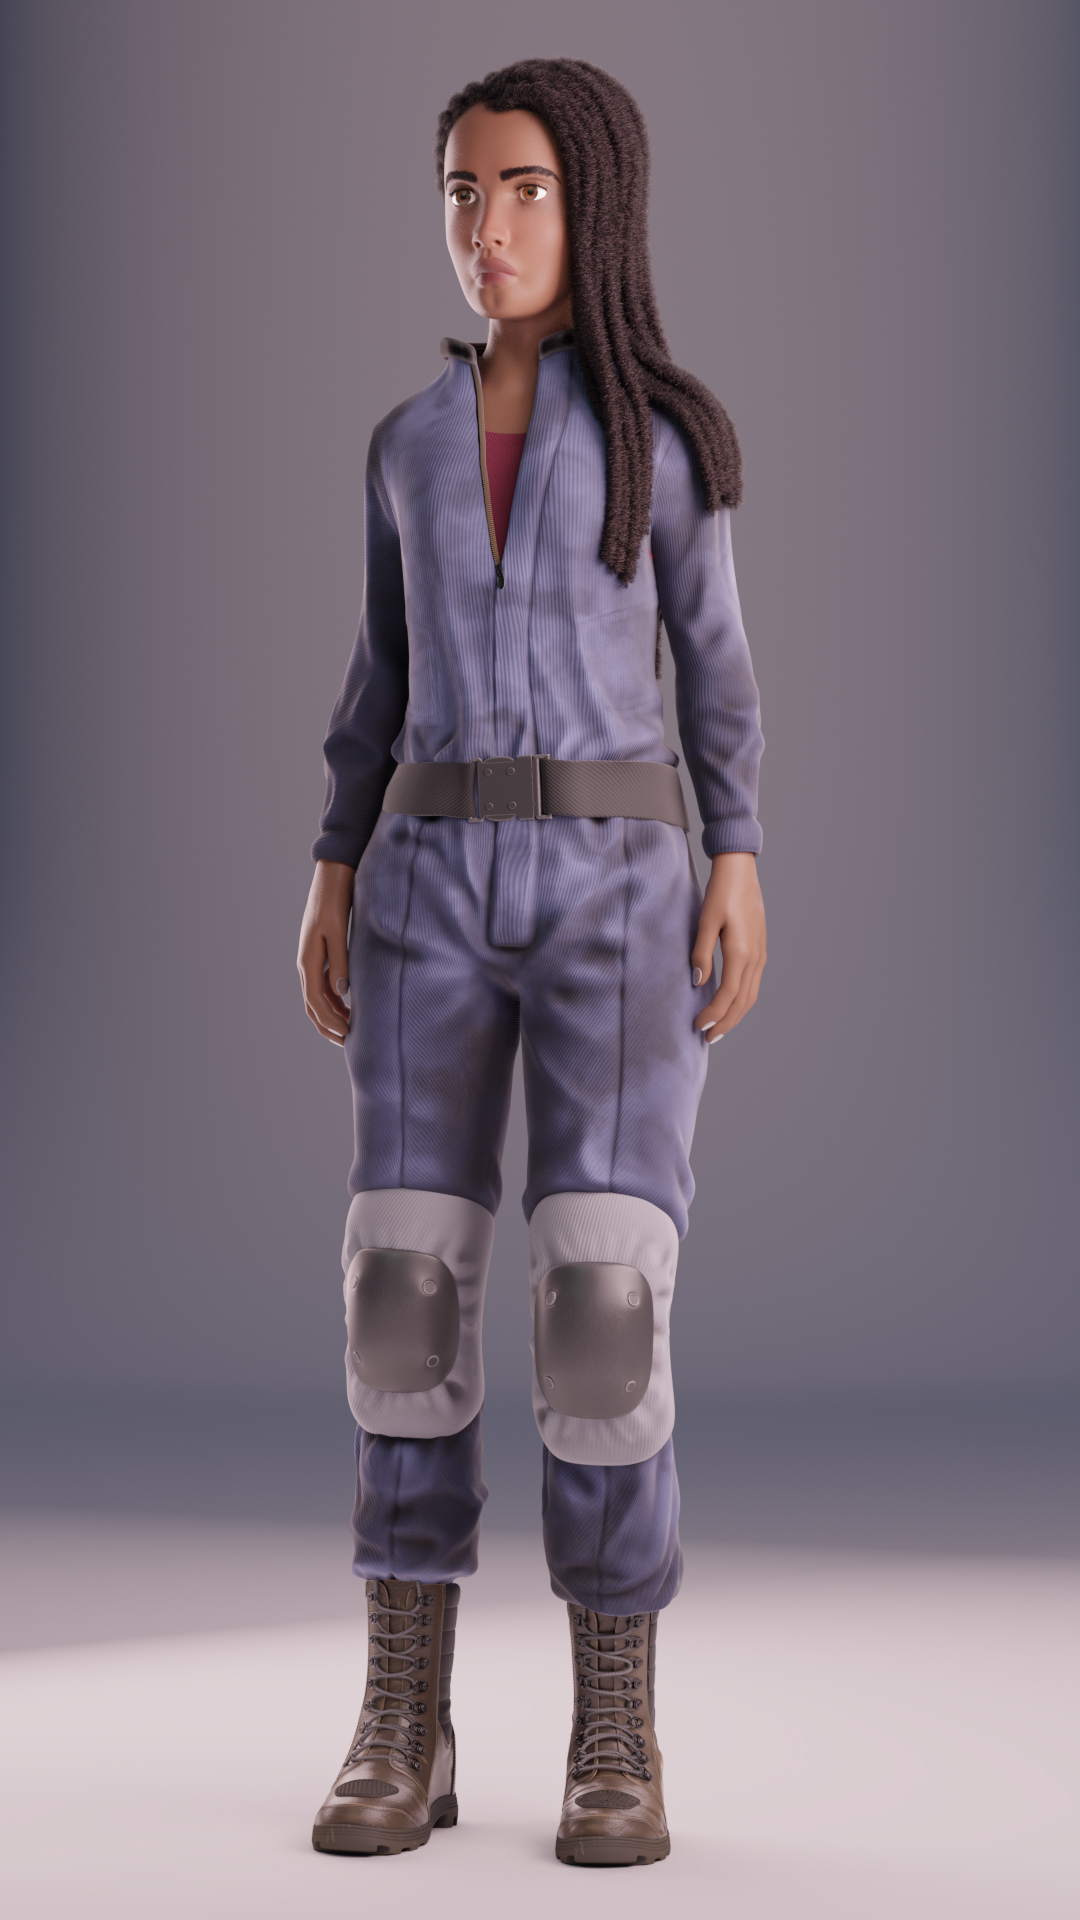
I wanted to stay away from the stereotypes often seen in characters: In my opinion, they tend to be muscular sturdy men or sexualized women and they are usually white. I know that these patterns have been changing recently, but still, there is a long way to go! Then, I searched for reference pictures and I found several images of women with dreadlocks, which I saw as an interesting feature to add to my character. At that point I had no idea how much extra work this would demand from me.
Sculpture and Modeling
In both models I employed a mix of techniques, including modeling, sculpting with multiresolution, and sculpting with dyntopo to do retopology.
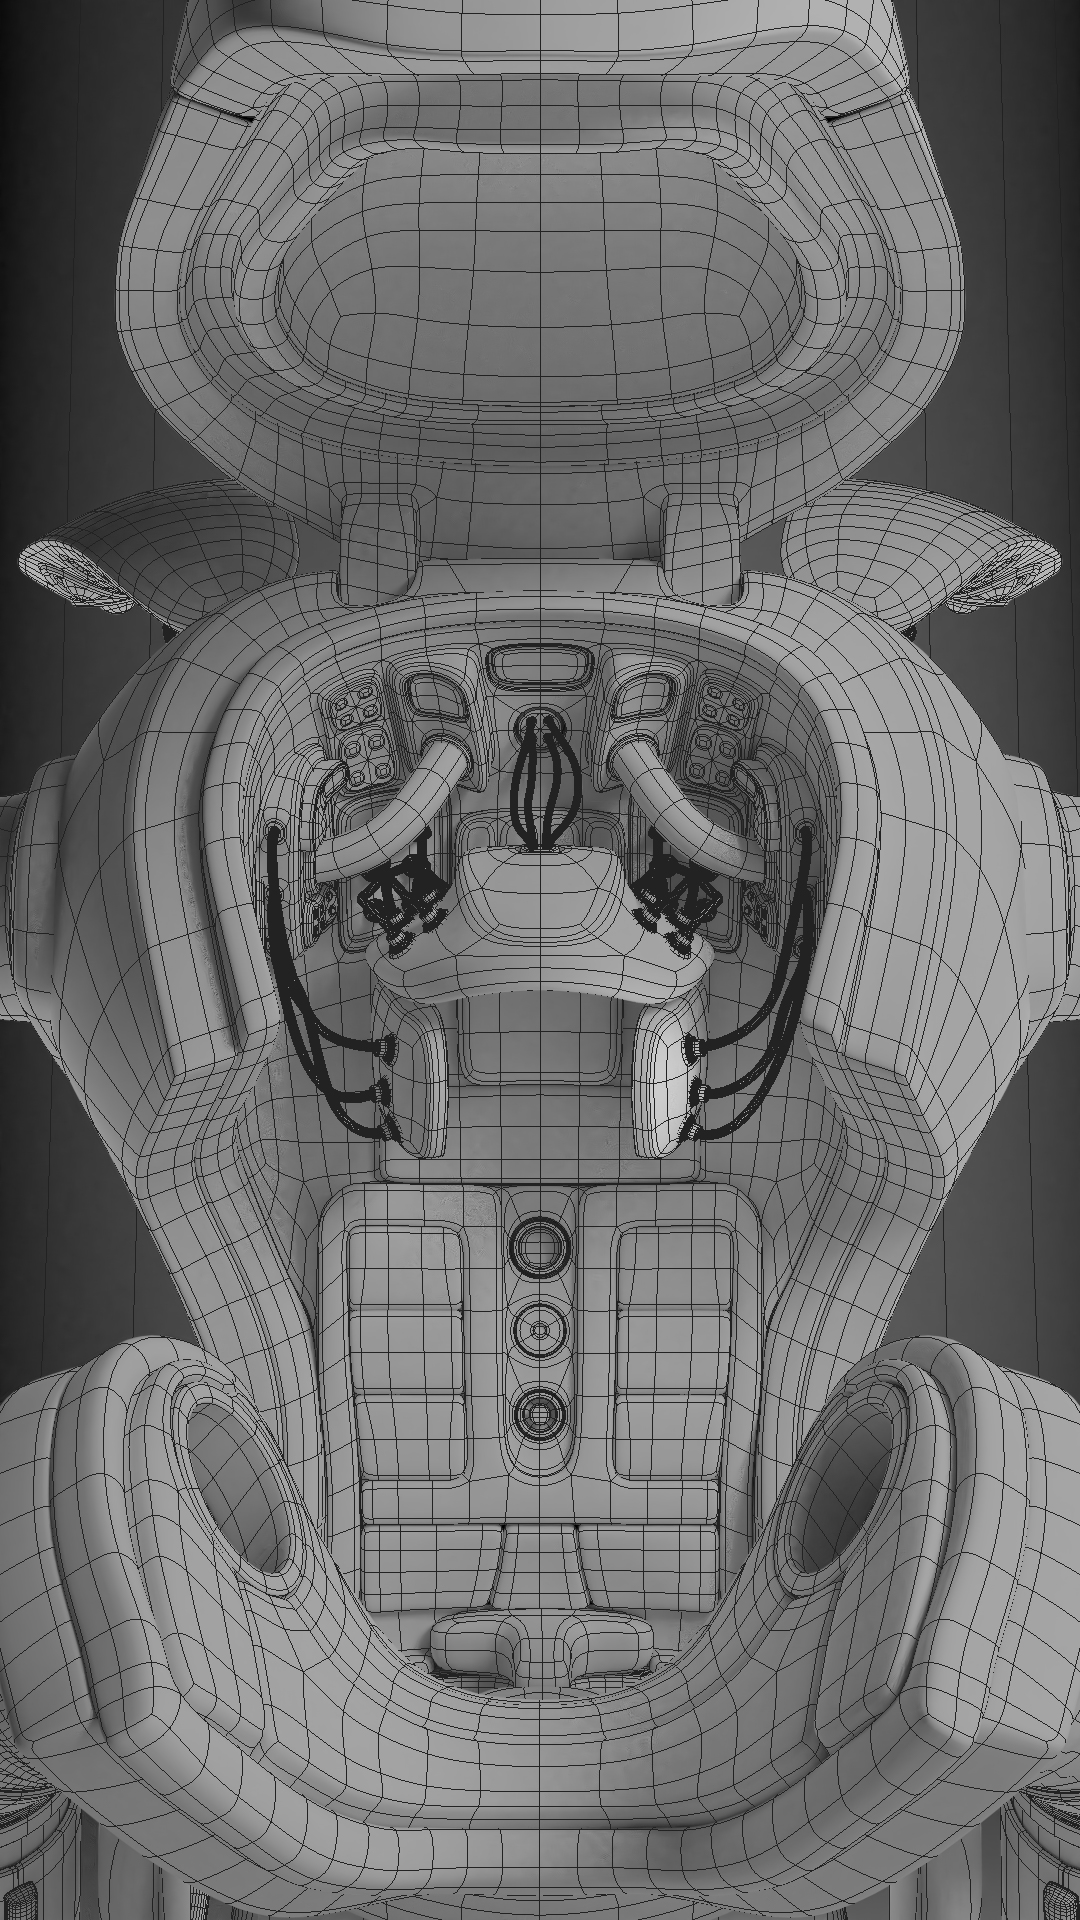
For the external part/body of the Suit, I used two Add-ons: Bool Tools and Sculpt Tool. They were really useful and efficient when sculpting with dyntopo to create, in a very fast way, new holes, cuts and meshes.
Since arms and legs are far less complex, I didn’t deem sculpting a necessary tool here. Therefore, I ended up only modeling from primitive objects, which lessened the need for retopology.
The internal part was also made through regular modeling, but without the use of primitives. I based it on the internal sides of the walls, extruding the edges and molding the vertices, until I had formed the internal walls in the shape I wanted. For the Suit, multiresolution was employed only on the rubber structures that connect the parts of the arms and legs, in order to create wrinkles and folds. For the tubes and wires, I made use of cylinders with modifier curves, which facilitated their manipulation and positioning.
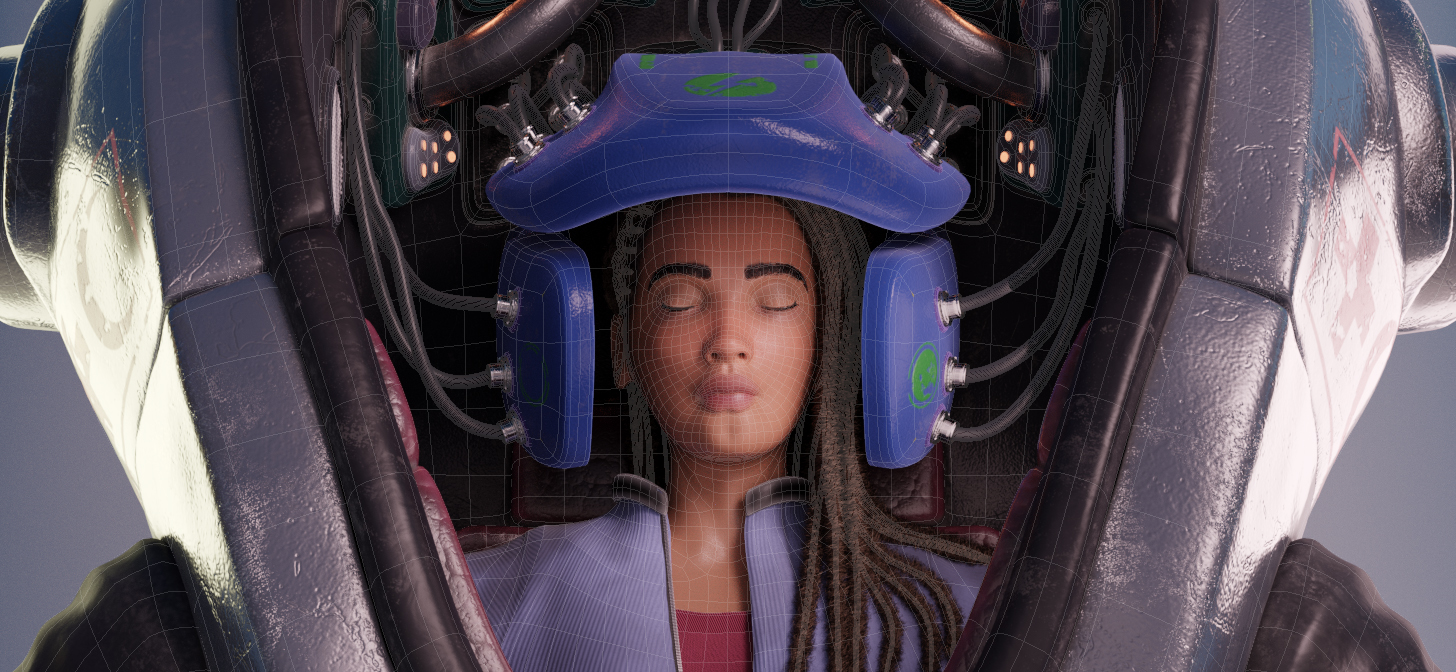
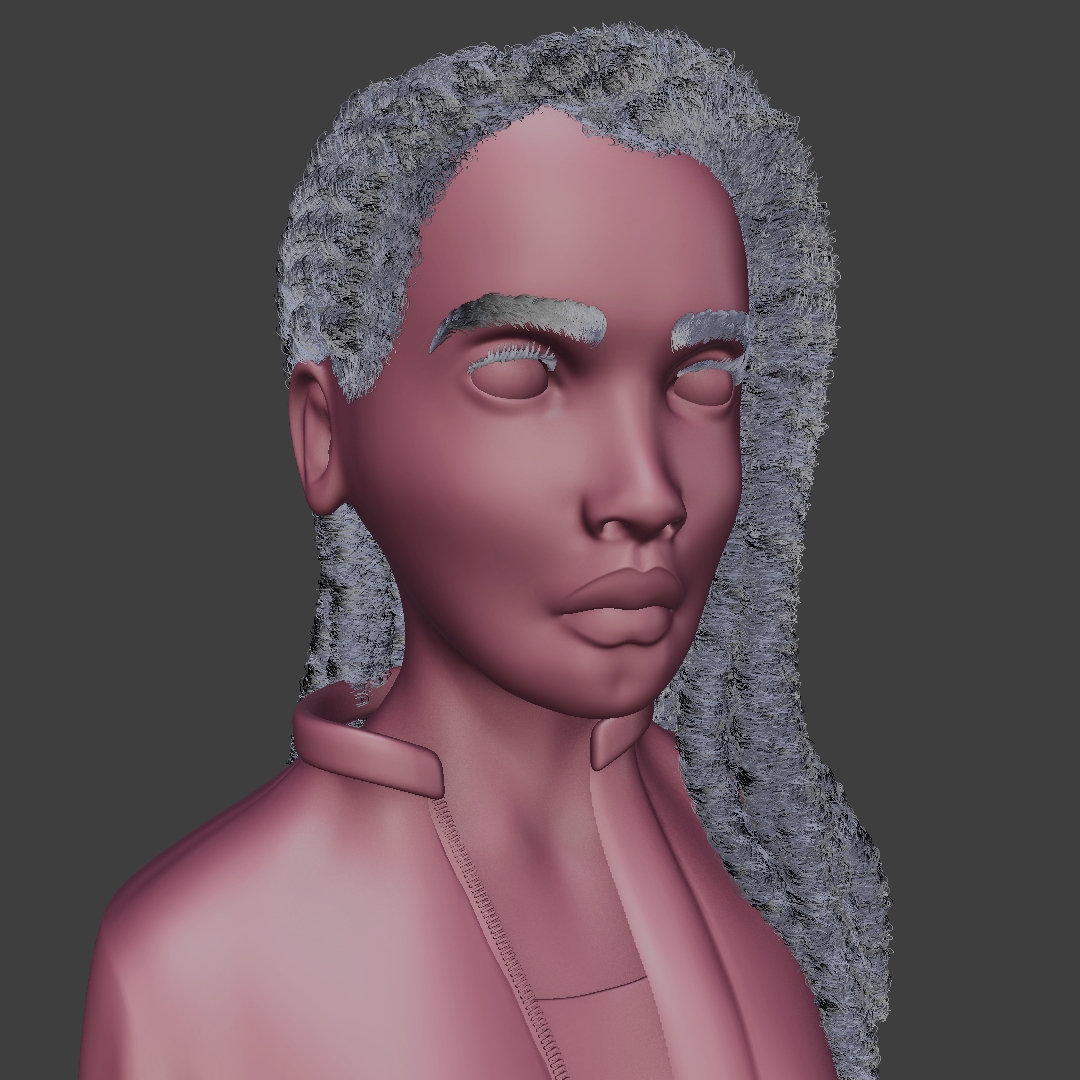
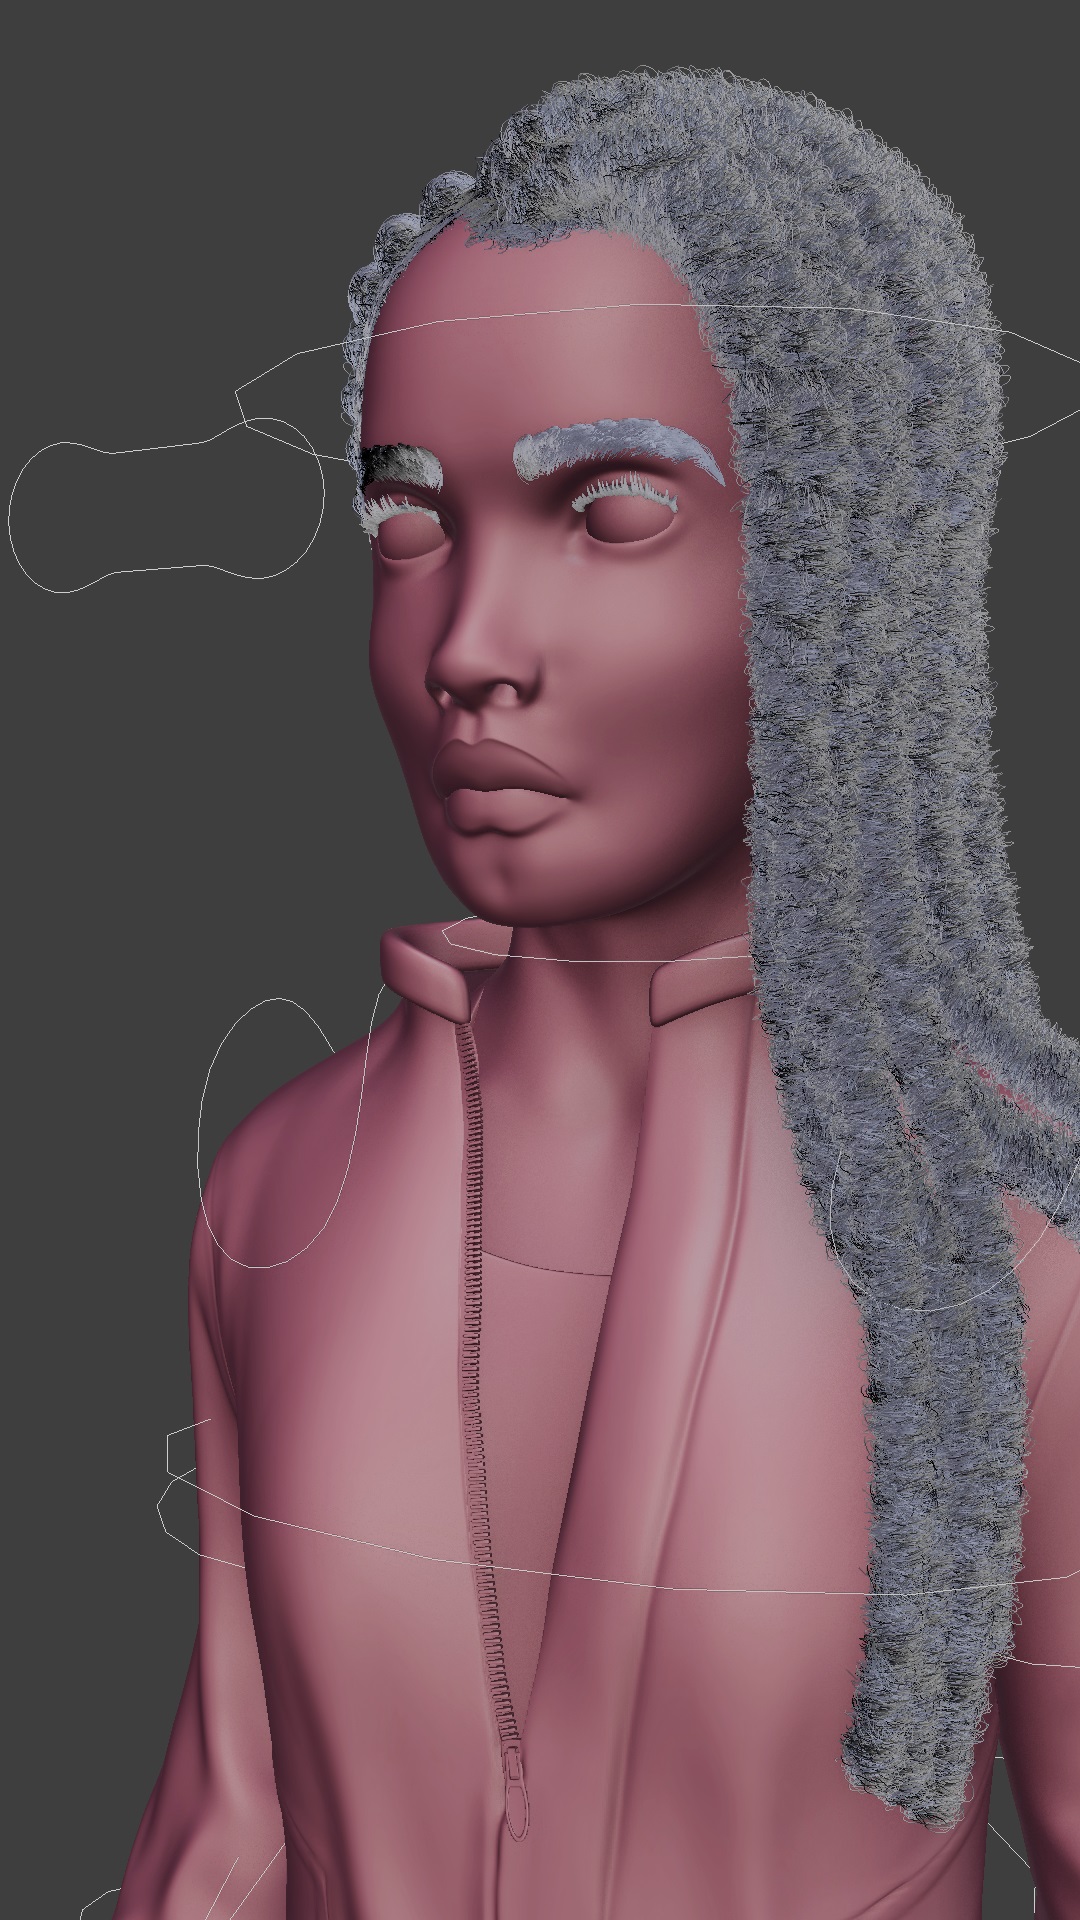
Keeping in mind my anatomical studies, I made the whole body of the Character by sculpting with dyntopo. I decided to do it despite knowing that only the head and the hands would be exposed in the final version, so much that I took out the whole mesh covered by the overalls for rendering the final model.
For the garb, I made a simple mesh for fabric and I used a multiresolution modifier to sculpt folds and wrinkles in clothes, boots, and knee-pads. On shoelaces, zippers, and dreadlocks I also utilized the curves modifier in the same way I did with the cables from the Suit. The dreadlocks were a remarkable challenge. I had to go through several experiments before I got to the final result.


Texture maps and materials
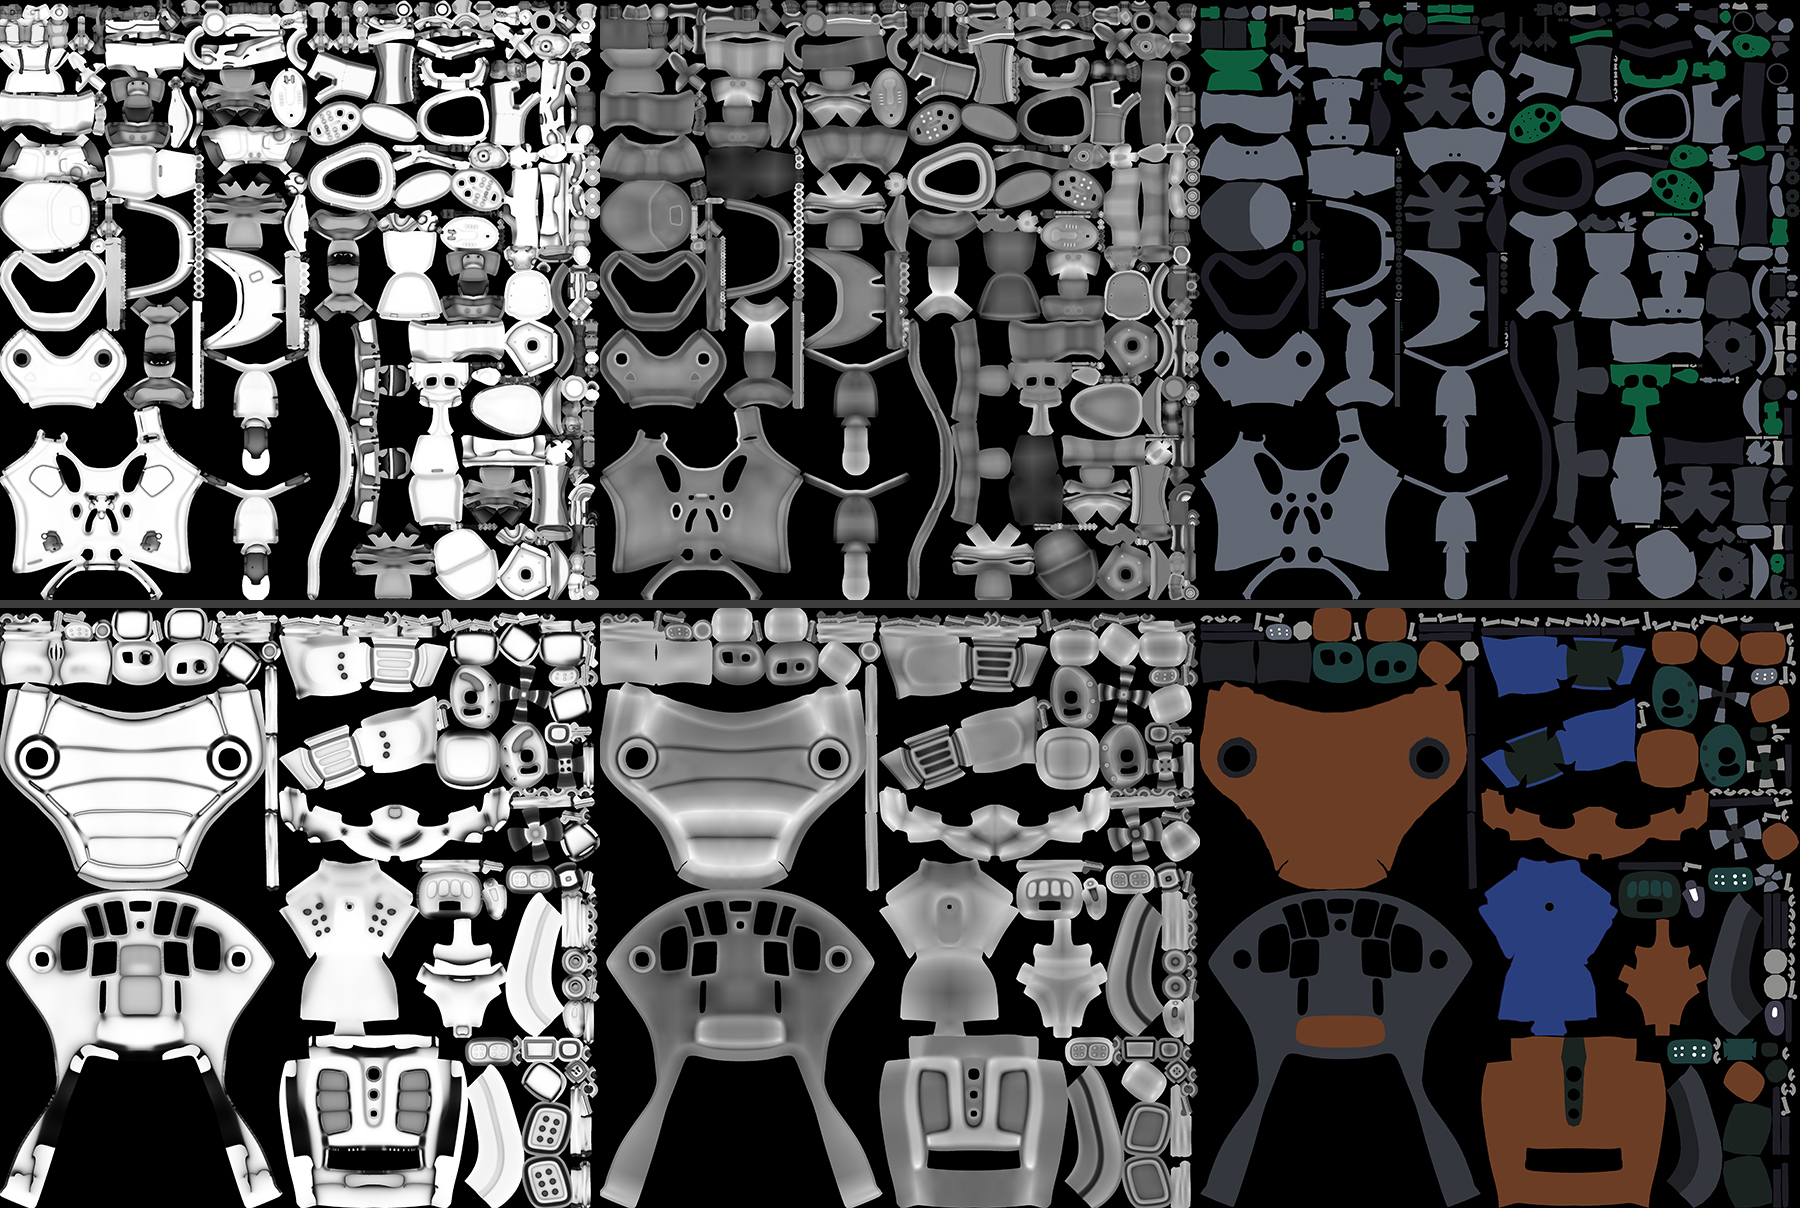
Due to the number of objects related to the Suit, their materials were partially rooted on texture maps and tiles images, partially on procedural textures. I applied the Add-on Texture Atlas to avoid too many texture map images. In general, the Texture Atlas duplicates the objects, brings them all together, creates a UV which is then applied on the original objects. It ends up maintaining the objects apart but with a single UV space. To avoid creating images that were too large for the texture maps, I used the Texture Atlas twice, one for the external and the other for the internal part of the model. I made all maps on Blender through Texture Paint and bakes. When necessary, I used Krita to make some adjustments. I created the symbols for the decals on InkScape and I applied them on the model with the brush employing texture mask on the mapping stencil.
I made all the texture maps of the Character’s face based on Rico Cilliers’ series of tutorials “How to create a stylized 3D character”. It was one of the hardest sections of my work with the models. It was where I had to spend more time to get a satisfactory result, and I realize that I need to study a lot to get a result like Rico Cilliers’, lol.
Due to the fact that I am not very familiar with creation of materials, I researched lots of tutorials that could provide me at least a starting point to the largest possible amount of materials. For the metal of the Suit, the leather of the internal part, and the fabrics of the Character, I relied on the courses by CGCookie. The remaining materials were worked through Youtube tutorials like, for example, the face of the Character which was based on Rico Cilliers. At this stage, in order to enhance the visibility of the materials, I made a pre-light with some area lamps and I set an HDRI as Environment Texture, which I came to use later as a foundation to light the final scene.
Rig, Lighting and Positioning
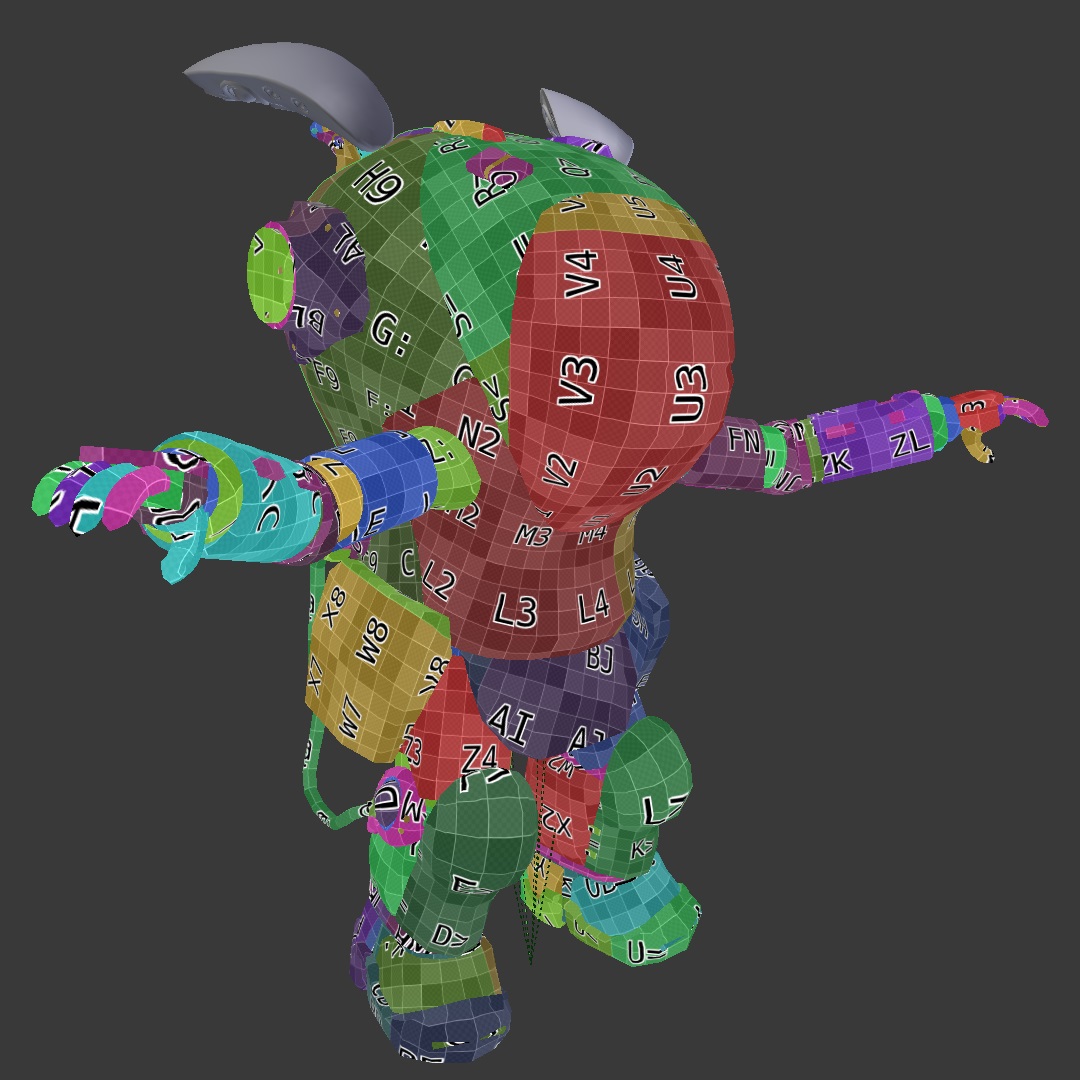
When I decided to make the Character, my intention was to produce only one image of her. This original image is the one in which she is seated and playing with her cell phone. Even when I was still planning only this unique image, I decided to model her in A pose in order to apply the rig techniques I had learned on my studies. I made the complete bones rig of the body without any addon. I also used some shape keys on the face to be able to close the eyes and to add some expressiveness. In the end, when I got to the moment of positioning it, I had to make some adjustments in the meshes because my topology and the Weight Paint were not very good.
I didn’t make a bones rig on the suit. I only parented the pieces in a sequence in which moving them would make some sense. Each door is parented in a null object and they open when rotated on the X axis. These are, basically, the movements the Suit can perform.
After I finished the rig, I thought it would be really cool to position the Character. For fun, I made two more poses with her, which were the one with her alone and the one with her inside the Suit. After having the positions settled and taking into consideration the pre-light of the materials phase, I added some more light to the scene by a system of trial-and-error. I tried several different positions of light and rendered it on low quality until getting to a result that pleased me.


These models are the utmost level I was able to reach on my studies in 3D. It makes me really happy when Bart features me on Blender Artists. I still have a long way to go on improving my techniques and I intend to keep creating lots of models to perfect my skills.
![]()
About the Author
 Luis Augusto, Bachelor in Audiovisual, 3D student and Blender enthusiast.


