
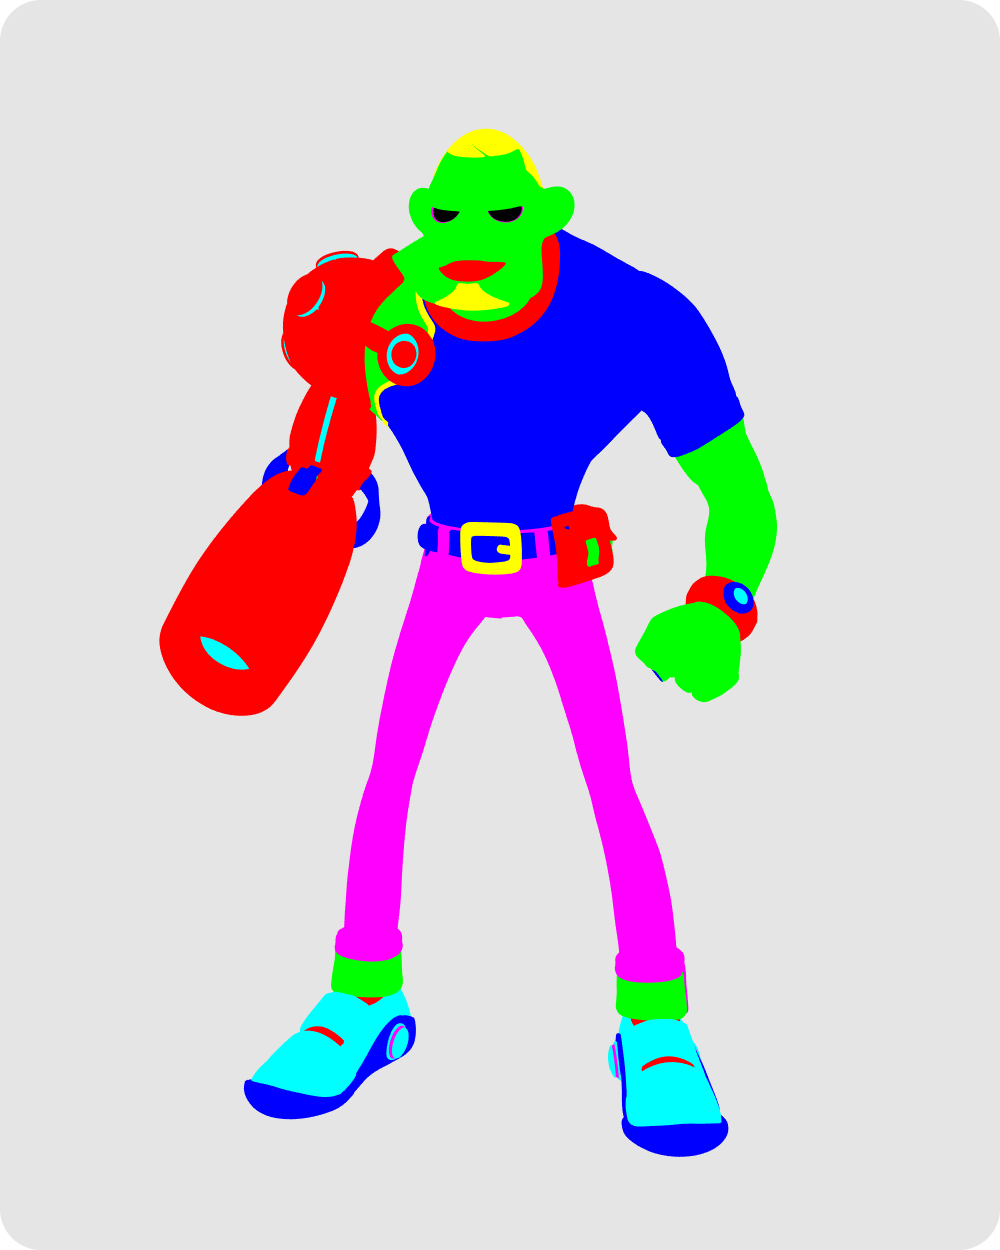
Making Of Dave

Lucas Falcão shares details of the creation of his recent character Dave.
Introduction
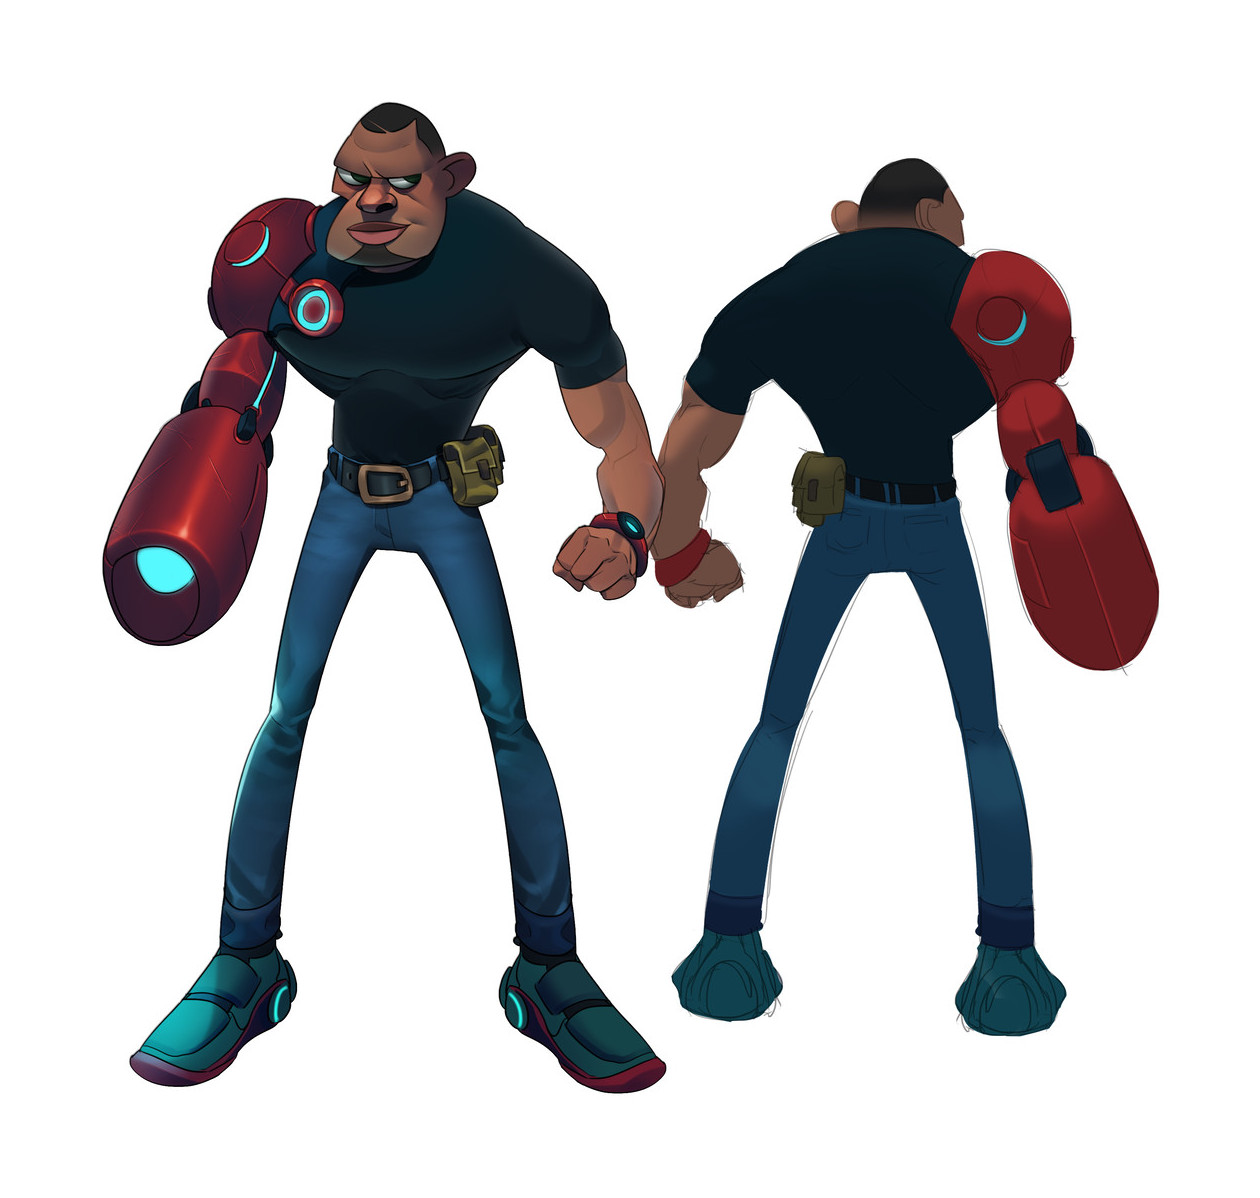
This character was done in collaboration with Alfred Achiampong, he is a great character designer from Accra, Ghana. He Artstation is always popping up some new cool characters.
For this project, I did the blocking, sculpting, modeling, retopology, UVs and ID masks using Blender 2.79b. After that I’ve copy paste my scene to Blender 2.8 and there I did the materials, lighting, hair, render and compositing.
Blocking
This is the very first step where I like to work on the big shapes and silhouette using poly spheres or other primitive meshes. And then I do boolean operations on the parts that I want to sculpt and start detailing it. I’ve blocking him direct on the pose, so this way I could jump the rigging step and finish the project more faster.
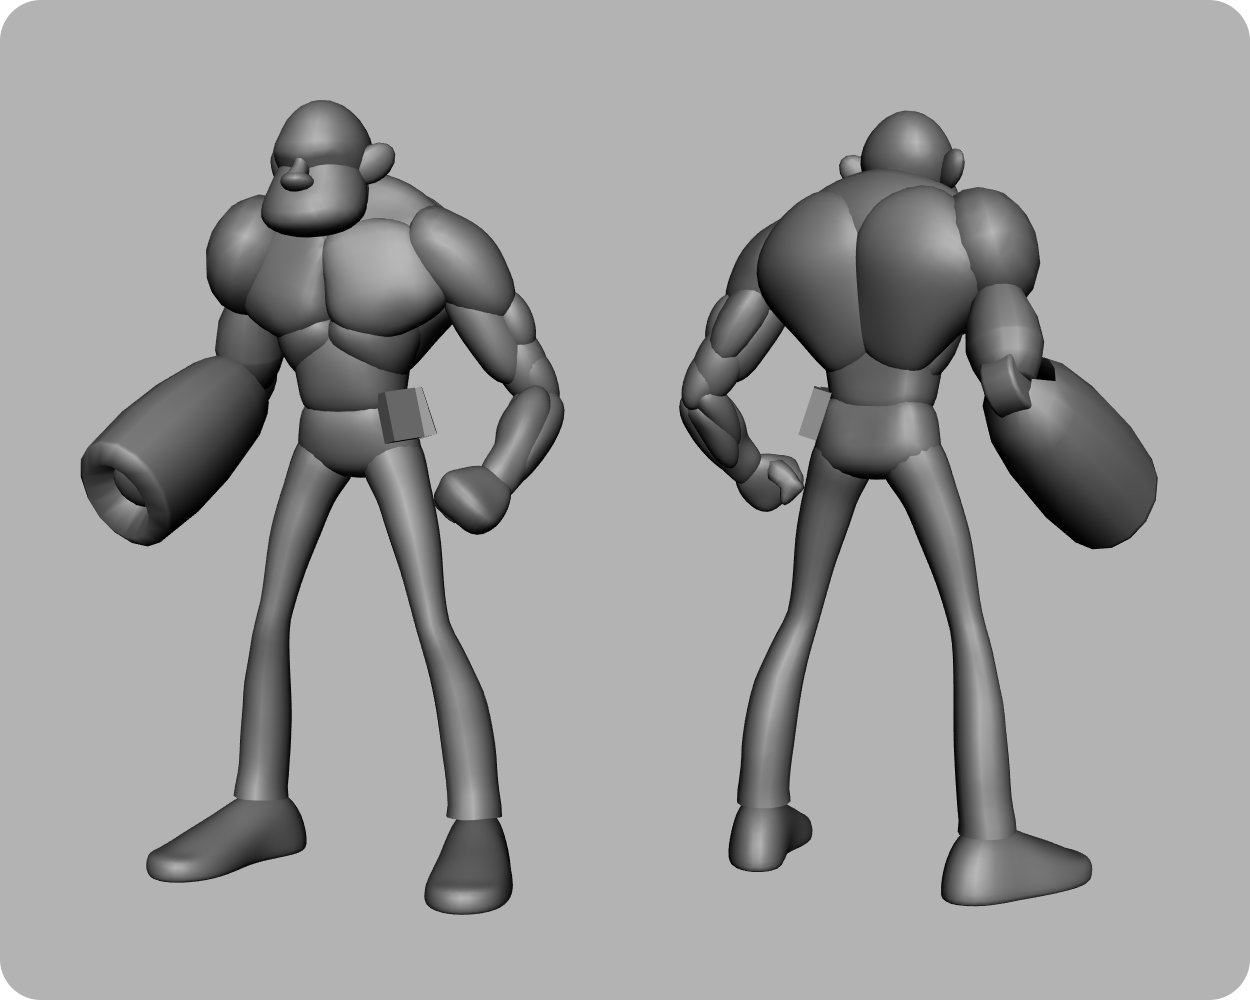
Modeling and Sculpting
Some parts of the character I did with poly modeling, like the mechanical arm, shoes, belt and the little bags. The rest was sculpted using Dyntopo and the default brushes in Blender, nothing fancy.
As you can see I changed the design of the shoulder on the mechanical arm, Alfred was pretty nice in let me do that. One trick that I used to modeling this part was using the Solidify modifier with “Only Rim” checked, this make easier to place the cuts on the metal, you just select a loop and hit “V”.
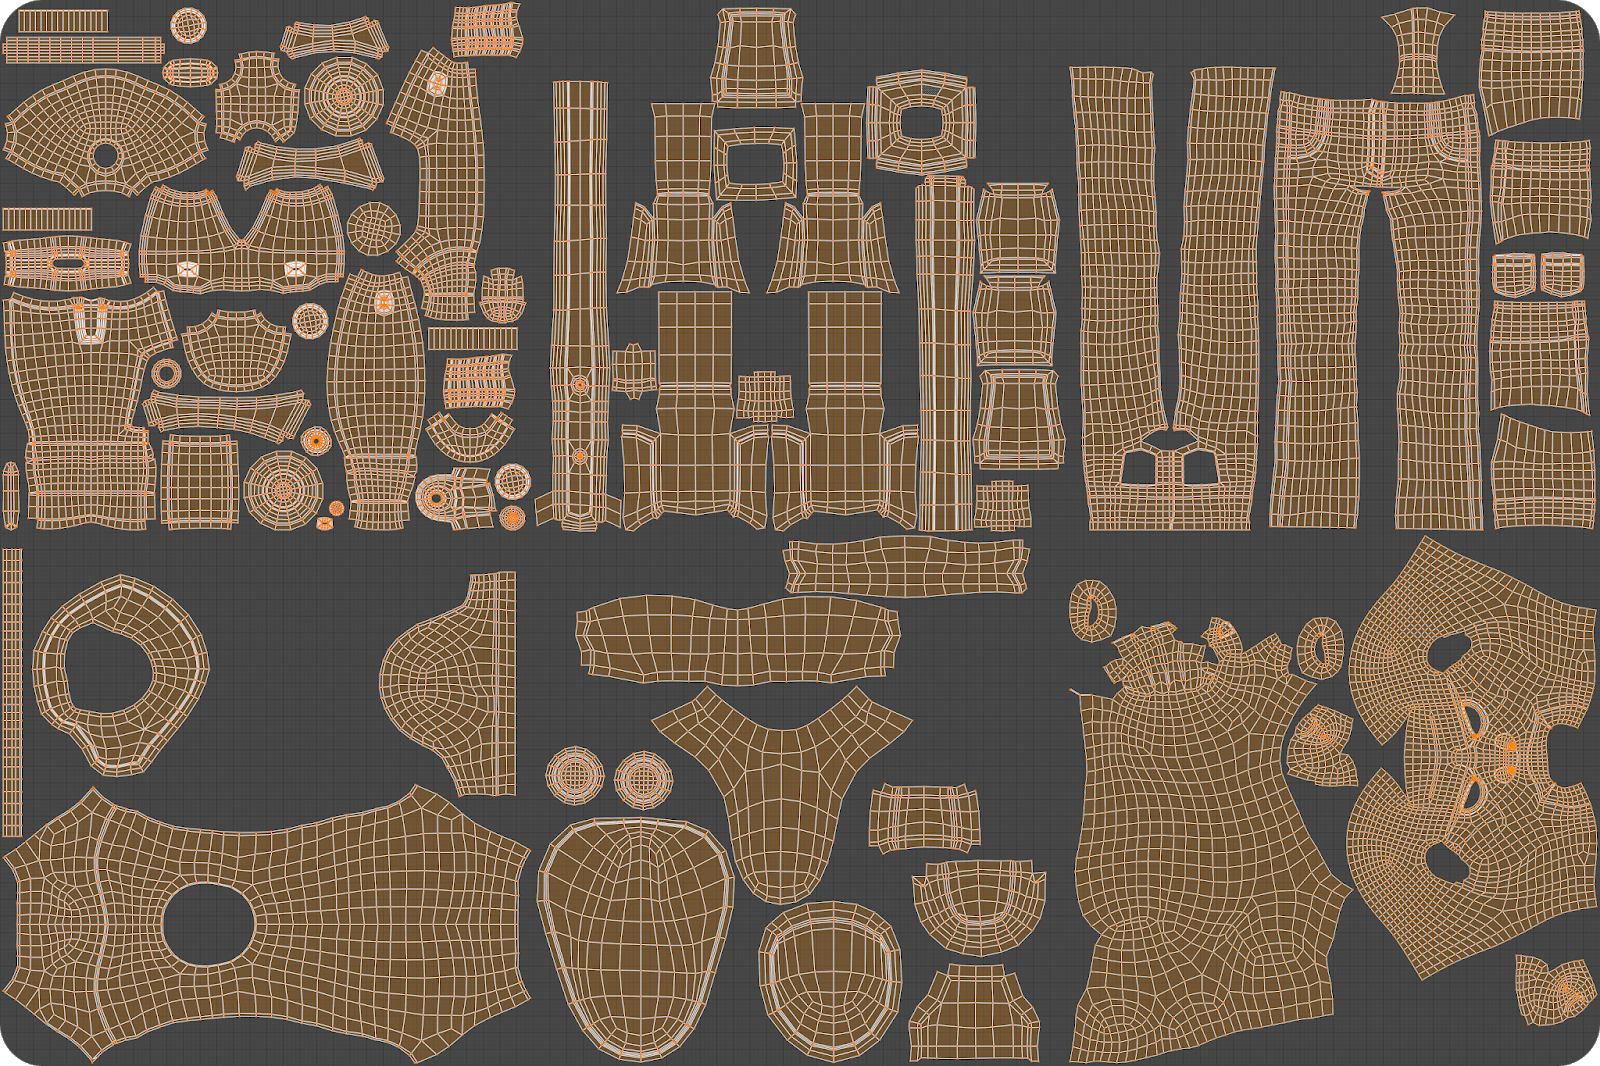
Retopology
For this step I used mainly Retopoflow, I’ve recorded some timelapse to share my process on this task. Overall I focus on place the important loops and then I go closing the gaps on the mesh.
https://youtu.be/BR7To5dXGyw
https://youtu.be/7hcR4cBtthY
https://youtu.be/M3iIyCiJi4g
https://youtu.be/08-Xn6L2QvU
UV’s
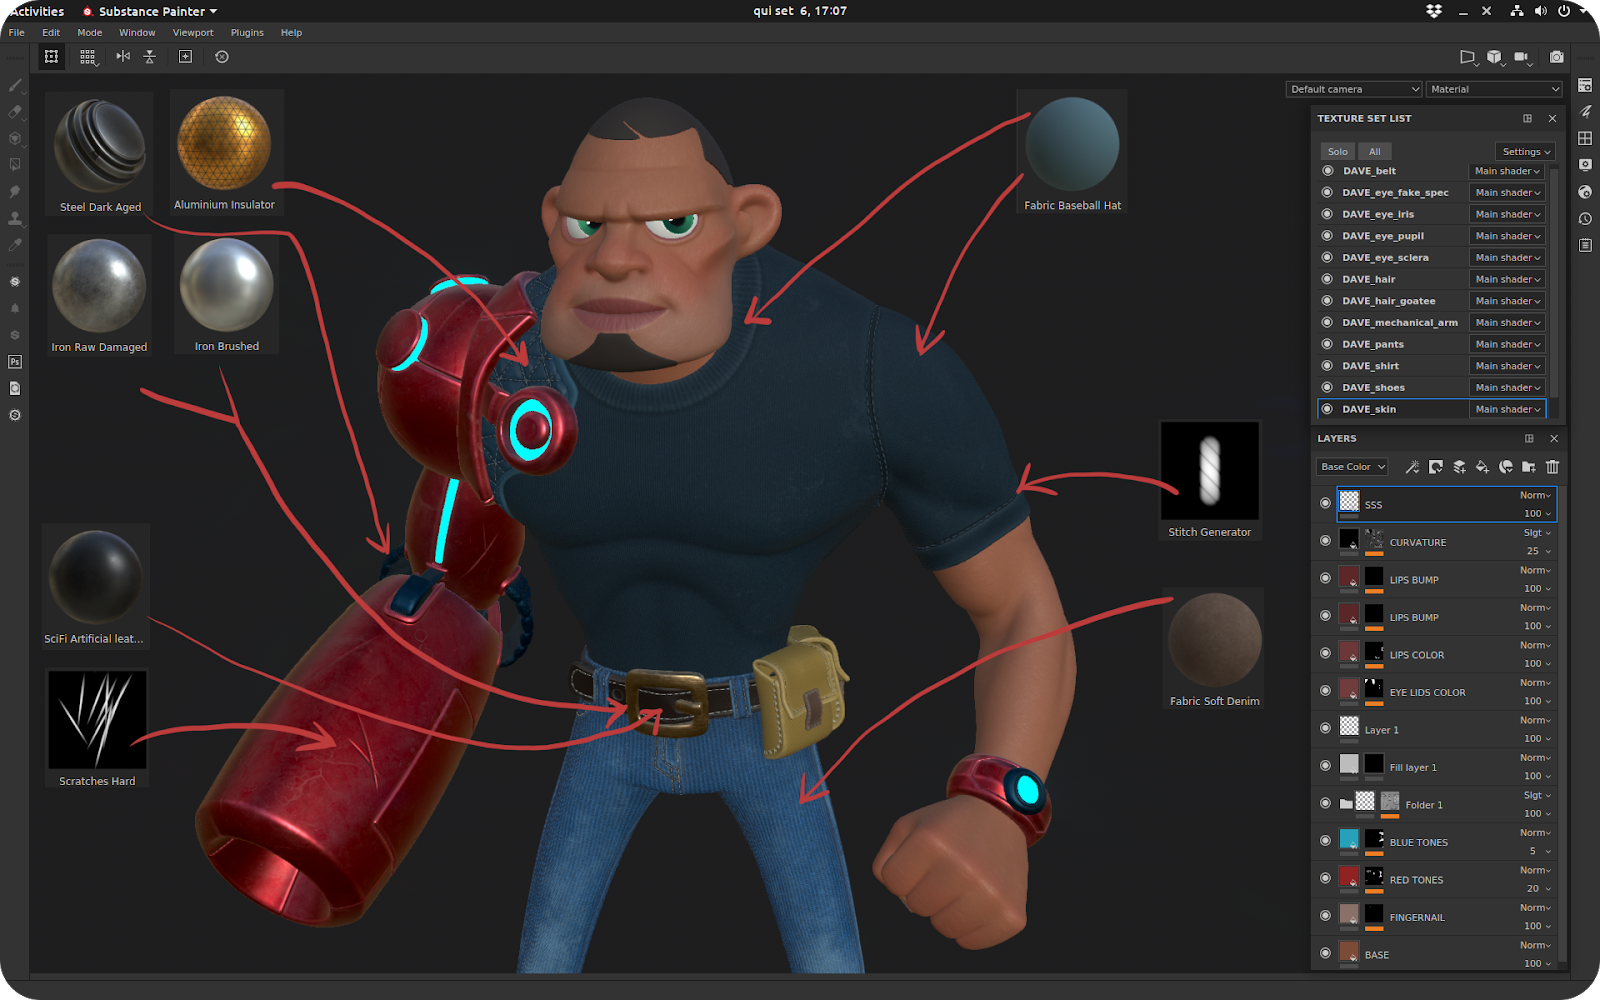
I’ve separated the model in six UV sets, which I textured in Substance Painter and some other parts I used procedural texturing inside Blender.
- Belt and little bags
- Mechanical arm and watch
- Pants
- Shirt
- Shoes
- Skin
ID’s
I like to create ID masks in Blender using Vertex Colors because it’s so easy to setup. You just have to select the faces you want to paint, go the the Vertex Paint mode, active the face selection mask in the header and hit Shift+K. You can also hit L to select elements in the Vertex Paint mode without need to back to Edit mode. Make sure to use full RGB colors or the combination of two RGB colors.
Then in Substance Painter on the Baking window, go to the ID tab and on the color source change it to Vertex Color.
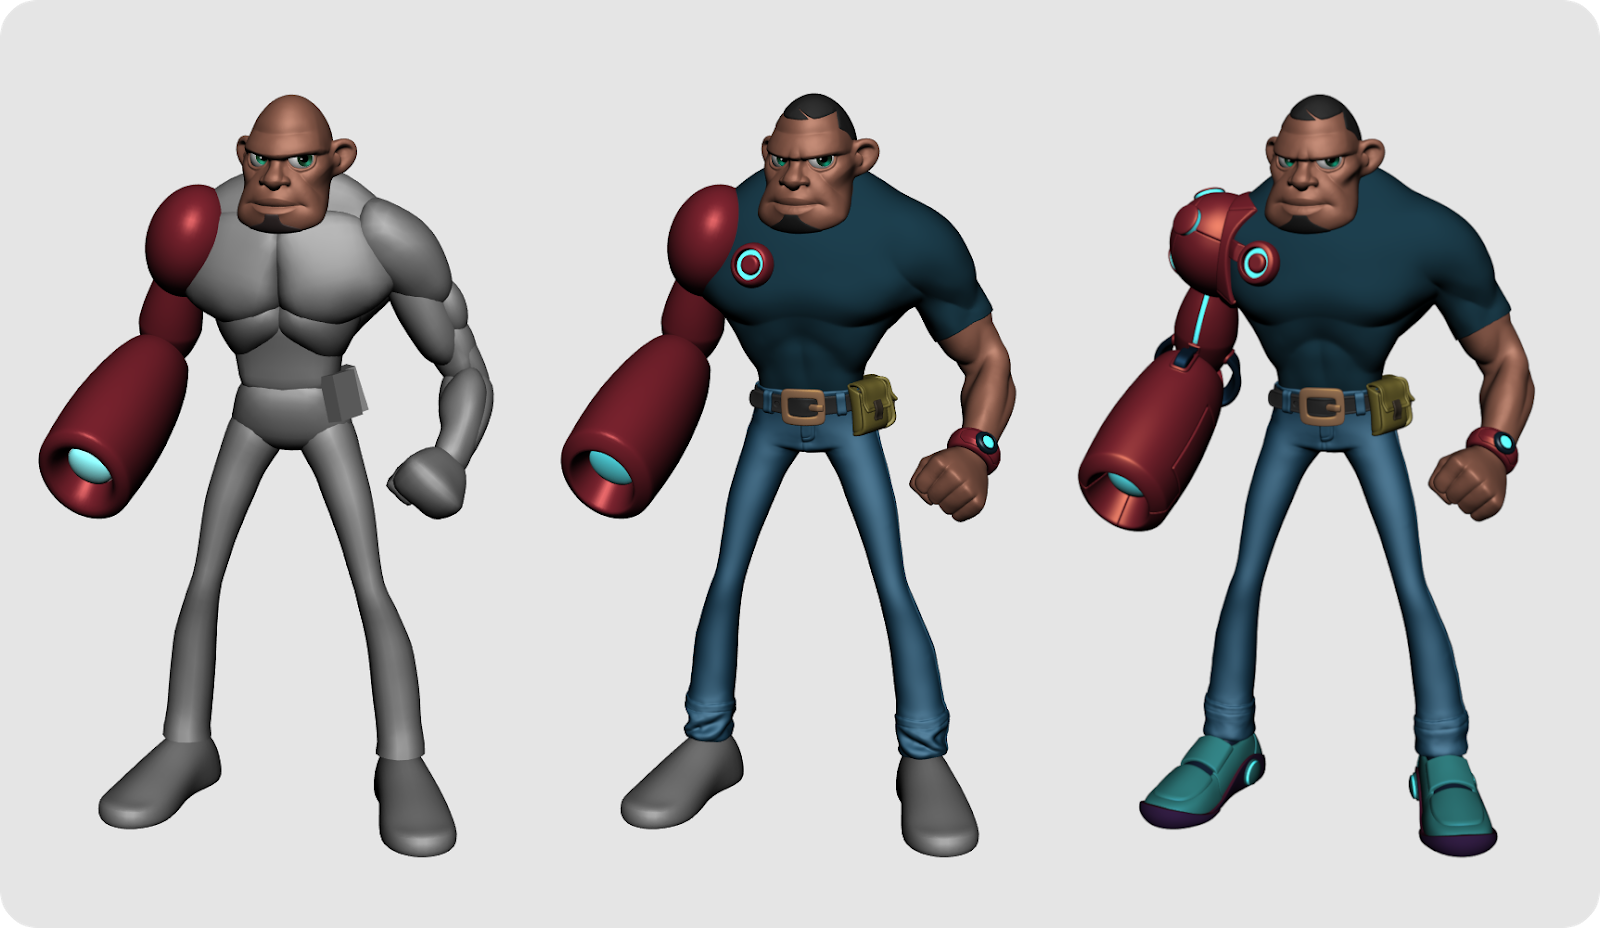
Texturing
The texturing was done using Substance Painter, with the default tools available and some hand painted textures, specially on the skin. One trick that I used for the stitches, was to duplicate the layer, give it a little bit of blur and a small amount of bump to inside. This way you can have a little bit of “shadow” that will make your stitch pop out more. I also used the curvature map a lot, to break the looking that something was never used.

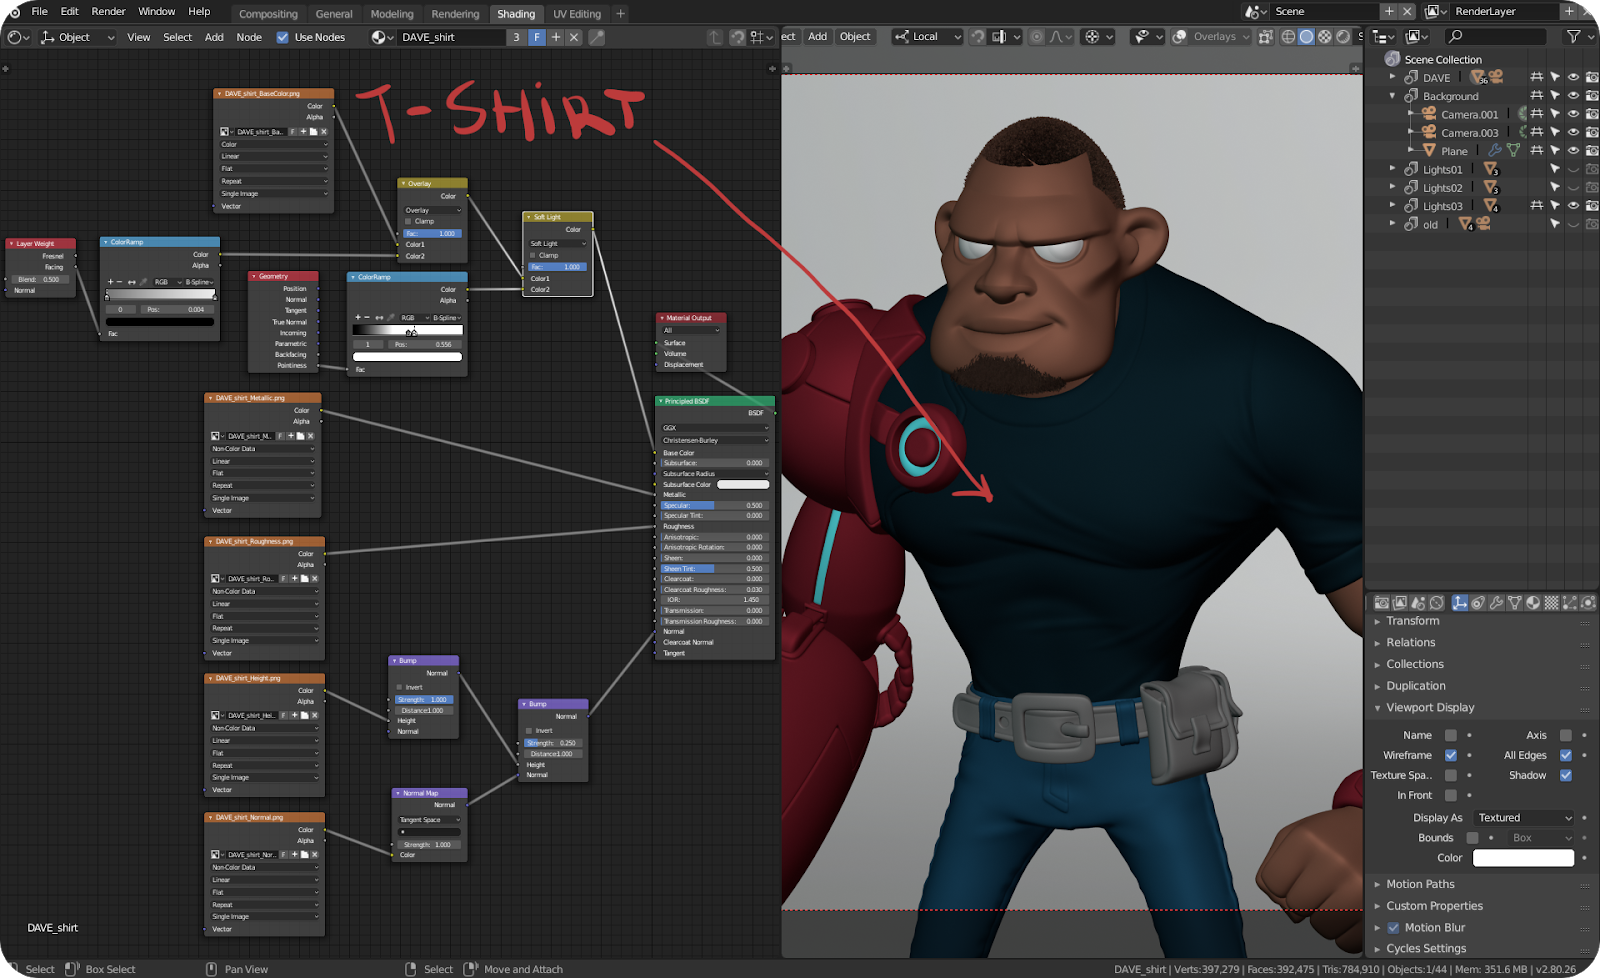
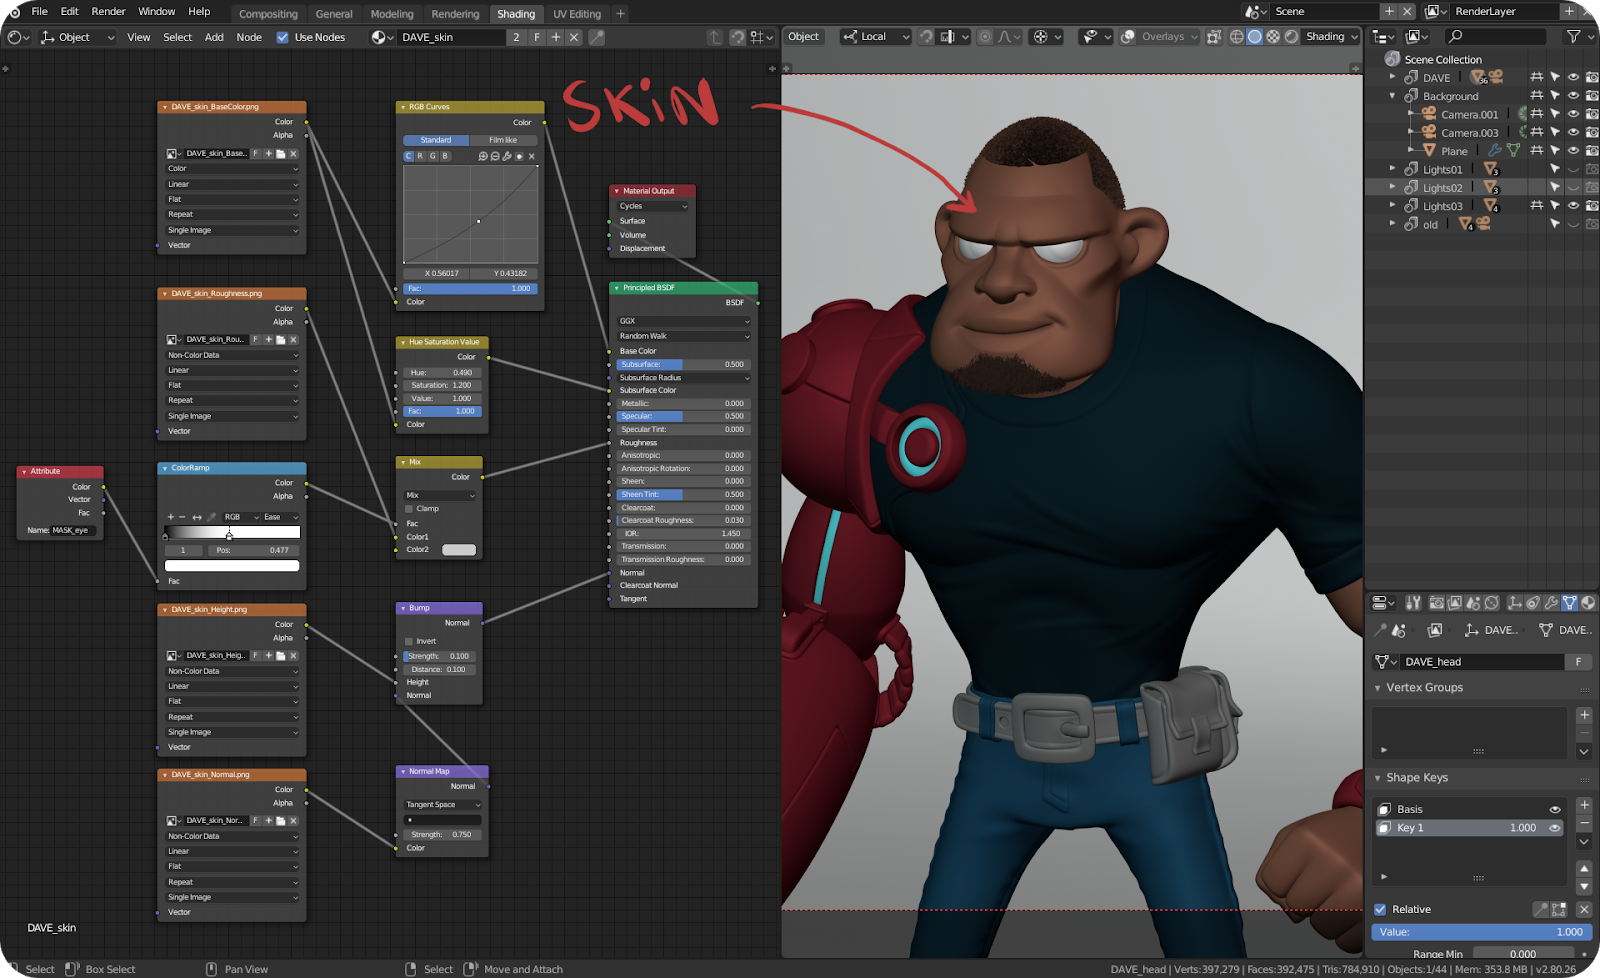
Materials
So in this part of the process I start using Blender 2.8 Alpha 2, I selected all parts of Dave in Blender 2.79b, then Ctrl+C and in 2.8 Ctrl+V. I think you need to enable the Add-on Copy Attributes Menu for be able to do this operation, but it ships with Blender you don’t need to download anything.
For the materials I used for almost everything the Principled BSDF, then the Principled Hair BSDF and Emission shader for the parts with lighting. For the skin I used the new Random Walk method for the Subsurface Scattering , which is amazing!
I like use Layer Weight with ColorRamp and blend it with the color texture, this helps to emphasize the shapes of the modeling. Also I use a lot the Pointiness to give that used effect on some parts.
Lighting
The lighting was done mostly using the classic three point lighting, with the key light positioned more above his head. I used plane meshes with Emission shader and I like to extrude a vertex in the center of the mesh to point the direction of the light. Also I used another light with a sphere shape to get more specular highlights on the eye. The world is just a Background node with pure black, but I created a infinite white background to bounce the lights.

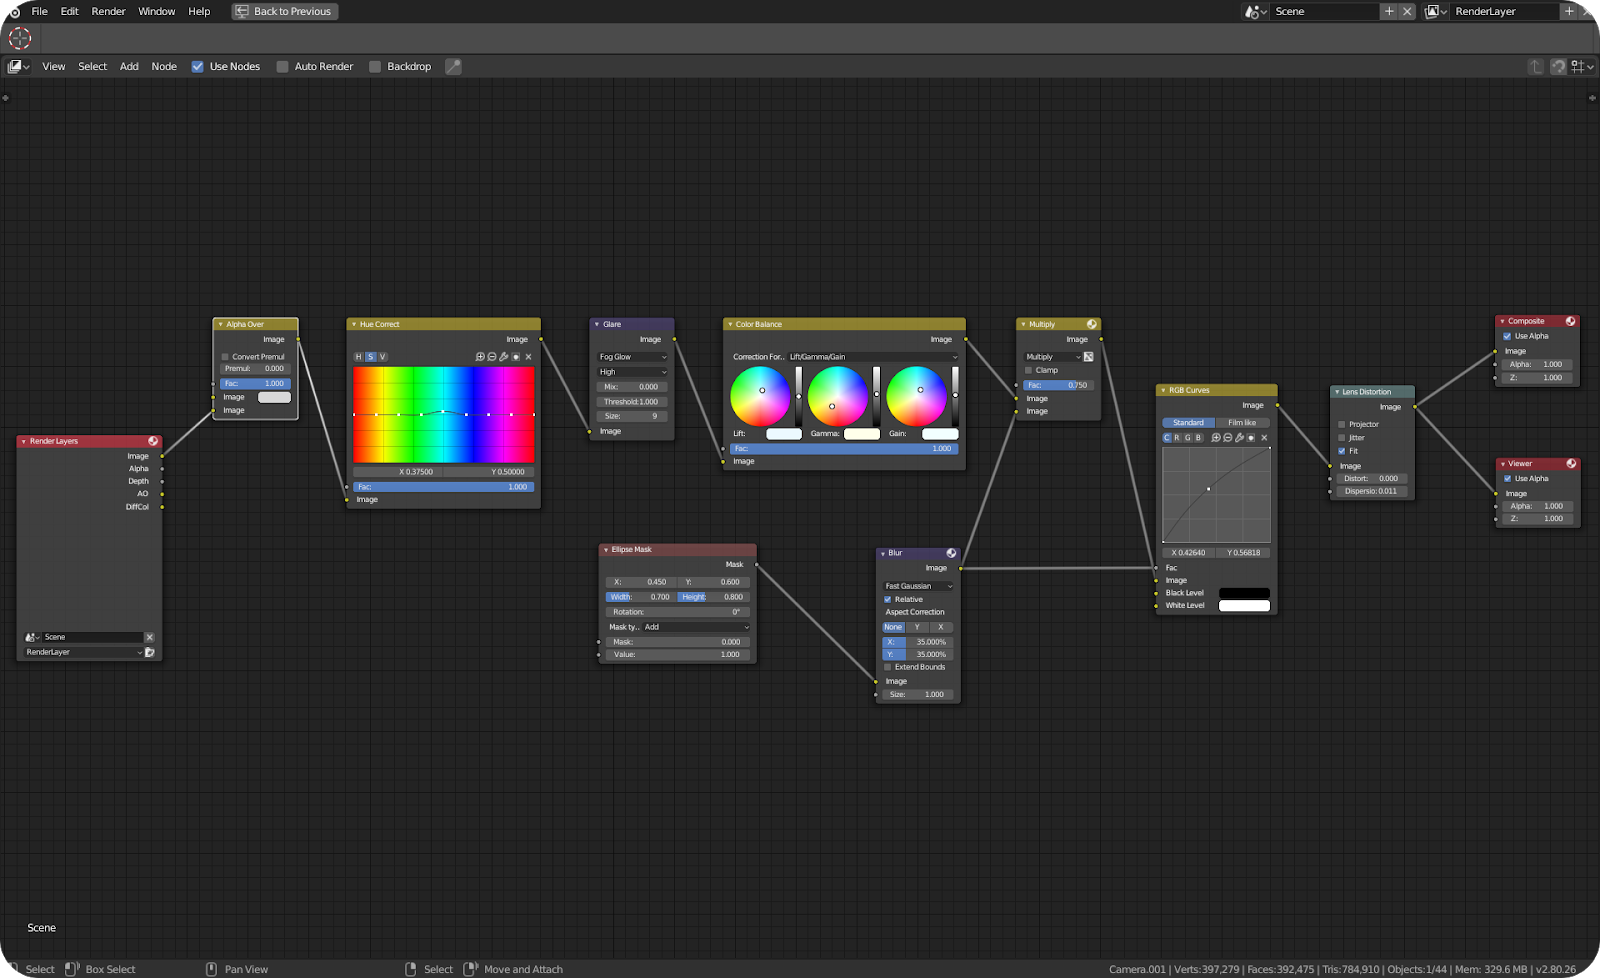
Compositing
The compositing was pretty simple, the background mesh was set to be the Shadow Catcher and then I used an Alpha Over to choose the background color. After that I used the Hue Correct node to bring a little more blue on the lights and next to that I used a Glare node with Fog Glow. Added a Color Correction node, created a vignette effect and for the last I’ve added a Lens Distortion node.


this is awesome, thank you for such an in depth look
Thank you!
can u make a tutorial about texturing dave using substance painter ?
Maybe next year I’ll do something like this.
Thanks for sharing the process!