
How plants work
Today, Jesse Davis looks into different aspects of plant life and explains details to keep in mind when modeling them. You can see all his articles here.
Plants are all around us. Whether it’s outside in the forest or inside on your windowsill, they’re there. Because of this, us Blenderers have to model them from time to time if we want to make our scenes look real. There’s no sense in making plants if they don’t look real, so this article will teach you how they work.
Trees
A tree consists of a trunk, roots, and leaves. All are equally important when it comes to the workings of a tree, so they will all be covered.
Trunk
 All trees have a trunk and this part of the tree is probably the first thing you model. There are multiple ways of doing this, the easiest probably being the tree sapling addon in Blender. For complete artistic freedom, you’ll still have to make your tree from scratch. To get this done properly, some biology can come in handy. Don’t worry, I’ll keep it short.
- A tree grows from its tips. Every year there are new buds where either leaves, flowers or a new piece of the tree will grow out. This means higher parts of the tree are less likely to be damaged or show signs of erosion.
- Most trees have a central trunk where all other branches spring from. Sometimes this trunk splits into two or three parts, but it’s not the norm.
- The older the tree or a branch, the more time it has had to grow in length and diameter. The higher up or further along a branch you go, how thinner it should be. Branches tend to form a kind of half-sphere to make sure leaves don’t overlap too much.
Sometimes a bud goes dormant, only to grow later on. Because the bud doesn’t go up it is possible to have new branches on an old part of the trunk
And finally, trees never grow straight. It’s not that they grow towards directs sunlight (that’s too strong), but a trees growing directions changes with all the condition the tree lives in.
Leaves
 A tree needs leaves/needles or it dies. Besides making photosynthesis possible they’re essential for water transport. Every tree has its own kind of leaves, so make sure you look up what kind of leaves your tree has.
When you’re making leaves, make sure to add a translucent node in the node editor. While they do provide some shade, leaves never completely block sunlight. This comes in handy for the tree too, because other leaves can absorb the sunlight that passes through.
Finally, there’s fall. Probably one of the best seasons to add some color to your trees. Be careful when making your leaves in this season, as not all leaves change color equally. Always check how your tree looks in fall before spending time making up the right materials.
Roots
Mostly unseen, roots play a big part in the functionality of your tree. Since you’re probably not going to make the entire root system of a tree, there are only a few things you need to know:
- Trees usually have one anchor root that goes deep, while the rest of the roots stay in relatively shallow soil. This is important if you’re making landscapes, as you’ll have to check whether your tree can live in that landscape or not.
- Roots keep soil in place. Because of this, the soil particles won’t blow away as easy as when they’re not anchored by tree roots. Keep this in mind when you’re making a landscape with a lot of erosion.
That’s it for trees. If you’re looking for some youtube tutorials on trees, here are a few good ones:
- Realistic tree by CG Geek
- Christmas tree by Blender Guru
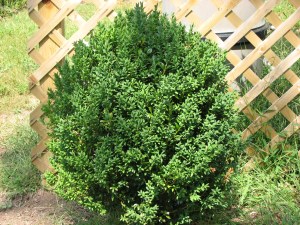
Bushes
Bushes, while sometimes similar to trees, are a bit different. Sometimes shrubs look so much like trees that they’re called trubs, so they’re really a grey area when it comes to modeling them. Nevertheless, here are a few principals you should keep in mind.
Stems
Bushes or shrubs have multiple stems instead of one, all sprouting from a central point. Whether the stems go straight up or lie on the ground differs from shrub to shrub. Most shrubs aren’t any higher than 12 feet. Like trees, stems grow from their tips, making newer parts of the shrub thinner than older parts. Because most stems of a shrub start are equally old they have an even diameter.
Leaves
 Like trees, the leaves of shrubs are different from species to species. Unlike trees, those leaves don’t just grow on the top of the shrub. Instead, they grow on the ends of every stem and small branches, causing the whole shrub to be enveloped in leaves. Again, leaves are a little transparent, something to keep in mind when adding the right materials.
When it comes to fall, shrubs show off their fair share of colors. Depending on the kind of shrub this can variate from yellow to bright red, so check this out in case you’re making a fall scene.
Roots
Shrub roots are completely different from those of trees. Usually, they’re less than half the lengths of the above-ground shrub. Because shrubs aren’t top heavy like trees, their roots can be thinner. When you’re making a landscape that wouldn’t fit a tree, like a place with hard winds or shallow soil, you can consider adding some shrubbery instead.
If you’re looking for a tutorial on making flowers, here’s a good one by Gleb Alexandrov
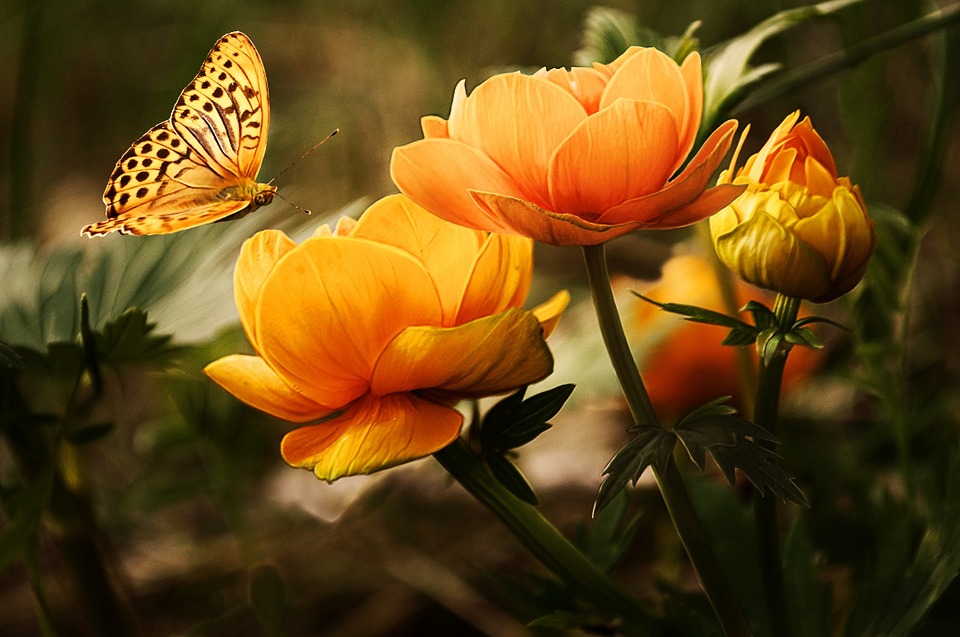
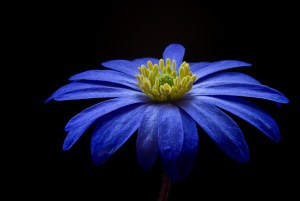
Flowers
Plants use flowers to multiply. The bright colors and nectar are there to attract insects, who then distribute a plant’s pollen. Not all plants use flowers as a means to multiply, so check before you model.
Shape
 Flowers can be categorized into a bunch of shapes, but those usually show themselves when you look up reference photos. The important part is that you can divide flowers into symmetrical and unsymmetrical flowers. The symmetrical flowers will take less of your time, as you can use an array modifier to copy one petal, then modify each petal to make it look realistic.
Color
Flowers have bright colors for a reason. Without them, insects would have one less incentive to fly towards them. To get this in your art, use saturated colors when you’re making the material to use for your flower petals. Something important to notice is that flowers are darker near the flower’s center, getting lighter as it nears the tip. Besides this, flowers are slightly transparent. Don’t overdo it, but a little transparency can really improve your flower’s realism.
Symbolism
 Like you probably know by now, I’m a fan of art that tells a story. Flowers are a great way to do this, as a lot of them have a symbolic meaning. Since not everyone knows these, so you shouldn’t use flowers as cornerstones for your story. These are the best known symbolic flowers:
- A red rose. You probably already knew this one, but a red rose is used as a symbol of love, passion or beauty.
- Daisies are a little less known, but they’re a symbol of innocence.
- Poppies are often used when death is portrayed, symbolizing the consolation with it.
- Lilies and irises can also be used when death is at play, only instead of consolation they symbolize life
Finally, you can use flowers to catch the attention in a scene. Because of the natural bright colors they have, a flower stands out in a very natural way. This can be used to create a starting point for viewers in interior and nature scenes.
For anyone looking for some video tutorials on flowers, here you go:
- Make a rose with blenderplus
- Create a detailed flower with Bandyte
That was it for trees, bushes, and flowers. Important parts in many scenes, it’s important to model and texture them right. Good luck with your next scenes!
All the best,
Jesse Davis


Great article!
I am a plant physiologist and plant ecologist. I just developed a hypothesis, and need to do a 4D-modelling/ visualization, thus I want to learn 3D modeling/ visualization. Could you please give me some suggestion?
Many thanks and all the best
Hong Li Wang
I’m glad you liked the article! Depending on the kind of 3D visualisation you want, you might want to consider hiring a 3D artist instead of learning everything yourself. 3D modelling isn’t easy and usually very time-consuming, so if you wish to make a complicated and/or photorealistic model DIY might not be the best choice. Before you hire anyone, check if they have a portfolio and if the renders in those portfolios look good enough for your purposes.
If you’re really set on doing this yourself, in which case I’d like to welcome you to the world of 3D ;), you should start with some beginner tutorials to get a hold of the basics. Try Blender Guru’s donut tutorial and move from there. Remember, the more you practise, the better your models will get so depending on the kind of model you need to make you might have to invest some time. Before you start making your own model, see if there are Blender addons that can make your work a little easier.
Good luck with your visualisation and hypothesis!
Perhaps you should look into the book Algorithmic Beauty of Plants by Aristid Lindenmayer.
http://algorithmicbotany.org/papers/abop/abop.pdf
I’d highly recommend you to use an algebric method for describing your bothanic models than try to do it by hand. There are methods you can use L-Systems to output your 3d models.