Sanjeev Nandan writes:
Creativity comes to everyone in bits and pieces. The hard part is to stay motivated long enough to complete your project. For me this comes in the form of music videos. This is my 3rd music video and I would have never learnt as much if it weren’t for these videos.
This song was a collaboration between my daughter and me and we had the melody and the lyrics for quite some time. Little did I know that it would be almost a year before I completed the animation.
Characters
In some way, this was an easy choice. Since the song was about dance I know that I needed some dancing characters. The song would be sung by my 14 year old daughter so it made sense that the characters were all girls. I made one simple character - the tall one in the song. Then I thought to myself, ‘Why not shrink this character and with a few tweaks make her younger sister’. Thus came the twins ‘red’ and ‘orange’.
Rigging
Spent a lot of time looking at several videos to create the armature. I know there are several ready made atmatures out there but I just wanted to do it all from scratch. After all this is the best way to learn. It had to be perfect because time well spent here is time saved in future.
The Animation
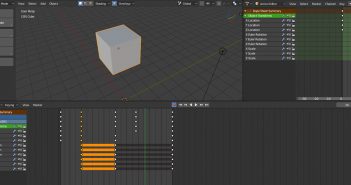
Now began the hard part. I wasn’t sure if I could pull off the dance moves. So I took a leap of faith and jumped. I started looking at several dance videos. I must have looked at hundreds by the time I located the right ones. I would download the video, mute the original sound and play my song and adjust the video speed to match the song. Once I found what I liked, I then split that video into sample images. Ok, this is going to get a little dry here. There are several tools to split the video into sample images but the one I used was FFmpeg. I got all the images I needed. Fortunately I have some html/javascript experience, so I took select images and wrote something to display the images in a loop till it looked like a dancing gif figure. The trick was to have around 8 to 10 images per loop. Once you got that and it matched the music you are all set for pose mode. If you do a bit of math you will be able to figure out the interval ( number of keyframes ) between each image. I would look at each image and try to get that pose as best as I could. Did I tell you that this was the easy part. :) . The tricky part was the transition from one dance loop to the next. I used NLA editor and I am glad that I did. You can add subtle repeated movements using NLA editor but it does takes some getting used to. Luckily I was able to copy the animation to the other characters.
Rendering
For test renders I used a sample size of 4 and 20% image size. Each image still took around 20 sec to render. With around 4000+ frames, this would take me ~22 hours. Believe or not that wasn’t so bad. I had a fan blowing on my computer and ran the damn thing. I also monitored the GPU temperature. It was at around 50 to 60 deg C. Fan speed was probably at 50%. For my final render I used SheepIt render farm. This video would not have been possible without it.
Every software used for this music video is free.Blender 3D, Audacity, MuseScore, SheepIt
Go community!


4 Comments
Nice work!
Nice voice and music, good animation, funny dolls :-)
thanks
great work ! great fun to watch and listen. You both made a great job!
Thank you