
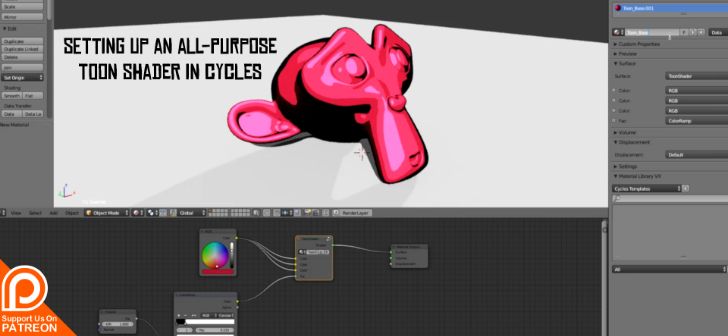
Setting up an all-purpose toon shader in Cycles
Paul Caggegi writes:
Hi Blendernation! In this free Patreon post, I show one way to set up a good all-purpose, light-responsive toon shader complete with color control. This method will teach the beginner how to set up shader nodes, group nodes, and use a couple of often overlooked methods to achieve a clean NPR look. It’s easy to customize, too! The working file as well as the finished shader are available on my Patreon.
https://www.youtube.com/watch?v=04-U6EHkIww
I’ve watched a number of toon shading videos for Blender (I’m in 2.92), and yours made the most sense and was the easiest to follow, Thanks!!! Though it’s an earlier version, I believe all the steps are still doable.
I still haven’t found a way to apply a toon shading to an image mapped object, and I’m beginning to think as yet there isn’t any way to do that. But with your video, I felt the first domino fall of comprehending toon shading an object that most importantly can be used as a material over and over.
It would have been nice to learn how to copy the material group to another file, but yours is still the best by far, and I’ll find the tutorial for that next.