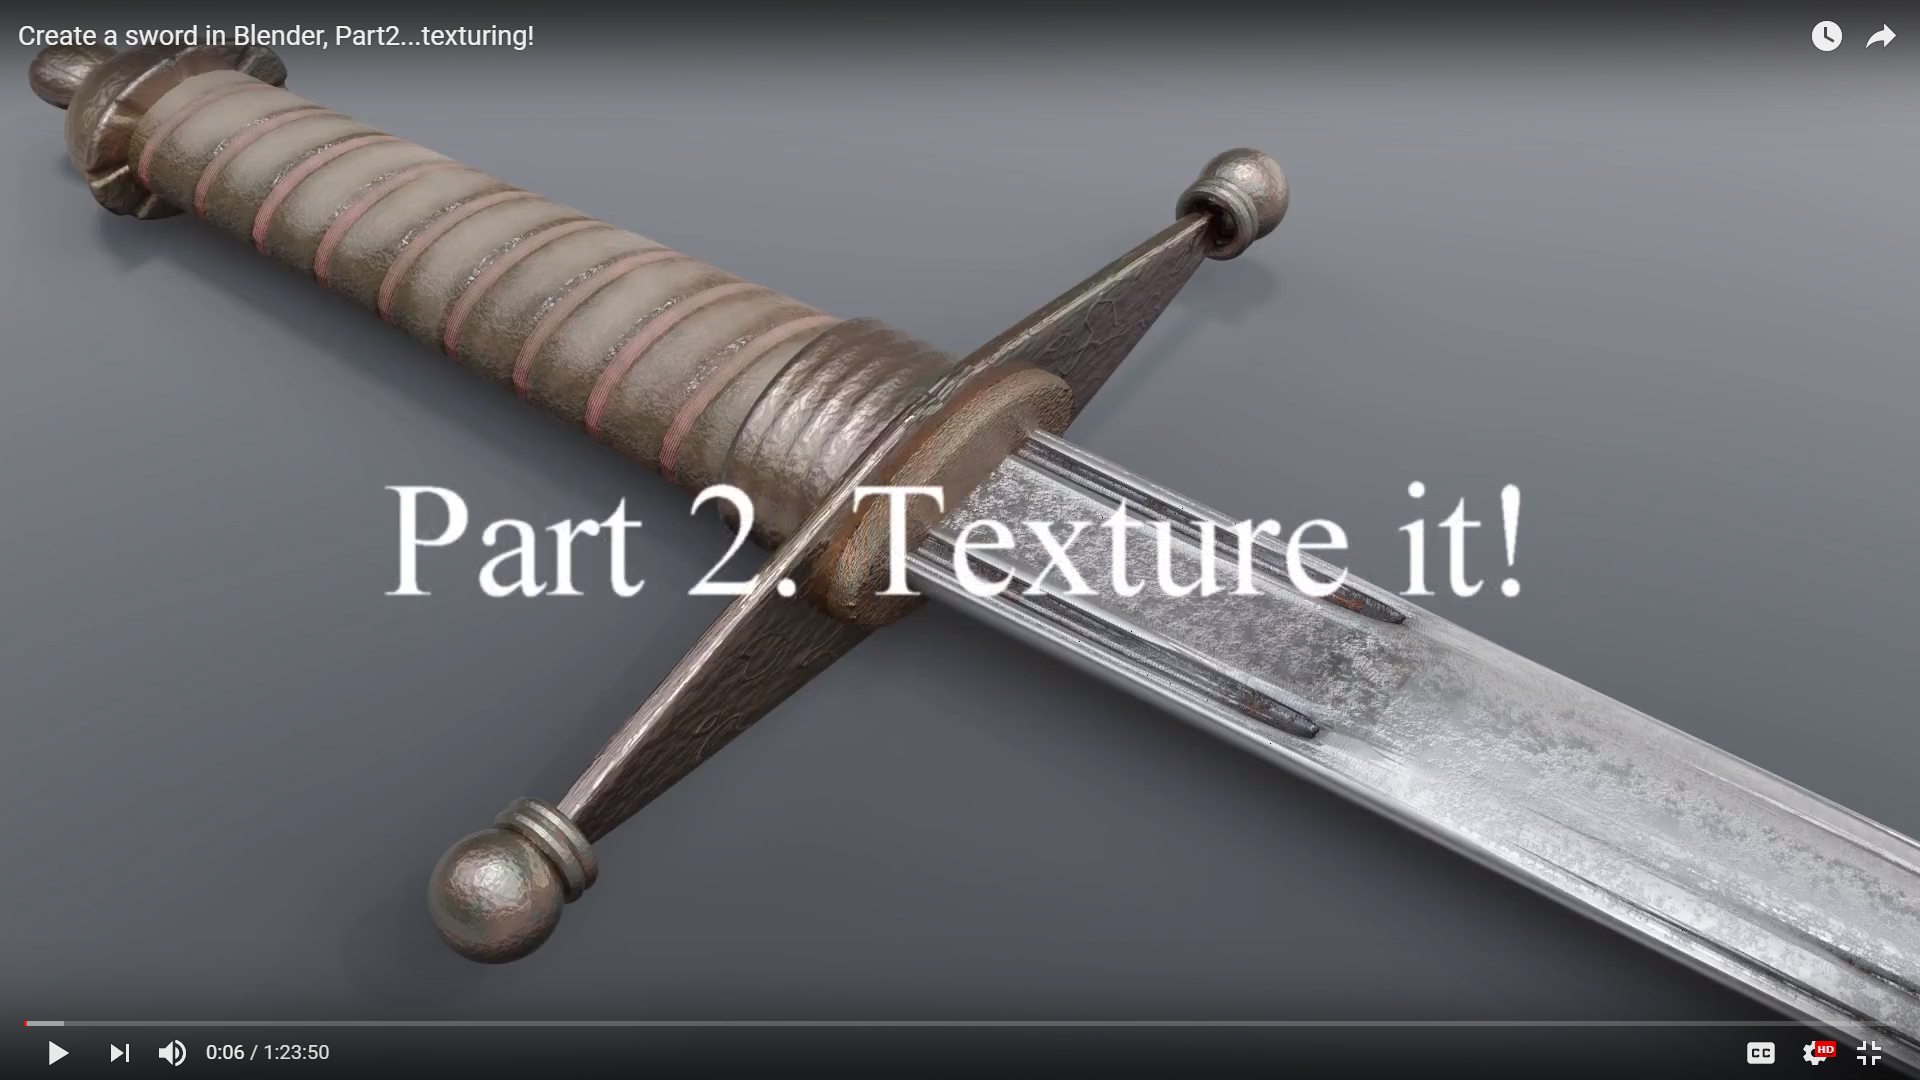
Tutorial: Time to texture the sword!
jtornhill writes:
For you viewers (and those that will come) that built a sword from my previous video tutorial, I have now finished the second part of it. How to texture the sword!
This is no “follow and get a great result!”. It’s more a deep dive in to the nodes on how you should apply them, how to think and the pitfalls that may arise when working with them so you will all get slightly different end result I believe depending on paths and directions that you take when texturing.
Thank you! I have eagerly awaited the second part! Now I will try it
Good luck! I hope you find things that is useful for you :).
Interesting tutorial, but I would recommend modelling at real world size from the beginning.
Put an object with known dimensions into your scene then adjust your background image scale to match some part of the image you know/can estimate the real size of.
Once you get into the habit of doing so it makes life a lot simpler.
I often use Blender to figure out complicated, real world problems – usually sign installations, but other things too.
Working on a case for a valve amplifier at present.
It makes hardly any difference to workflow.
Set your preferred units in the scene tab and away you go.
Hi, you are of course correct in your statement and suggestion. I was more thinking of creating something simple to get an object to texture and it takes me just seconds to change things that I think has the wrong scale… but that is when I work by myself. When showing a tutorial I should not take in these extra steps, so good feedback and I will think about it in the future. Still a noob when it comes to sharing my knowledge, but I’m slowly getting it :)!
Hi!
I have a problem with the texturing of the rear metal part of the handle.
When I set the second color ramp node (see picture), unlike in the tutorial, the main surface changes color instead of the aging area
Can you help me? What am I doing wrong? Thank you!