
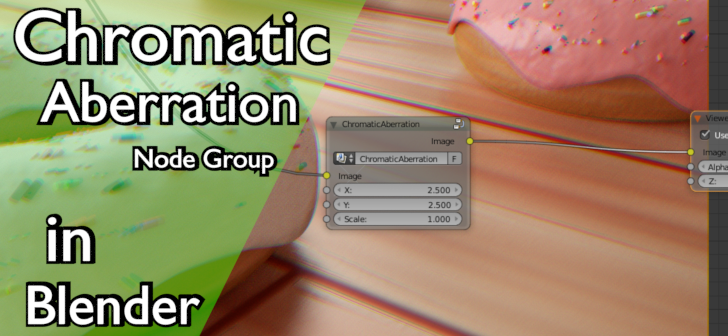
Tutorial: Chromatic Aberration Node
BlendMaster writes:
Hey Everybody! In this tutorial I will be showing you how to create a super easy node group for adding chromatic aberration to your scenes in Blender. This node group is great because it adds some slight realism to any scene you are working on. Typically, when you take a photo with a digital camera, there is some distortion and this is why adding chromatic aberration gives images a more realistic look to them.
I hope you guys enjoy this tutorial and learn something new. Thanks for watching!

Nice simple tutorial. Curious if there’s any advantages in this method over using the distort filter in the compositor for chromatic aberration? Other than maybe a little more control here. But thanks for posting, always good to learn another technique, regardless!
Thanks. Main advantage to this as you said is a little bit more control. I also feel it’s a little more user friendly because the values used in the distort node are very random and small. I also feel that the distort node may add actual distortion to the image that is unwanted if you just want some color distortion.