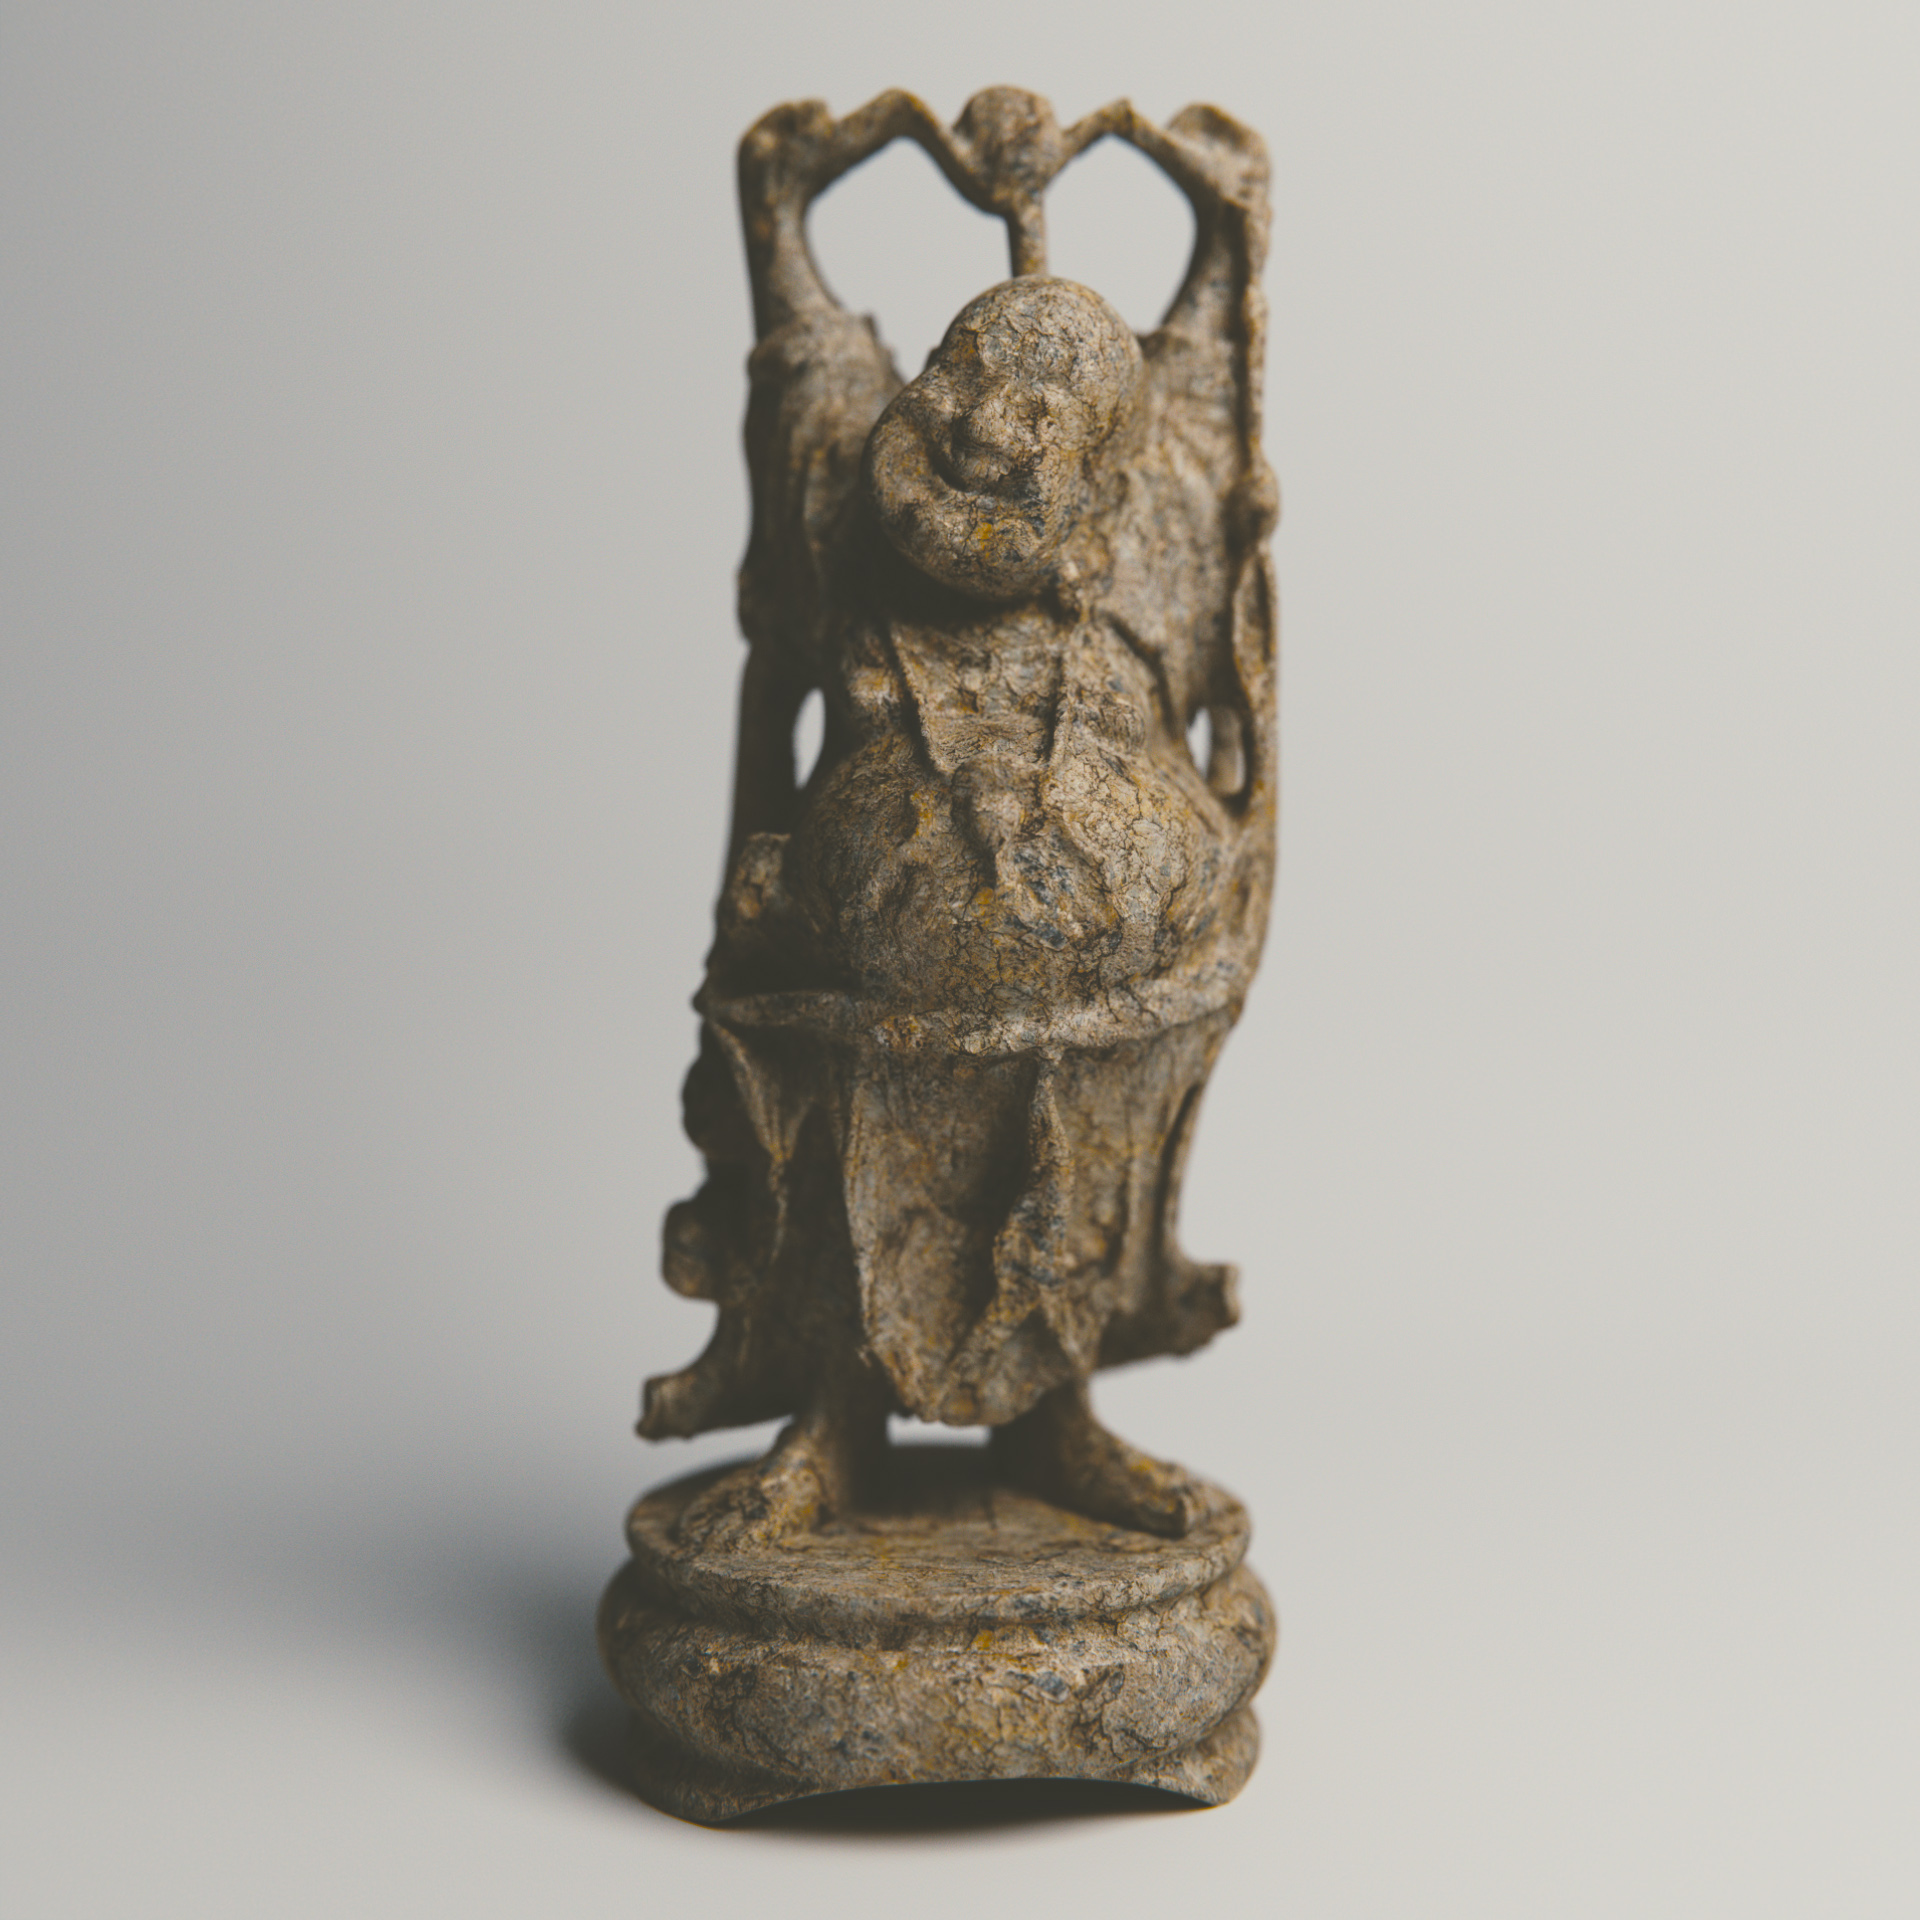
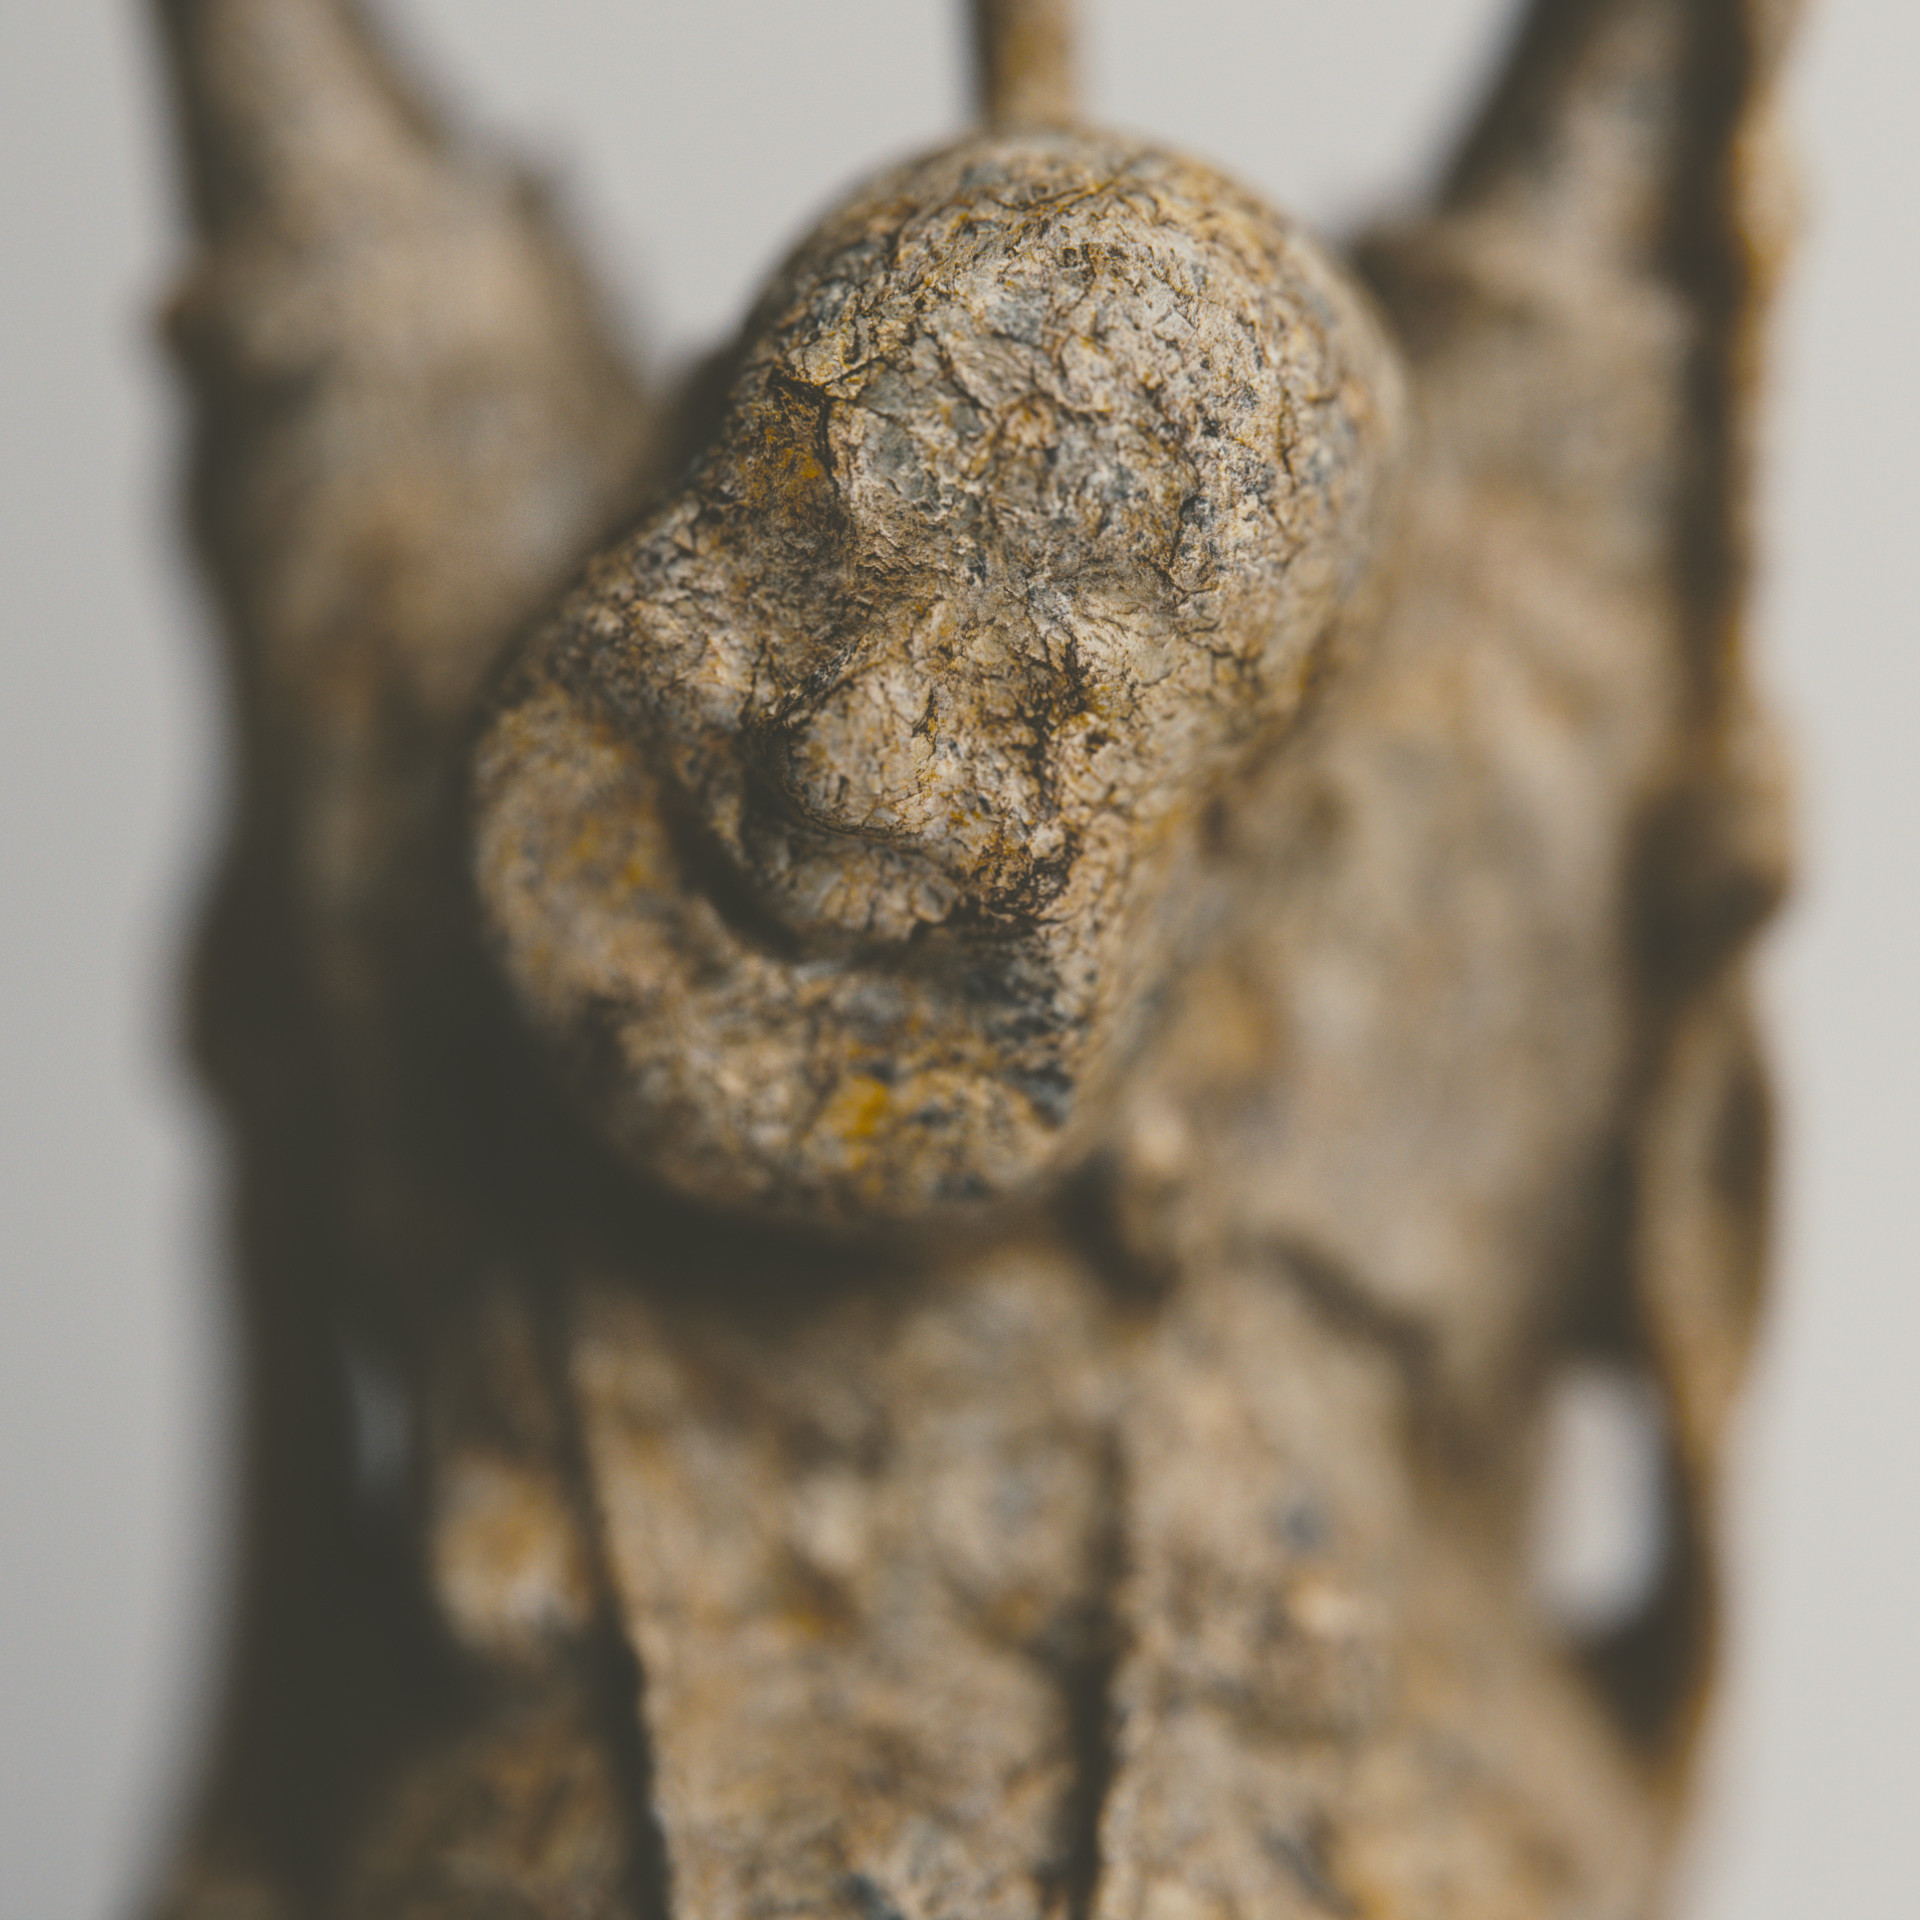
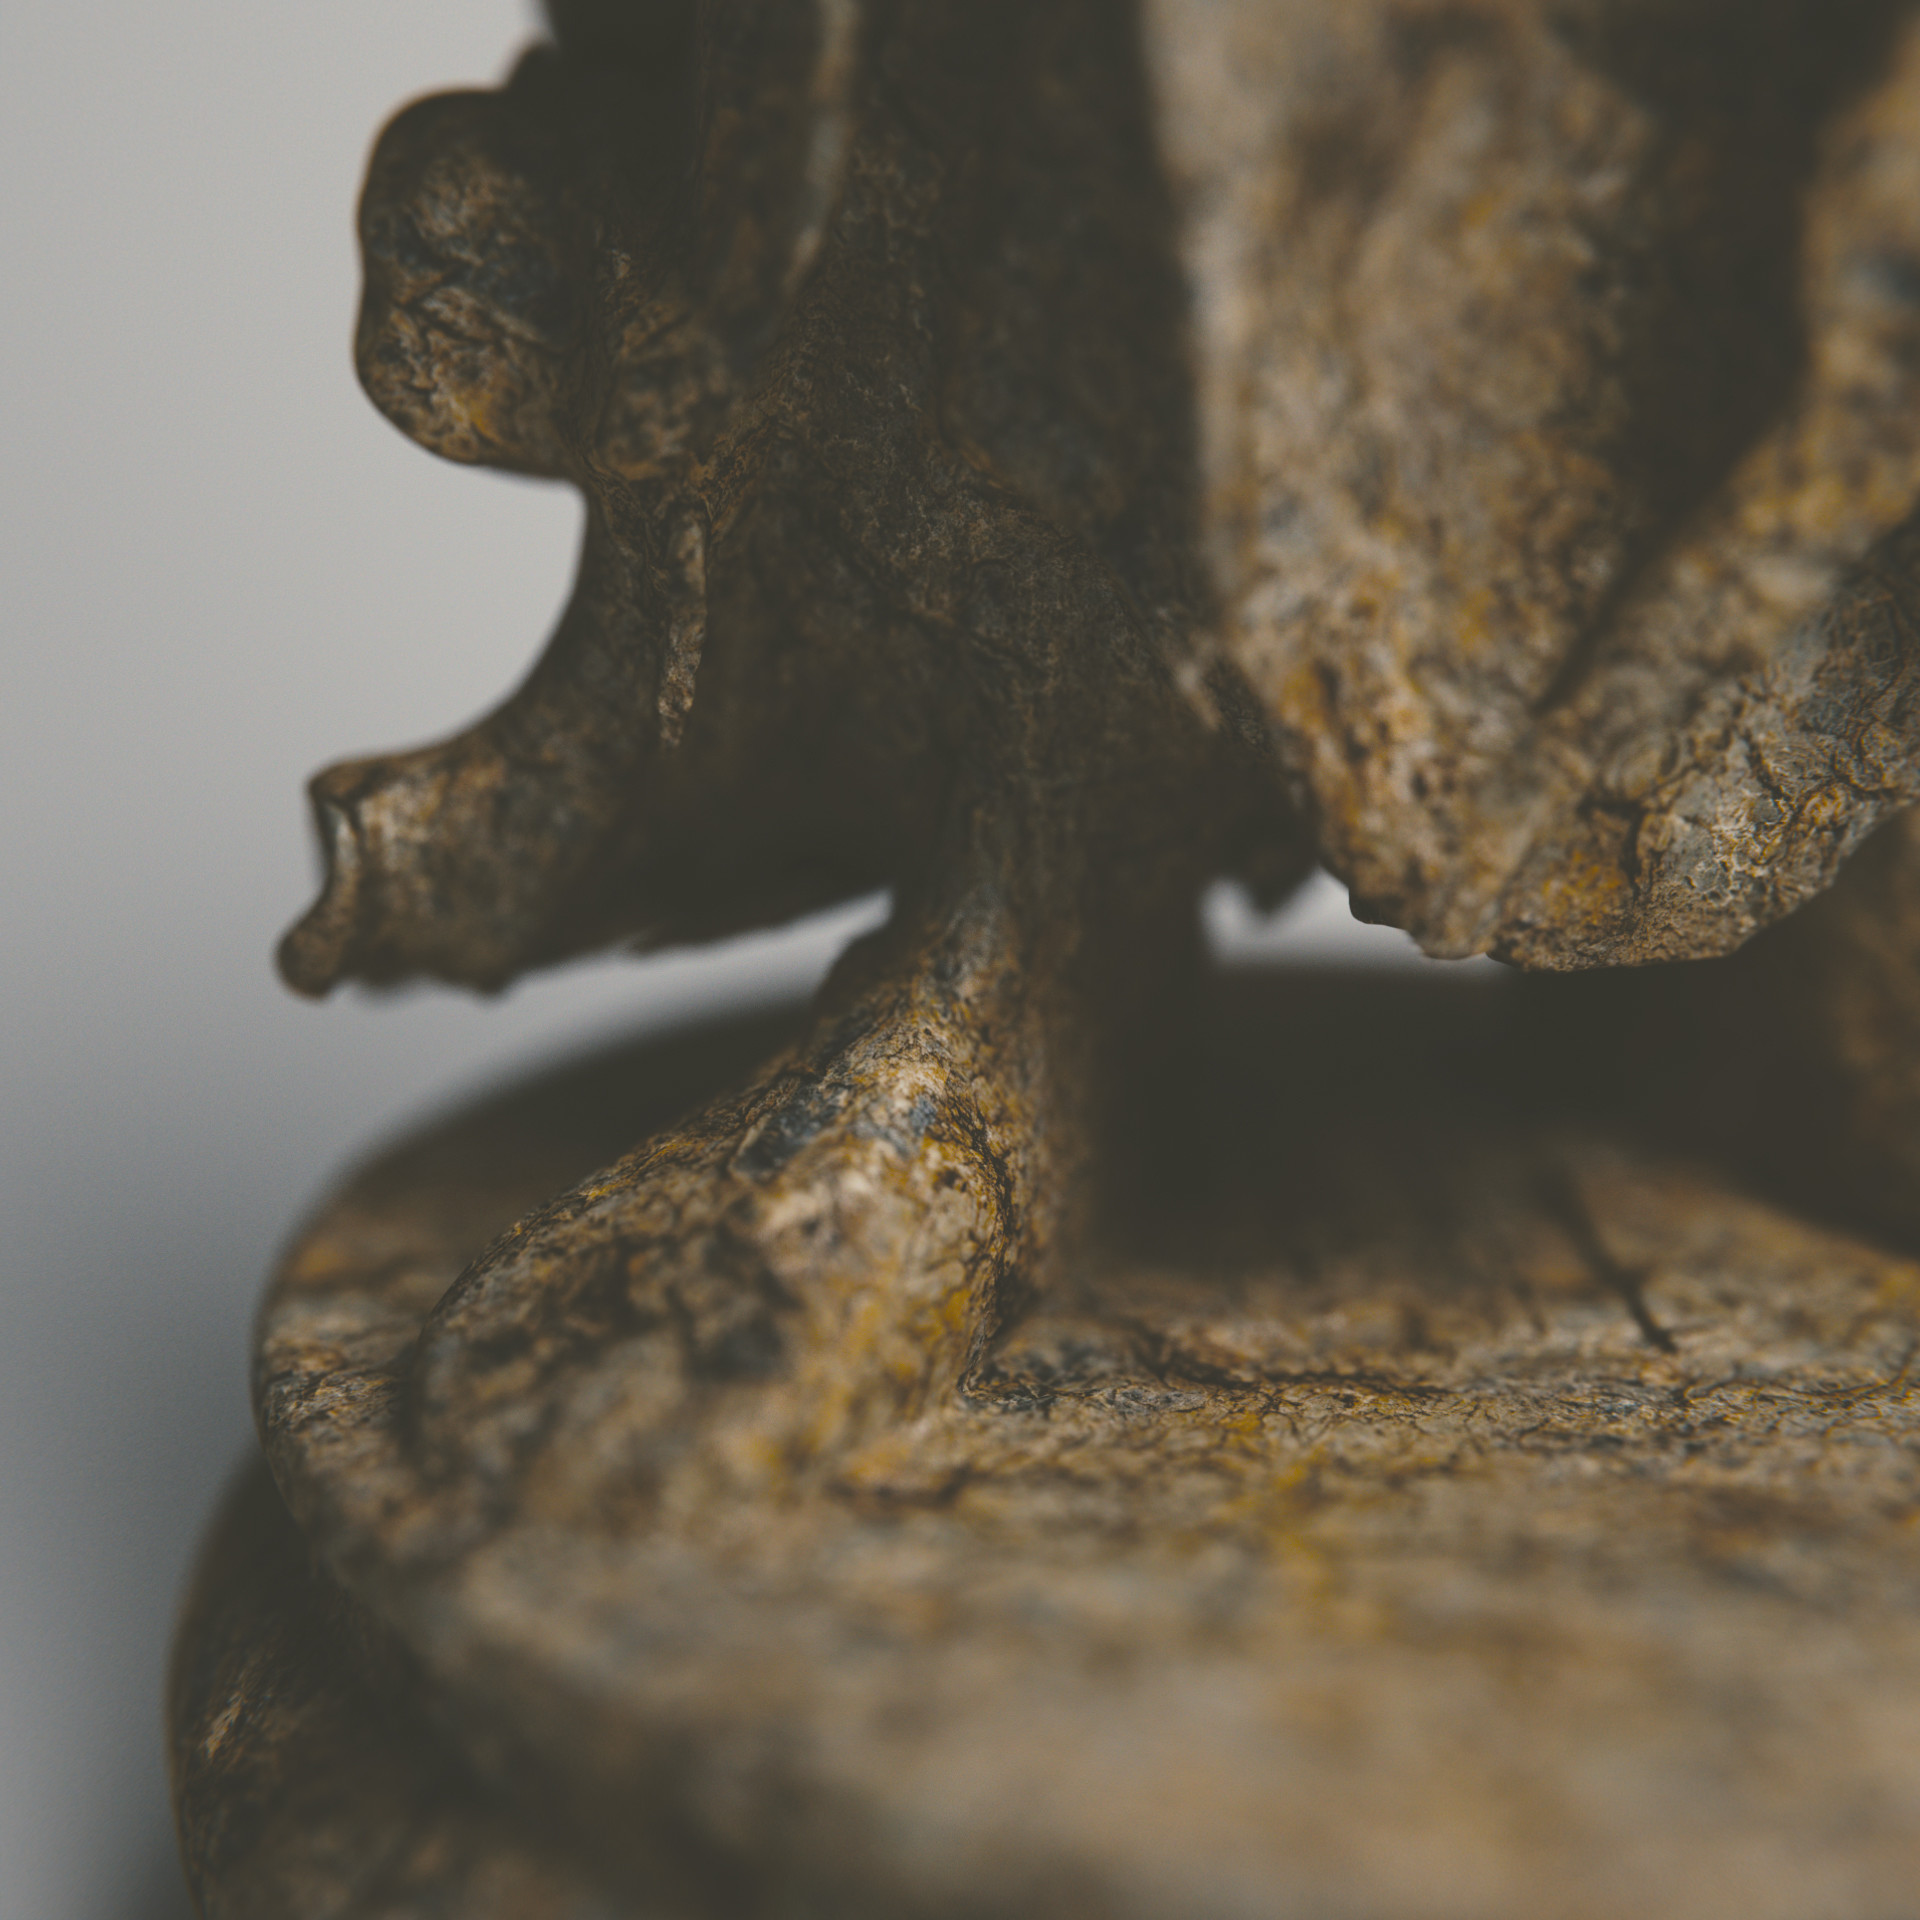
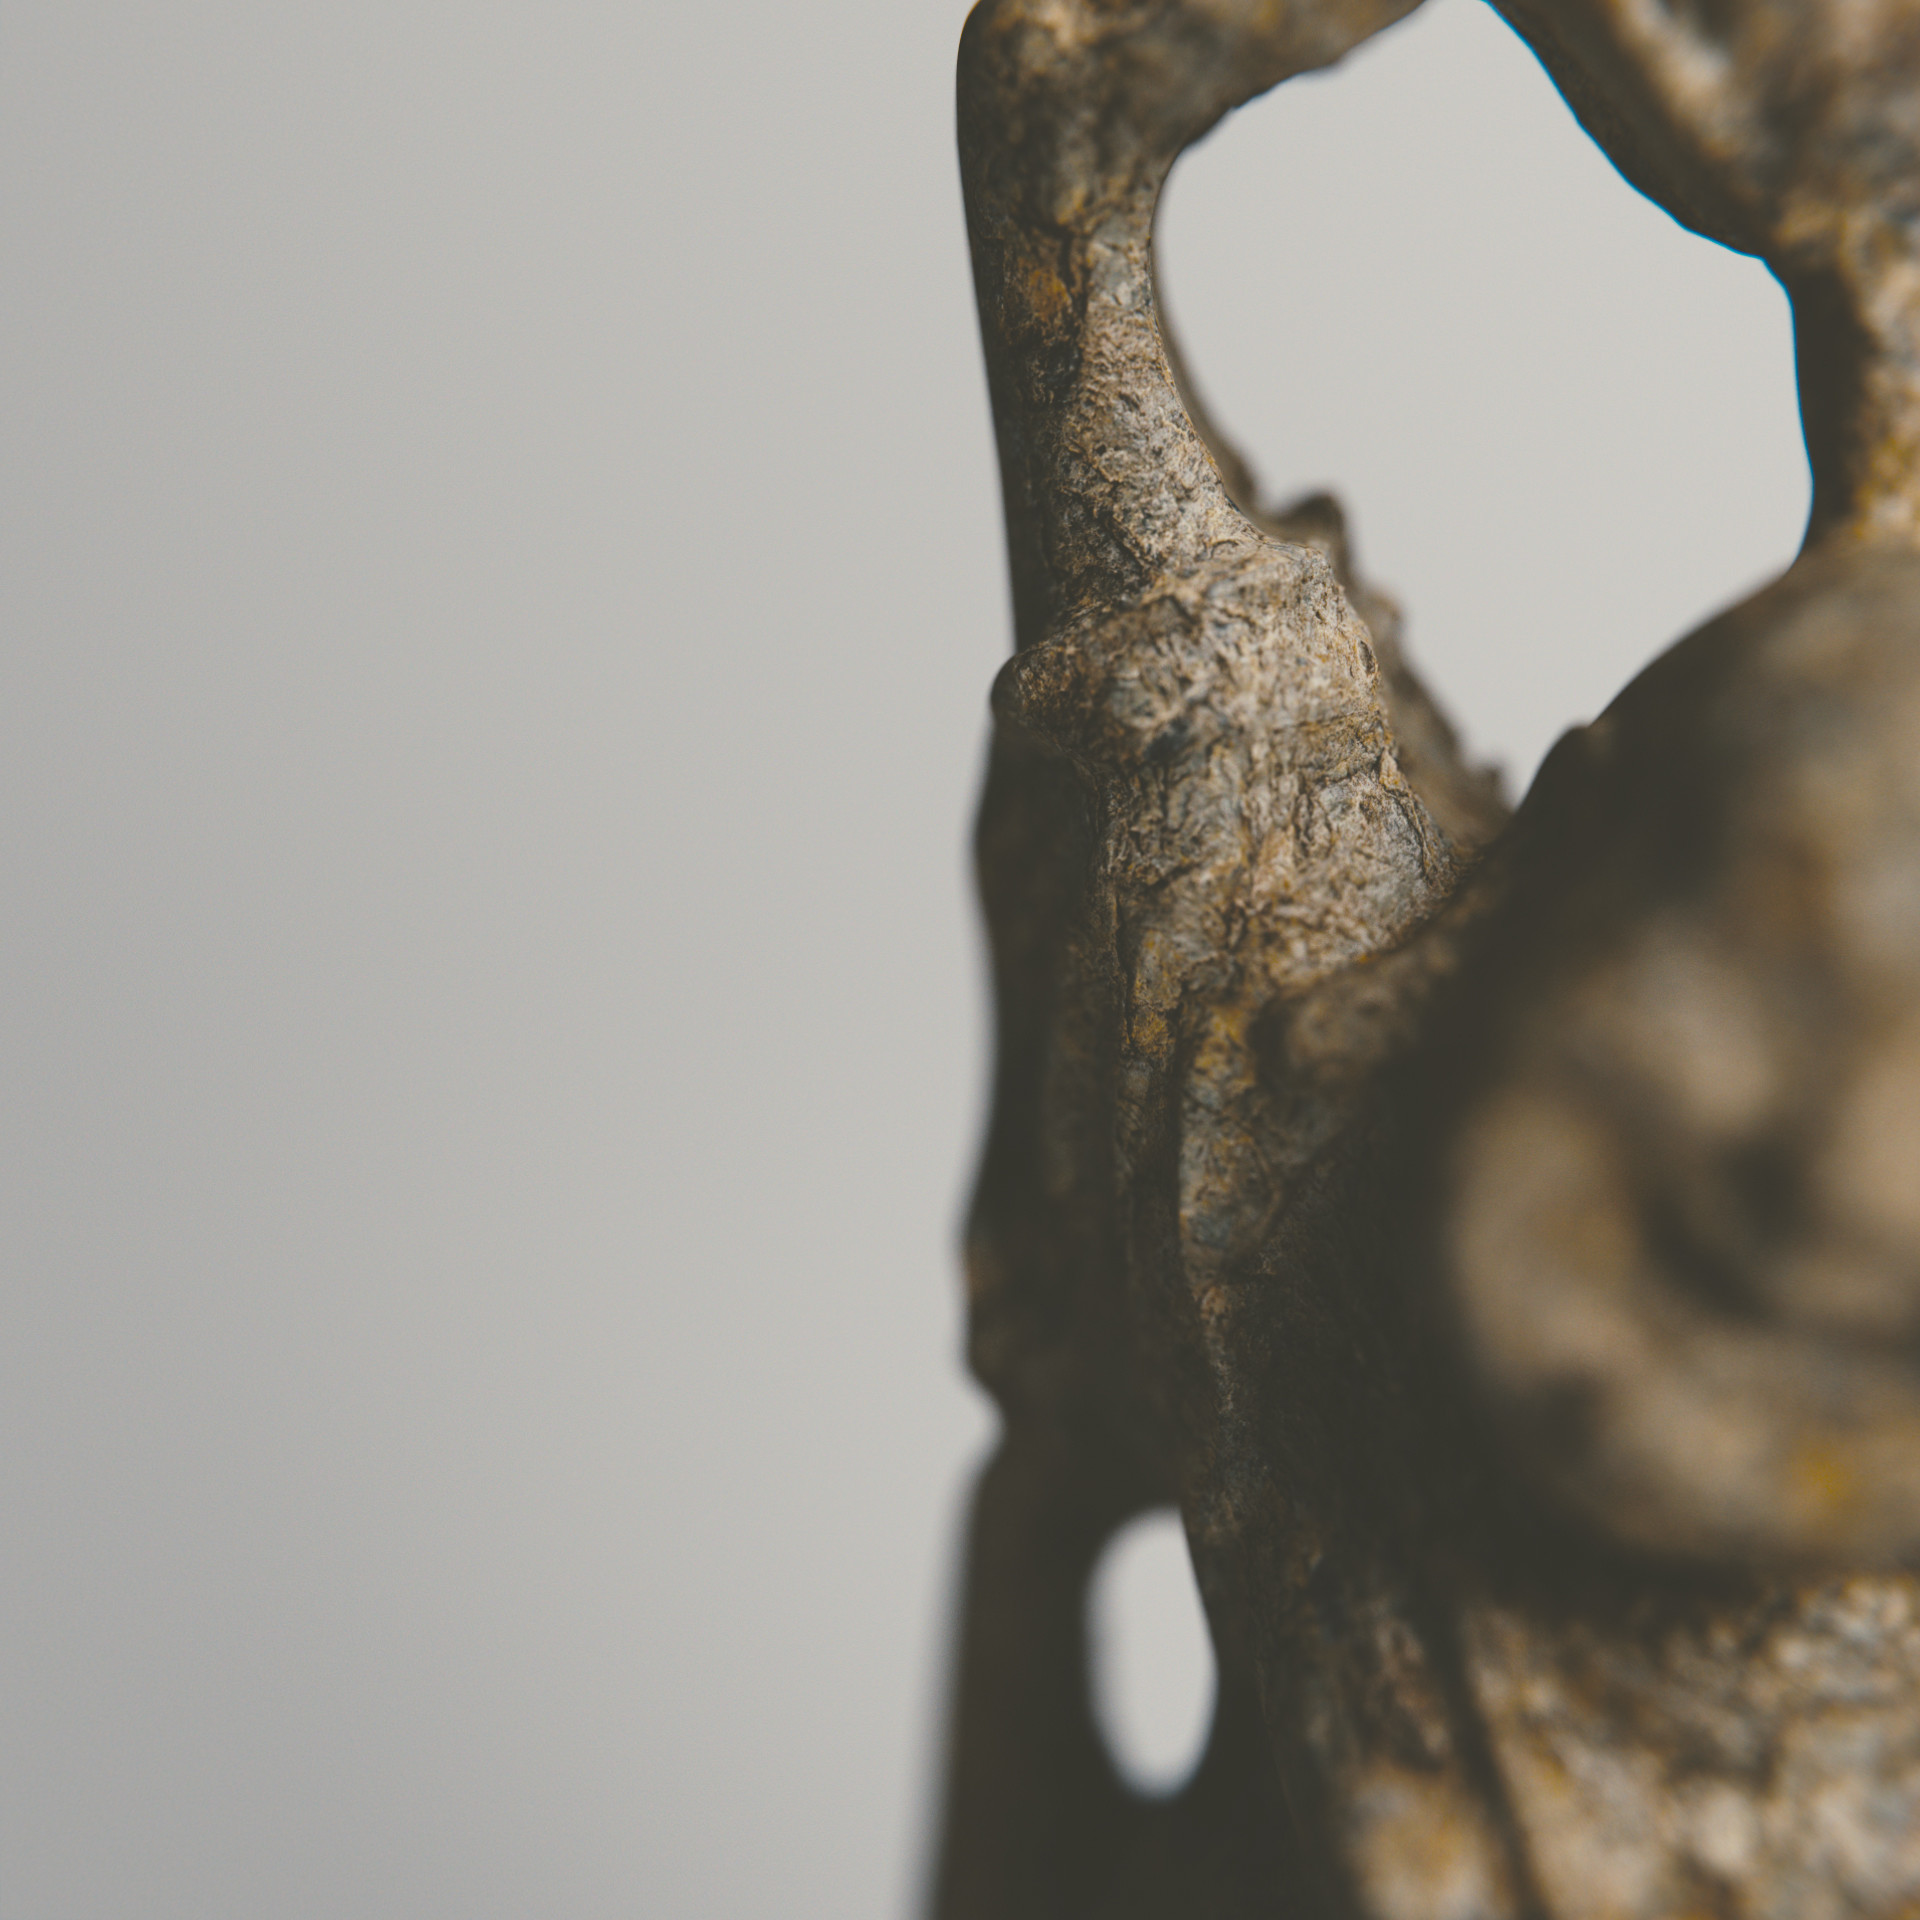
Rock Buddha
Rence writes:
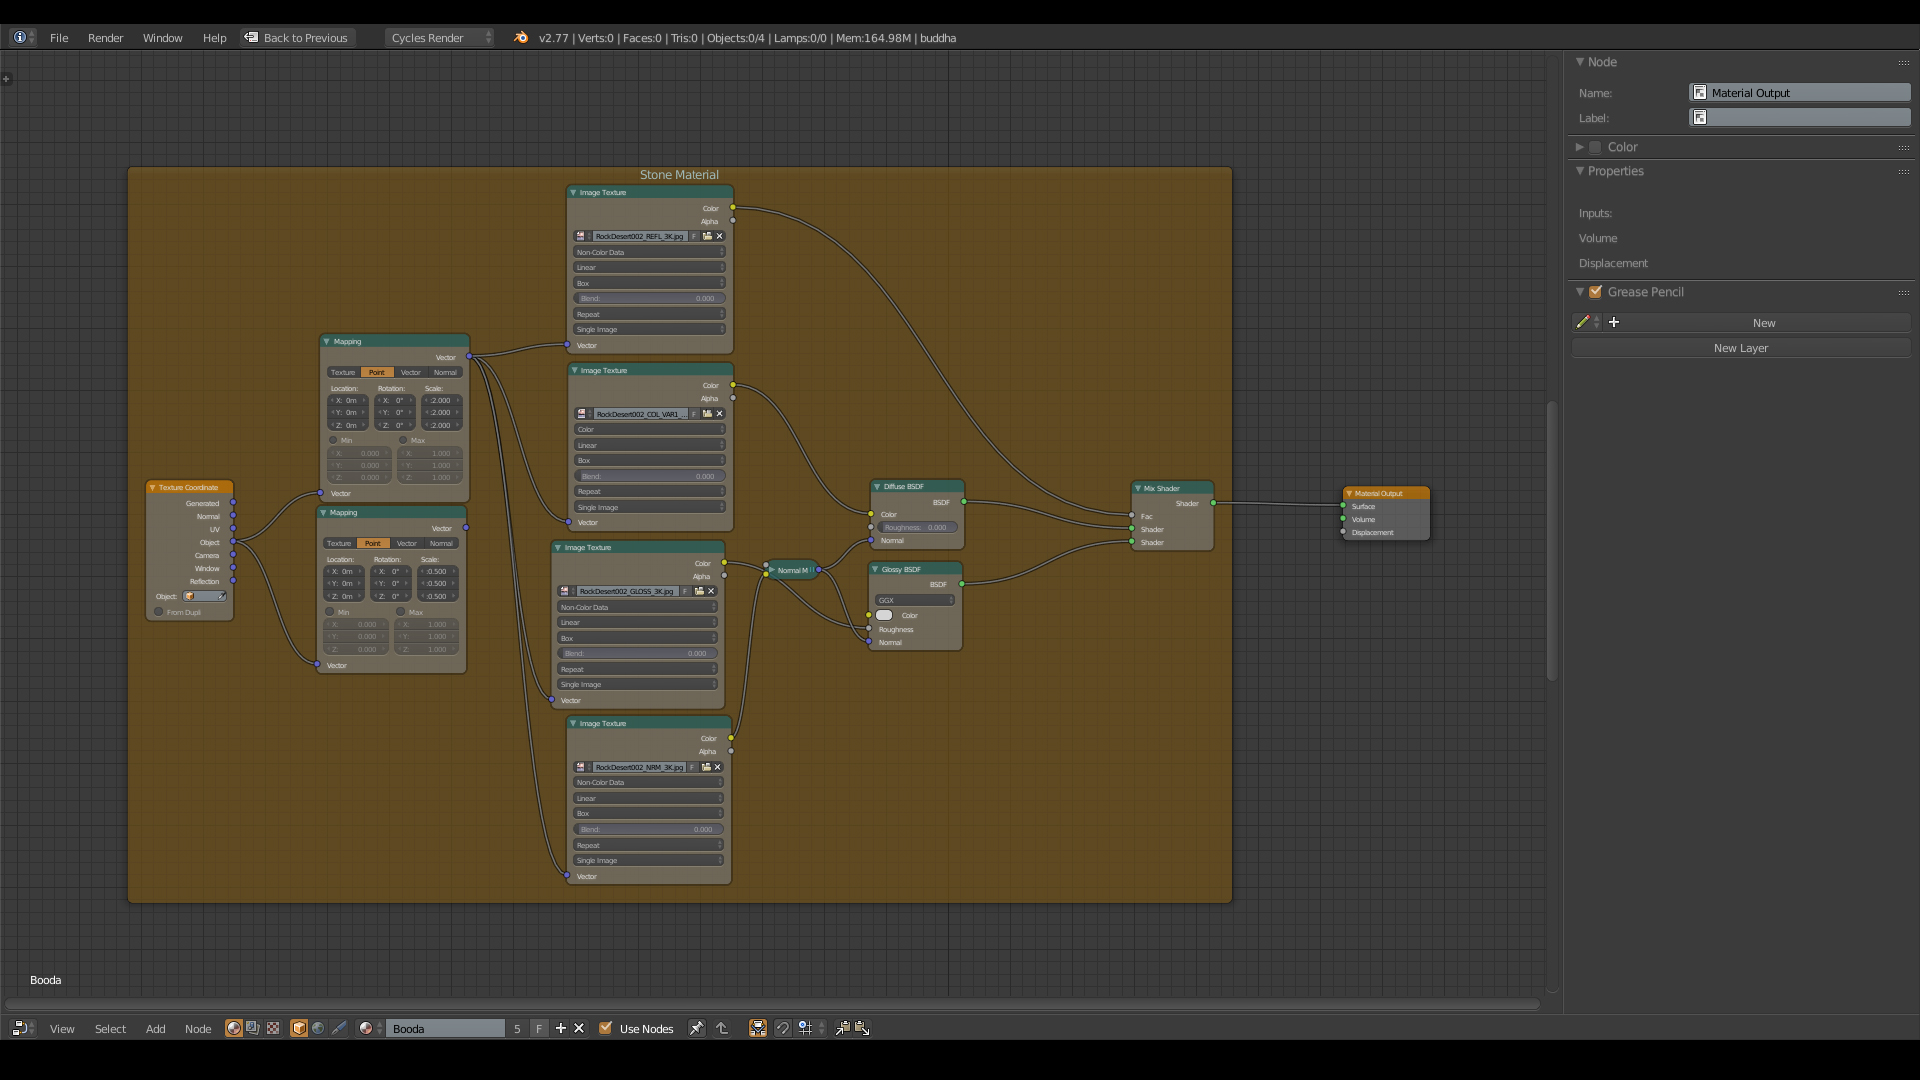
I wanted to take my renders to the next level in my personal work. I was always happy with my work but the renders always had that ‘digital’ feel. I think I found the sweet spot on the lighting/coloring on this one after quite a while of tweaking. Very simple shader, using a rock map from Poliigon.
The material is as basic as a Diffuse mixed with a Glossy. The rest are all maps. A Color map driving color of the Diffuse shader, Gloss map driving Roughness of the Glossy shader, Normal map driving the normals of both shaders and a Reflection map driving the Factor of the Mix shader.
There is one mesh light in the scene. The background environment is solid black. The cameras have a 55mm Focal Length with a full sensor. For the depth of field I just set up the distance as far as I wanted and tweaked the radius until I liked the DOF.
I spent some time playing with the Color Management settings using the film emulation along with tweaking the Exposure and Gamma values. Rendered in Blender Cycles with 500 samples and a little bit of post also done in Blender like film grain, chromatic aberration and color balance.


Truly amazing look, well done!
Thanks for the comment Ross!! I appreciate it!
Great work! Would be interested to see how you achieved the film grain and chromatic aberrations in post if you’re up to sharing.
Hi CGCOWBOY.
Thanks so much for the comment! Your tutorials are awesome man!
The film gran is just a lens distortion node with just the jitter checked. Then piped into a mix RGB node and mixed back in with the nodes before the jitter, mixed at .333 to favor the clean render.
The chromatic aberration is simply a lens distortion node with fit checked and a very subtle value of like 0.02 in the dispersion parameter.
Not sure how to post the image here, but if that didn’t make sense, I can email you a screenshot of the network!