The Secrets to Realistic Texturing
Blender Guru dives into Texturing in this video tutorial.
Andrew Price writes:In this tutorial I answer the question of “what are all those specularity, occlusion and displacment maps actually for?”
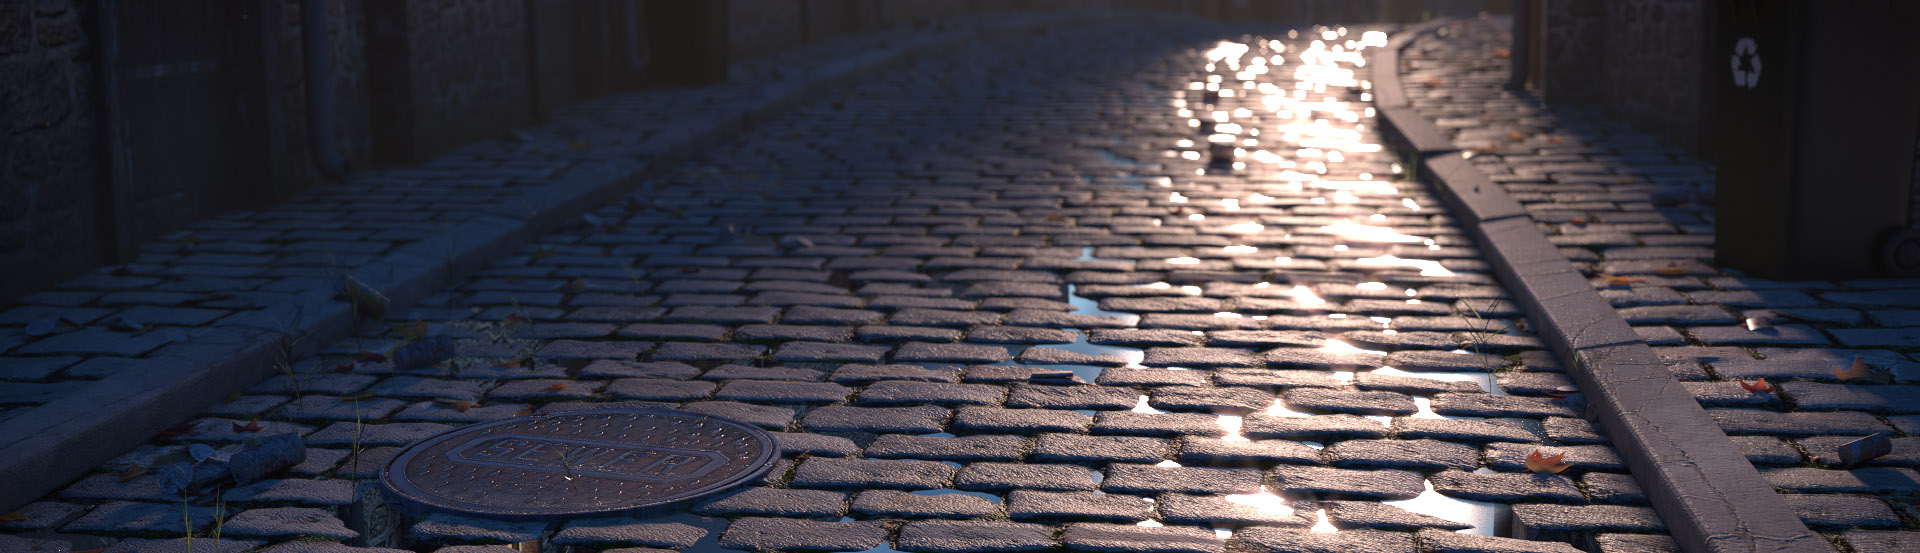
It focuses on the material of a cobblestone street, and then walks you through how to create realistic textures using Crazybump and rendering in Cycles.
Link
Hi all,
Just a quick tip; I’m running Windows 7 Ultimate x64 and CrazyBump would crash whenever I tried to load in a texture. After going through the event logs it was a DLL in .NET that was responsible; I carried out a repair on .NET 4 and installed .NET 4.5; issue resolved.
I learned a lot from Andrew’s tutorial; only downside is that I’m now going back through my project and re-texturing everything ;)
Project blog: http://andyjourneyman.blogspot.com
Andrew’s tutorial is very good (as usual) but I recommend following the written description for texturing. Several comments on Blender Guru pointed out a mistake in the video and Andrew replied that he would update the written tutorial.
Also, I’ve used CrazyBump and it is a very good application. However, the personal edition is $99 and the profession version is $299.
ShaderMap 2 (www.shadermap.com) is a very good alternative at $39.95. It doesn’t have as many options, but it produces all the same maps (diffused, ao, normal, specular, etc.), it’s easy to use, and personally, I can’t tell the difference between the CrazyBump maps and those produced by ShaderMap 2. It also has a trial period so you can try both and compare.
Anyway, both are very good. I just thought I’d highlight an alternative for those who want similar results for a much lower price.
Plus Shadermap works under Linux via Wine. Crazybump does not.
Good tutorial as always. Normal error apart, he always (ALWAYS) forget to set non color data in all textures where color is not needed. Please Andrew read documentation expecially on normal textures.
Does anyone know if crazybump is runnable on Linux? Or if there are some alternatives for Linux?
try xNormal… I remember it’s free and can be on Linux
xnormal isn’t available for Linux and will likely not work in wine. However, there is this Gimp plugin… though I haven’t used it and can’t speak to it’s quality.
http://registry.gimp.org/node/69
There is also the Bitmap2Material app from Allegorithmic. Most of their apps for for proprietary texture packages called Subtances, but with the B2M app you can actually import an image texture, generate all the maps, and export to standard image files. Also other than CrazyBump it’s the only other Mac based texture map generator I’ve seen so far. http://www.allegorithmic.com/products/b2m/overview
I did the Normal and Displacement for sort-of nothing by using the free nVidia plug-in for Photoshop to create the Normal map. For the displacement map I used Photoshop to turn the image into a grayscale, then pumped up the contrast to exaggerate the effect.