 I remember when I first saw an autostereogram image. It took me a while to figure out how to see it, but then the concept of a three-dimensional image being hidden in another image blew my mind. Kapil Hari Paranjape describes how you can create these images for yourself using Blender, the Gimp and StereoGraph.
Kapil writes:
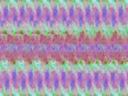
Single Image Stereograms (SIS) are two-dimensional images that seem to be three-dimensional; these 3-d images appear to "pop up" (or "pop down") out of the printed paper. The amount of training the typical human nervous system requires to see such images seems to vary from person to person; it seems to help if you are old and myopic! This tutorial is not about that however; it is about creating the images that will invoke the 3-d image in the eye a trained beholder.
Here's some background info on SIS images and how to view them.
The supplied software is for Unix systems only, which is a bit of a bummer, but I've looked around and found some free alternatives (1 2).
24 Comments
A long time ago I played a lot with stereograms and the best software I found was stereograph. I wrote a small sequencer plugin to ease the work mentioned above. Maybe someone can create a standalone sequencer plugin or effect node so everybody will be able to enjoy it.
Here is the addressefor those interested: http://fab.gnux.info/progs/stereograph.tar.bz2
That's really fun. I recall how much those magic eye books cost and feel slightly jipped. Anyway, here's my first attempt (10 points to the first person to guess what it is):
http://sympodius.com/pictures/Sue.png
ooh......is it that suzanne monkey model thing?
And ten points go to Kayde!
Well done Kayde, and congratulations (*the crowd cheers and claps*).
The article suggests using stereograph directly from the command-line. As long as we are using GIMP, it is much easier to use the GIMP stereograph plugin...
Sorry, here's the link:
GIMP Stereograph plugin
I actually did this a few years back, though I've long since forgotten what (pre-switching-to-ubuntu) windows app I used... an alternative way to get the depth map is to make all your materials pure, shadeless white, and then create a black Mist in the world panel that increases with distance from the camera.
@ Sympodius
Really! sweet!
Where can I cash in these points?
( I couldn't really tell exactly what it was....I thought I saw a monkey there.... So I considered the following, The filename, and that if you're anything like me, if I wanted to try something, I wouldn't waste time making a model to test it on, so I'd grab the monkey )
I am wondering if there is out there a tutorial (a plugin?) about the production in Blender of those 2-coloured drawings (blue-red) that when seen with plastic glasses (blue-red) look 3d.
I agree, I think it would be awesome to have plug-in for the blue-red glasses. Could you imagine rendering an entire animation that could be viewed in actual 3d with the 3d glasses?? That would be crazy...
I did some research, and apparently these are called Anaglyphs. I am currently looking for any blender solutions, but if anyone finds any before me, post them here.
Thanks,
advs89
Rendering Red/Blue separated images in blender is as simple as getting two cameras, seperating them by a small amount so that each one see's a different eye's view of the scene, rendering the two images and combining them with some program. (if you're running windows you can use "anaglyph generator" -I think that's what it's called- to do this; or just seach on google for some other program if you can't get that one to work for some reason or you're using a different OS) I would post a link here to one I made a long time ago but I haven't really got time. -epat!
-BTW: did you know that the GE can do Red/Blue 3D seperation too...
"rendering the two images and combining them with some program"
such as the Blender compositor, maybe? ;-)
@Kayde
You can't cash in the points, per se. I think it's more of a status thing. I'm up to 12432 points myself :) It's almost enough to buy the Sword of Froboz.
As for the 3D glasses thing, there is a 'wiki how to' page about it. You can follow the same process with Blender as with a real camera. The tutorial is here: http://www.wikihow.com/Make-3D-Photos
There's also a somewhat interesting one about making a camera attachment to take 3D pictures using mirrors and such: http://www.wikihow.com/Make-a-Camera-Attachment-to-Take-3d-Anaglyph-Photos%21
wow! I tried the "wiki-how" link and it worked beautifully!
I can see the nose of my newly modeled monster sticking out of my screen!
Thanks!
Using the compositor to make anaglyphs with two cameras should be pretty easy.
The Blender Game Engine can do anaglyphs in realtime. Just take a screenshot of in-game anaglyph and there you go!
by the way, is there any Windows version of StereoGraph? Can someone compile it with the scource code? (I don't know how, and if it needs a program to compile it, I can't put it on the computer I'm using (it's my moms). Or is it not cross-platform, even if you do compile it for Windows?)
There is another type of stereograph where you put the left picture on the right side and the right picture on the left side and look at it cross eyed. I know, it sounds weird but it works.
I tried rendering a test movie with blender in this format. I rendered each eye seperately and composited them in the sequence editor. I was pretty unimpressed. I think that the settings as to how far apart the cameras are and where they are pointing is key to the result. I think mine were too close to really show off the stereo effect and I pointed them parrallel.
Tynach,
Please leave an e-mail address if you want my Windows Stereograph binary. I am pretty sure that I still have the really buggy one that I compiled once upon a time.
Your better bet, though, is to use the GIMP Stereograph plugin. It can be run from the GIMP with a GUI, as opposed to the command-line interface that you will get with plain Stereograph. My advice is, only use my Stereograph if you really must, because I never got jpg and png support working - you must use ASCII ppm images (aka not fun) for input. And even then it doesn't always work right. GIMP plugin is much better - and if you don't have GIMP, then man, get it! It is 100 stars of out 10 awesome!!!!
~Peter
No, that's GIMP.
And BTW, jswoerner, yeah, both cameras must be pointed at the object (not parallel) or it doesn't work...
~Peter
I'll use the plug-in. Thanks anyways.
That's a real jump way back in time but still fascinating...
Still looking into ways to do this in 2020, any possibility that someone has found a way to streamline the entire process in blender since there have been a few updates since 2015?