A Pawn in a Hurry

Introduction
You have already seen that you can use Blender to create interesting images. Adding objects, materials, lights and a camera allows you to set up a scene in exactly the way you like. Blender will calculate the correct lighting and shadows automatically for you.
But there is more! There is a complete animation system inside Blender. Making an object move is as easy as defining its beginning and ending position. Blender does the rest for you – calculation of all the frames between beginning and end are done automatically.
In this chapter I will create a simple scene consisting of a chessboard and a pawn. The pawn will jump happily across the board and it will deform a bit when it hits the ground.
Creating the Pawn
To create the pawn I use a technique called ‘Spinning’. Using this, I will only need to draw an outline of the pawn and then Blender will calculate how the object should look based on this outline.
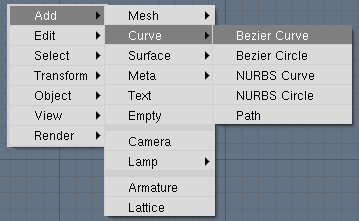
Start with a new Blender scene, delete the default cube and switch to front view ([NUMPAD-1]). Add a new Bezier curve from the toolbox: press [SPACE], select ‘Curve’ from the right button bar and then select ‘Bezier curve’ from the list:
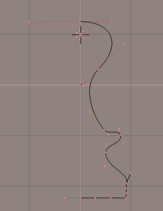
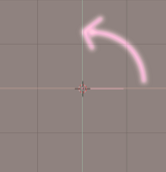
You can add extra points to the curve by selecting an endpoint, holding down[CTRL]and LeftClicking. Try playing with the curve a bit before going on – also pay attention to the way the ‘handles’ affect the direction of the curve in a particular point. Shape the curve as indicated below, and pay special attention that the endpoints on the left are located on the blue axis (the Z-axis). I will be using the Z-axis as the axis of rotation later.
When you want to create a rotation object, you must indicate the location of the rotation axis with the 3D cursor. I want to place this somewhere on the Z-axis. While still in front view, LeftClickon the blue Z-axis to place the 3D cursor there.

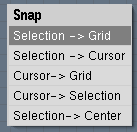
A nice trick to align the 3D cursor or objects is to use the snap function ([SHIFT][S]). With this, you can do four things:
- Align a selection to the grid. For example, when in editmode you can place vertices exactly on grid corners with this.
- Align a selection to the cursor. This moves the currently selected object or vertex to the 3D cursor location.
- Align the 3D cursor with the nea- rest grid corner. Useful in our current case to match up the cursor exactly with the Z-axis (place the cursor somewhere near a grid corner and activate this option).
- Align the 3D cursor with the curr- rently selected object or vertex.
The rotation axis is always perpendicular to the screen. Switch to top view with NumPad [7]. You now see the 3D cursor, indicating the position of the rotation axis and our curve which will move in the direction of the arrow in the illustration.
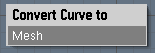
I am almost set to create the pawn. There is only one more thing to prepare: the spin function only works on meshes, and not on curves. So first convert the outline curve into a mesh by leaving editmode ([TAB]), selecting it and pressing [ALT][C]. Select ‘Mesh’ or press [ENTER]to perform the conversion.
Now switch to the Edit Buttons screen. Enter Edit Mode ([TAB]); in the Mesh Tools panel you see a button labeled ‘Spin’:.
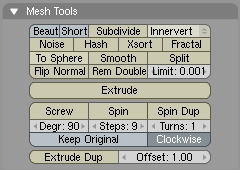
Underneath it are inputs for ‘Degrees’ and ‘Steps’. Set degrees to 360 and steps to 21. (This value determines the resolution of the resulting object – higher values increase the smoothness). If you SHIFT-Click in the number panel, you’ll be able to manually enter a value.
If you wanted to create only half an object, you would set the degrees value to 180.
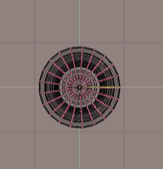
All set? Now first select all vertices with [A]; next switch to the top view with [NUMPAD-7]. Press the ‘Spin’ button and watch the result. The curve has been extruded and rotated, leaving behind a complete pawn.
Hint: If you have set up your screen to work with multiple 3D windows, Blender will need to know in which window you wish to perform the spin operation. The cursor changes into a question mark and you must click in the top view window to proceed.
All is not ready yet, though. It may not be obvious, but there is still a seam in the object where the ‘beginning’ meets the ‘end’ of our spin sur- face. I have found an easy trick to close it: while still in edit mode, first select all vertices in your object with [A]. Next, press [W] to bring up the Specials menu and use the ‘Remove Doubles’ option to weld the double vertices together.
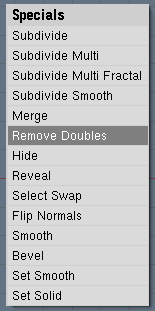
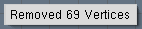
After performing this operation, Blender reports on the amount of vertices that have been deleted. Just confirm this requester.
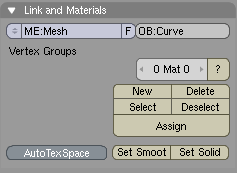
As a finishing touch, smooth the pawn by clicking on ‘Set smooth’ in the EditButtons window:
There is a good chance that the buttton on your screen will say ‘et Smooth’ because of the way the user interface is scaled on your screen.
Try holding down [CTRL] and dragging with the MiddleClick to modify the size of the interface elements. (And, yes, [SHIFT] and MiddleClick will move the interface panels instead of resizing them).
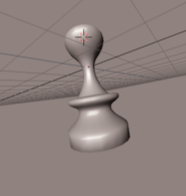
Show time! Switch to solid perspective mode by pressing [Z] and NumPad [5] and drag around with the MiddleButton to look around your object.
Continued on page 2…