BlendyCat shares this time-lapse video of flower modeling.
Watch how I create photorealistic flowers in this short speed modeling video.
I started by creating the shape of the flower which sort of resembles a bowl, then I applied the flower textures and worked with the nodes until I got the right effect. It was just slightly glossy with a bit of bump and translucency just like a real flower. Then I modeled the base for the flower using the add sapling add-on. I used color ramps for the color with a random node for a bit of random tint. I added translucency and glossy to the flower for realism. The next step was using a particle system for applying the flower model to the tips of the flowers. I did this with the tips of the flower base as a vertex group. I applied the vertex group into the density setting in the particle system tab.
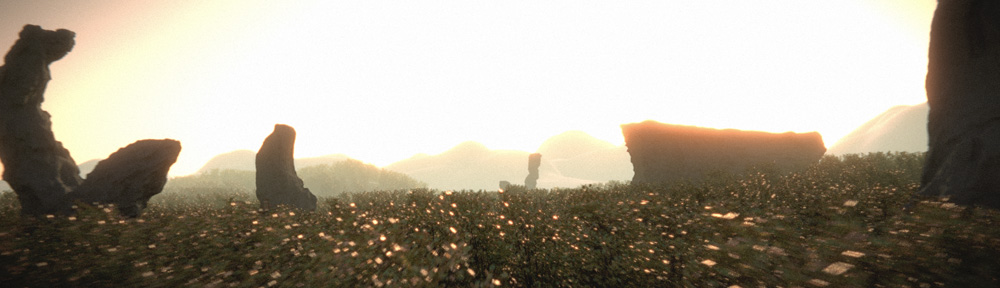
To make the final render, I used a particle system with the flowers I created earlier. The plane had a grass and dirt texture applied to it. In the camera tab I put the focus on a scaled empty placed right next to the center purple flower. The f-stop value was set to 1.8 (In other words, whatever is not close to the focus point is quite blurry). I changed the resolution of the image to fit my screen resolution. It makes a great wallpaper for retina display. :)
9 Comments
hey this tutorial is very insightful. but to be honest (and no offence meant), what we see at 2:46 is hardly photorealistic. but i guess it would look very nice in a whole peadow.
I wouldn't really consider this a tutorial I guess. Thanks, I guess you have to risk realism with close-ups. ;u;. Thank you for your advice! I really do appreciate it! :)
Nice time-lapse! Helpful ideas!
Please credit your sources! Did you learn to do this from CG_Geek?
https://www.youtube.com/watch?v=gF6qkByl-_M
He sells assets, but also showed how to do it for free. Very helpful. He also has a good tutorial for photographing textures. (Did he learn this from someone else?)
We can at least try to credit where we learned things (at least when we're teaching/explaining our work to others)... Everyone wins.
We're artists and we steal/learn from each other, but there's good and bad theft. It was well said here:
http://austinkleon.com/wp-content/uploads/2011/09/poster-8-500x666.gif
http://austinkleon.com/steal/
because they used some of the same techniques but you saw it first somewhere else?
all of the techniques used in both vids were pretty obvious techniques if you know blender.
they're also not really blender specific and have been around for quite a while before either video was made.
One month ago, a video was posted on BN showing how to how to make a flower and make stems using the sapling plugin; a rock with moss, all low-poly and textured with and cycles shaders with alpha masked textures...
http://www.blendernation.com/2015/08/30/tutorial-how-to-create-low-poly-nature/
(It's nearly identical in technique and content.)
Much of what I learned there was new to me, but I may have missed someone else showing those techniques earlier. I'm not new to Blender or CG, but it's not unlikely I missed it. Where did you learn this from?
My suggestion is that we try to credit and people who help us learn. (Would you hire someone copies tutorials without crediting? We're your future co-workers, bosses, and underlings, watching you.)
Even better than coping tutorials;,learn from many then make it your own and make it better. What's unique to you? What's important to you? I'd like to see your art and ideas, not a copy of someone else's.
Just because it's already been done before doesn't mean I'm copying anyone. :/
yea i saw that one too. i sped through most of it because i've seen the techniques in several other places and already knew them. i honestly don't even remember where i learned this stuff from by now.
that said you could probably find these techniques most similarly presented in videos about making foliage for use in games and not specifically just in blender but 3dsMax and Maya as well. (video games are low poly and aren't going to waste geometry when they can be alpha mapped) but these same techniques get used for a lot of things just applied slightly differently and once you learn them it isn't like it's a big leap to use them in slightly different manor than where you saw it first.
i've seen the technique used to put the flowers on the stems used to put branch planes on bushes in other programs. they call it different stuff yea but it's the same technique. heck it's very similar to the technique i use to slap down groups of assets randomly in predefined areas.
by the way the technique to add moss in CG geek's video requires a texture with an alpha channel and simply repeats the same moss shapes around the rock. the technique in this vid doesn't. in fact, most of the texture work in this video is different. (and i'd say in this video it's a bit more advanced in most places)
this moss adding technique could still be done even before cycles by using texture layer masks (i think that's what they were called but it's been quite a while since i last used it in blender internal) so it's hardly a new technique.
if you were gonna make common things like flowers and rocks and you were going to use image textures and keep it low poly, how would you go about it and why would your process look so different from either of these? would you really be able to tell the difference if they were all sped up like this video?
i'm not sure why you think achieving the same thing is going to look vastly different in the same program.
not photorealistic so much as nicely photo textured.
these would be pretty good for backgrounds but don't really hold up in close shots because you can tell it's a curved surface with a texture on it. to get photorealistic results you'll have to actually model pretty much everything rather than rely so heavily on texture work for the details.
that said, to fake it a little better you could separate the layers of petals in the texture (and edit in the missing pieces from the back layer) and actually create a separate mesh surface for the back layer... it may also help if those surfaces weren't so uniformly curved. nature is very patterned but it's also a bit messy when all is said and done.
Thanks for the constructive criticism! I agree that I could separate the layers for the individual flower petals. I also think next time I should make the flower a bit thicker. :)